Wisteria is a show-stopping plant admired for its draping clusters of violet or blue flowers and powerful, sweet fragrance each spring. If you’ve dreamed of expanding your garden’s display or passing along a piece of your favorite wisteria to a friend, learning how to propagate wisteria is both practical and rewarding.

This step-by-step guide takes you through several reliable propagation techniques and offers tips for ensuring the healthiest starts and the most vigorous new plants.
Choosing and Understanding Your Wisteria
For best results, start by understanding the wisteria variety growing in your garden. The three most common types are Japanese wisteria, Chinese wisteria, and American wisteria. Each offers subtle differences in flowering and vigor. No matter the type, all wisterias share a robust, twining habit and a desire to climb and sprawl wherever they find support.
Why Propagate Instead of Buy?
Propagating wisteria lets you multiply a unique or cherished variety at little cost, manage the spread of older plants, or simply fill empty spots in your landscape with something tried and true. Plus, the propagation process helps you bond with your plants as you nurture them from start to flourish.
How to Propagate Wisteria: Methods for Propagating Wisteria
Wisteria can be started from seeds, cuttings, layering, or by grafting. For home gardeners, each method brings its own timeline and set of expectations.
Growing Wisteria from Seed
Starting wisteria from seed is a simple, low-cost technique, but patience is required. New seedlings often take several years to mature, and the resulting plant may not resemble the parent in flower color or fragrance.
To get started, collect ripe seed pods in autumn once they have dried and split open. Remove the seeds and soak them overnight to soften their tough coats, which aids germination. Plant them into pots of damp, well-draining soil and keep the soil moist but not soggy. Place pots in a warm, bright space and expect sprouting in a couple of weeks. Once they have grown strong, transplant seedlings into the garden in spring, after any risk of frost.
Propagating Wisteria Using Cuttings

If you want new plants that mirror the parent’s color and vigor, propagating wisteria from cuttings works well and gets you to flowers faster than seeds.
Select softwood or greenwood cuttings in late spring or early summer, choosing stems that are healthy but not flowering. Make a sharp cut just below a leaf node and trim away most lower leaves. Dip the base of the cutting in rooting hormone, then plant into a pot filled with moist, airy potting mix.
Cover the pot with a clear plastic bag to hold in humidity, and set it where it will get bright, indirect light. Gently check for roots after a few weeks by tugging on the stem; new resistance means rooting is underway. When roots are well developed, repot the cutting into a larger container and gradually adapt it to outdoor life.
Layering: A Reliable Way to Multiply Wisteria
Layering is one of the easiest methods if you have a mature, established wisteria. This technique involves bending a healthy, flexible branch down to the ground, slightly wounding it, and covering it with soil while the tip remains exposed to light. The buried section typically grows roots throughout a season. Once it resists a gentle tug or develops visible roots, simply snip the new plant away from its parent and move it to its permanent home.
Layering is a great way to propagate wisteria because it allows the new plant to develop its own root system while still receiving nutrients from the parent plant. This greatly increases the chances of successful propagation and ensures that the new plant will be strong and healthy.
Grafting for Special Varieties
For gardeners wanting to preserve a rare cultivar or guarantee specific flower traits, grafting is a powerful method. This involves joining a cutting from the desired wisteria (the scion) to a healthy, established rootstock.
Clean, slanting cuts on both pieces ensure a good fit, then bind them securely and keep them in a humid, sheltered area while the graft heals and begins to grow as one. This is the most precise—but also most technically demanding—propagation technique and is best used when you have a prized wisteria you can’t risk losing.
Grafting is not only used for wisterias, but also for other plants such as fruit trees and roses. It allows gardeners to create new plant combinations that may not occur naturally, or to produce genetically identical clones of a particular plant. In addition, grafting can also be used to improve the overall health and vigor of a plant by using rootstocks with disease-resistant properties.
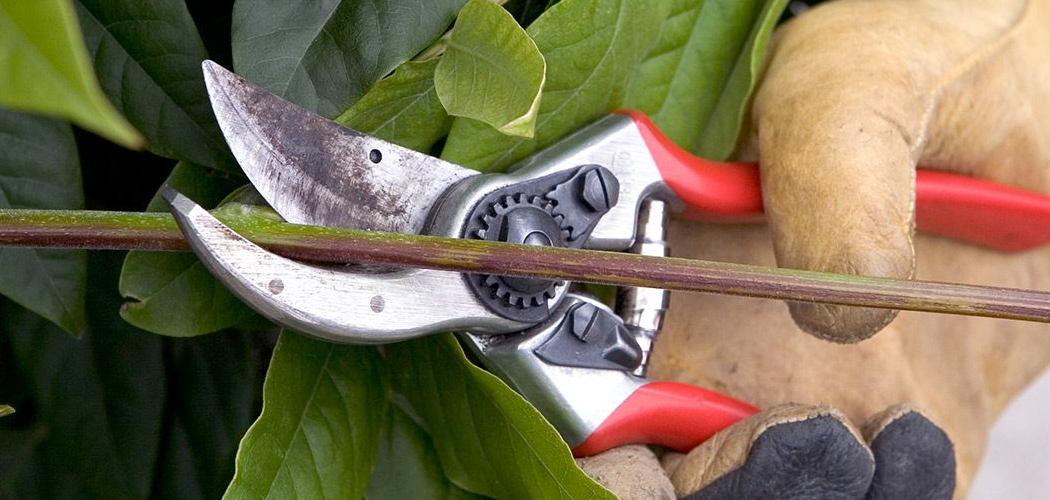
Essential Tools and Preparation
Clean, sharp pruning shears and a small knife are vital for making neat, disease-free cuts. Rooting hormone and quality potting soil support strong early growth. For layering and grafting, you’ll also need planting stakes, twine, and sometimes grafting tape to secure new unions. Always disinfect your equipment before use to prevent spreading disease.

Preparing the Parent Plant
Healthy parent plants are a foundation for propagation success. Water your wisteria well the day before collecting cuttings or selecting branches for layering. Inspect the plant closely for signs of pests or disease and only choose strong, undamaged growth for your propagation efforts.
Aftercare for Newly Propagated Wisterias
Once your new wisteria plants are established in pots or their permanent spot in the garden, focus on gentle care. Keep the soil lightly moist without overwatering, and provide plenty of indirect sunlight. Gradually increase light exposure for potted plants as they adjust. Wait to fertilize until you see active new growth, then use a balanced, slow-release food. Watch for fungal issues or root rot; proper airflow and well-drained soil are your best defense.
Transferring to the Garden
When cuttings or layered plants are ready for transplant, choose a spot with good support and full to partial sunlight. Dig a generous planting hole, nestle the roots in, and backfill with loose, rich soil. Water thoroughly and offer a stake or trellis for the young vine’s first tendrils to grab.
Maintenance and Pruning
Once your passion flower vine is established, it will require minimal care. Regular watering, especially during hot and dry weather, will keep the plant thriving. In colder climates, you may need to provide extra protection during winter months.

Pruning is also an important aspect of maintaining a healthy and vibrant passion flower vine. It’s best to prune in late winter or early spring before new growth begins. Remove any dead or damaged branches, as well as weak or crowded ones to encourage strong growth. You can also lightly prune throughout the growing season to shape the plant and promote more blooms.
Troubleshooting and Success Tips
Hydrangeas can be fickle, but with a little knowledge and attention, you’ll be on your way to growing beautiful blooms. Here are some troubleshooting tips and general information to keep in mind:
- Wilting leaves may indicate underwatering or insufficient moisture in the soil. Check for watering needs regularly.
- Yellowing or browning leaves can signal nutrient deficiencies or over-fertilization. Adjust feeding as necessary.
- Pests such as aphids, mites, and scale insects can harm hydrangeas. Keep an eye out for infestations and treat accordingly.
- Proper pruning is key to promoting healthy growth and abundant blooms. Remove dead or damaged wood and shape the plant as desired.
- If planting multiple hydrangeas, allow for adequate spacing to prevent overcrowding and encourage airflow.
- Regularly removing spent flowers can promote continuous blooming throughout the season.
Frequently Asked Questions
How Long Does It Take for a Cutting to Root?
The time required for a cutting to root depends on the plant species and environmental conditions. On average, it can take anywhere from 2 to 8 weeks for roots to form. Ensure proper humidity, temperature, and soil conditions to encourage healthy rooting.
Can I Propagate Plants in Water Instead of Soil?
Yes, many plants can be propagated in water. This method works well for species like pothos, philodendron, and monstera. Simply place the cutting in a container of water, ensuring the nodes are submerged, and change the water regularly to prevent stagnation.

What’s the Best Time of Year to Propagate?
Propagation is often most successful during the spring and early summer when plants are in their active growing phase. However, some species may also root well in other seasons under the right conditions.
Why Aren’t My Seeds Germinating?
If seeds fail to germinate, check that you’re meeting their specific requirements. Common issues include sowing them too deeply, using inadequate moisture levels, or planting them out of season. Additionally, some seeds require stratification or scarification before sprouting.
Can I Use Any Type of Soil for Propagation?
Not all soils are ideal for propagation. It’s best to use a light, well-draining propagation mix to prevent waterlogging and promote root growth. A blend of peat, perlite, and vermiculite is a commonly recommended option.
Conclusion
Propagating wisteria is a hands-on, satisfying process that connects you more deeply with these spectacular plants. Through seeds, cuttings, layering, or even grafting, gardeners can multiply their favorite wisterias and share their bounty. With patience, attention, and a little trial and error, you’ll be rewarded with thriving vines and a garden brimming with color and scent for seasons to come. Thanks for reading our post about how to propagate wisteria.