Removing grass with a shovel is a straightforward and cost-effective way to clear an area for a garden, pathway, or any other landscaping project. While it requires some physical effort, this method allows for precise removal without the need for heavy equipment. With the right tools and techniques, you can efficiently strip away grass and prepare the ground for your intended use. In this blog post, we’ll walk you through the steps on how to remove grass with a shovel so that you can get back to using it in no time! So grab your tools, and let’s get started!

Common Reasons for Removing Grass
There are several reasons why you might need to remove grass from an area. One of the most common is to create space for a garden or flower bed, where grass would otherwise compete with plants for nutrients and water. Removing grass is also essential when installing a walkway, patio, or other hardscaping features to ensure a smooth and stable base.
Additionally, you might want to replace an old or unhealthy lawn with new sod or seed for a healthier, more vibrant yard. Sometimes, clearing grass is necessary to reduce maintenance efforts or to transition to a more eco-friendly landscape, such as xeriscaping or planting ground cover. Whatever the reason, understanding the process of grass removal can help you achieve your project goals effectively.
Tools and Materials You’ll Need
To efficiently remove grass and prepare the area for your next project, you’ll need the right tools and materials. Here’s a list to help you get started:
- Shovel or Spade – For manually digging up grass and roots.
- Garden Hoe – Useful for breaking up the soil and loosening remaining grass.
- Sod Cutter – Ideal for removing large areas of grass quickly and evenly.
- Rake – To clear debris and level the soil after grass removal.
- Wheelbarrow – For transporting grass, soil, or debris to another location.
- Cardboard or Landscape Fabric – To smother grass if you’re opting for a no-dig removal method.
- Organic Mulch – For covering areas where grass has been removed.
- Herbicide (optional) – For targeted removal of grass or other unwanted growth.
- Gloves and Safety Gear – To protect your hands and body while working.
Ensuring you have these tools and materials ready will make the process smoother and more efficient, no matter which grass removal method you choose.
10 Methods How to Remove Grass with a Shovel
1. Select the Right Shovel for Grass Removal
The first step to removing grass effectively is choosing the right shovel. Not all shovels are created equal, and some are specifically designed to make sod removal easier. A flat-edged spade or a square shovel works best for cutting through sod, as they provide a straight, even edge that slices cleanly through the grass and roots.

On the other hand, a pointed shovel can be useful for digging out deeper-rooted grass, especially when dealing with species like Bermuda or crabgrass. Make sure the shovel is sharp—using a dull tool can make the job unnecessarily difficult. Regularly sharpening your shovel blade will reduce effort and help you cut through the sod more smoothly.
2. Prepare the Grass for Easier Removal
Grass removal becomes significantly easier if you prepare the area beforehand. Start by mowing the grass as short as possible, ideally down to about 1 inch. Shorter grass reduces bulk and makes it simpler to see where you are cutting.
Next, water the area thoroughly a day before starting the removal. Moist soil is much softer and more pliable, allowing the shovel to penetrate easily. Avoid saturating the ground, as overly muddy conditions can make lifting the sod messy and challenging. Moist but not soggy soil strikes the right balance.
3. Mark and Divide the Area
Dividing the grass into smaller, manageable sections helps make the removal process systematic and less physically taxing. Use garden stakes and string to mark the boundaries, and then use the shovel to score the grass into rectangles or squares about 12 to 18 inches wide.
This segmentation allows you to focus on one piece at a time, minimizing effort and reducing the risk of leaving patches behind. Working in a grid pattern also makes it easier to see your progress and stay motivated throughout the task.
4. Use the Right Technique for Lifting Grass
Position the shovel at a shallow angle—about 30 to 45 degrees—to slide the blade under the sod without cutting too deep into the soil. Start at one corner of the marked section and push the shovel forward to loosen the roots.

Once you’ve loosened the sod, lift it gently using a prying motion. Be careful not to rip the sod apart, as intact pieces are easier to handle and can be repurposed elsewhere. Lift with your legs rather than your back to avoid injury, and work in small sections to reduce strain.
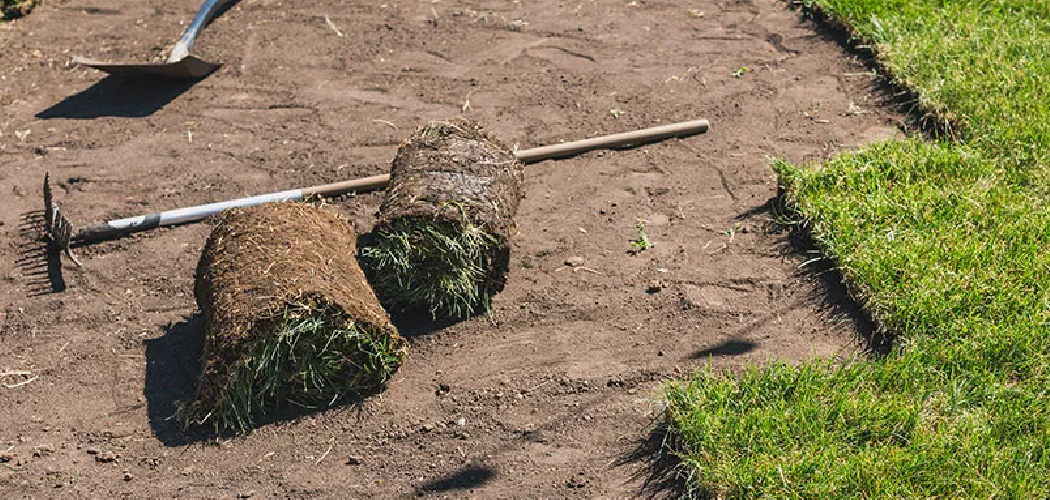
5. Roll the Sod for Reuse or Disposal
If you plan to reuse the grass or compost it, rolling the removed sod is practical. After lifting a section, roll it like a carpet from one end to the other. This keeps the roots intact and reduces the amount of space the removed sod takes up.
If the sod is particularly thick or heavy, cut it into smaller strips before rolling. Rolling also makes it easier to transport, whether you are moving it to another part of your yard or preparing it for disposal.
6. Double Digging for Thorough Root Removal
Double digging is an effective technique if you want to ensure that the grass doesn’t regrow. After removing the top layer of sod, dig down another 6 to 8 inches to remove any remaining roots.
Use a fork or pointed shovel to loosen the subsoil and remove lingering root fragments. This method is especially useful when dealing with resilient grass types that can regrow from root pieces left in the ground.
7. Dispose of the Grass Properly
Once removed, the grass and sod can be reused, composted, or discarded. If you plan to reuse the grass, transplant it immediately to another area where it is needed. For composting, place the sod grass-side down in a designated compost area and cover it with mulch to encourage decomposition.

If you are discarding the sod, check local regulations regarding green waste disposal. Some municipalities offer curbside pickup or have specific drop-off locations for yard debris. Never simply dump grass clippings, as this can spread invasive species.
8. Use Mulch to Prevent Regrowth
After clearing the grass, it’s important to prevent regrowth. One effective method is to cover the area with a thick layer of mulch (about 3 to 4 inches deep). This deprives any remaining roots or seeds of sunlight, inhibiting new growth.
Mulch also improves soil moisture retention and prevents erosion, making it an ideal finishing touch for areas converted to garden beds or pathways. Choose organic mulch like wood chips or bark for best results, as these will eventually break down and enrich the soil.
9. Maintain the Cleared Area Regularly
Even after thorough removal, grass can still sprout from dormant seeds or missed root fragments. To keep the area clear, regularly inspect for new growth and remove any shoots as soon as they appear.
You can also apply a pre-emergent herbicide or use a natural remedy like vinegar to spot-treat stubborn areas. Staying vigilant in the weeks following removal will help prevent the grass from reestablishing itself.
10. Reuse the Cleared Space Efficiently
Now that you’ve successfully removed the grass, plan how to make the best use of the cleared area. Whether you are creating a garden bed, pathway, or new lawn with different grass species, it’s crucial to improve the soil quality.
Add a layer of compost or organic matter to the exposed soil and till it lightly to incorporate nutrients. If planting new grass or flowers, follow up with a layer of topsoil and ensure proper irrigation to help new plants establish quickly.

Things to Consider When Preparing the Soil
When working with your cleared space, there are several factors to keep in mind to ensure the success of your project. First, assess the soil type and drainage capabilities. Sandy soils may need additional organic matter to retain moisture, whereas clay-heavy soil may require amendments to improve aeration and drainage.
Test the pH level of the soil to ensure it suits the needs of your plants or grass. Most species thrive in soil with a neutral to slightly acidic pH, but certain plants may have specific requirements. Additionally, be mindful of the local climate and sun exposure in the area, as these will influence the choice of plants or grass species and their maintenance requirements. Careful planning at this stage will set the foundation for thriving vegetation.
Conclusion
Removing grass with a shovel may seem labor-intensive, but with the right approach, it’s entirely manageable. Selecting the proper tools, preparing the ground, and employing efficient techniques can make the task smoother and less physically demanding. By dividing the area, lifting with care, and properly disposing of the removed sod, you set yourself up for success.
Furthermore, maintaining the cleared space and using it wisely after grass removal ensures that your hard work doesn’t go to waste. Whether you plan to garden, landscape, or lay down a patio, your newly cleared space will serve as a blank canvas for your outdoor projects. Thanks for reading, and we hope this has given you some inspiration on how to remove grass with a shovel!