Repotting African violet plants is an essential part of their care routine, ensuring they remain healthy and thrive. Over time, these beautiful flowering plants can outgrow their pots, leading to restricted root growth and reduced blooms. Regularly repotting them not only provides fresh soil with optimal nutrients but also encourages vigorous growth and maintains their aesthetic appeal. This guide will walk you through the steps of how to repot african violet plants.

Importance of Repotting for Plant Health
Repotting is crucial for maintaining the overall health and vitality of African violet plants. Over time, soil can become compacted and depleted of essential nutrients, making it harder for the plant to absorb what it needs to flourish. By repotting, you provide the plant with fresh, nutrient-rich soil that promotes better root development and healthier growth.
Additionally, old soil may harbor salt buildup or harmful pathogens, which can negatively impact the plant’s health. Regular repotting also allows you to inspect the root system for signs of rot or overcrowding, ensuring the plant has enough space to grow and produce its vibrant blooms.
Signs Your African Violet Needs Repotting
Recognizing when your African violet requires repotting is key to maintaining its health and beauty. One of the most common signs is overcrowded roots. If you notice roots poking out from the drainage holes of the pot, it’s a clear indication that the plant has outgrown its current container. Similarly, a lack of blooms or a noticeable decline in flowering may suggest that the plant’s nutrient supply is depleted due to old soil.
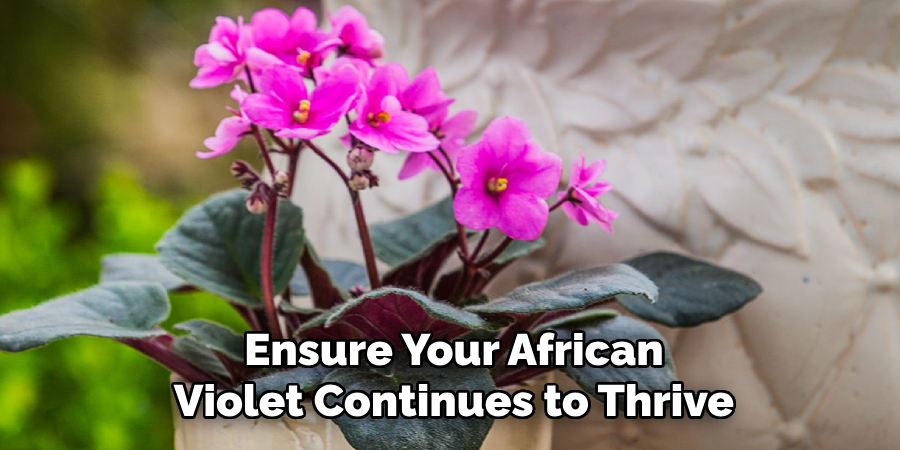
Another warning sign is wilting or yellowing leaves, which can indicate poor soil quality or salt buildup. Finally, if water tends to sit on the surface without being absorbed, the soil may have compacted over time, restricting proper water flow to the roots. By paying close attention to these signals, you can ensure your African violet continues to thrive.
10 Methods How to Repot African Violet Plants
1. Recognize When It’s Time to Repot Your African Violet
Understanding when your African violet needs repotting is the essential first step in promoting its long-term health. African violets prefer slightly snug pots, but over time, their roots become crowded, and the soil compacts or loses its nutrient content. Look for signs like stunted growth, dry or waterlogged soil, roots emerging from the drainage holes, or a noticeable neck forming at the base of the plant.
These indicators suggest the violet has outgrown its current pot. Typically, repotting every 6 to 12 months is a good practice, even if the plant seems content, as fresh soil replenishes nutrients and promotes stronger blooming.
2. Choose the Right Pot Size and Material
Selecting an appropriately sized pot is crucial to avoid stressing the plant. African violets thrive in pots that are about one-third the diameter of the plant’s leaf span. A pot that is too large holds excess moisture and can lead to root rot, while a pot that is too small can restrict root growth. Choose a shallow, wide container made of plastic or ceramic with proper drainage holes. Self-watering pots also work well for African violets if you’re consistent with maintenance. Ensuring the pot’s dimensions and material are compatible with your care routine lays the groundwork for healthy repotting.
3. Use the Correct Potting Mix for Optimal Root Health
African violets require a light, airy, well-draining soil mix. Standard garden soil is too dense and can suffocate roots. Instead, use a specialized African violet potting mix, or make your own by combining equal parts peat moss, perlite, and vermiculite. This mixture retains moisture while allowing for sufficient air circulation around the roots.
Some growers also add a pinch of crushed charcoal or coconut coir to further enhance the soil’s structure. Proper soil composition is critical because it affects how water and nutrients reach the roots, directly influencing the plant’s vitality and flowering potential.
4. Prepare the Plant by Watering Before Repotting
A day or two before repotting, give your African violet a moderate watering. Moist—but not soggy—soil makes it easier to slide the plant out of its container without damaging the roots. It also helps reduce transplant shock by ensuring the plant is well-hydrated during the process. If the soil is too dry, the root ball may crumble and expose the roots to stress. On the other hand, overly wet soil can be heavy and messy. Striking the right moisture balance will help keep the roots intact and the plant stable during the transition to a new pot.
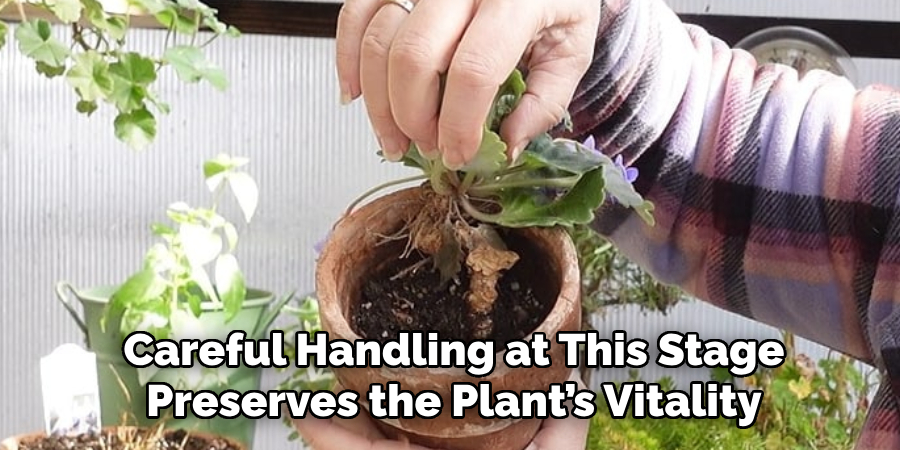
5. Remove the Plant Gently and Examine the Roots
To remove your African violet from its pot, turn the container slightly sideways and tap the bottom gently. Slide the plant out while supporting its crown and root ball. Once removed, inspect the roots closely. Trim away any dark, mushy, or tangled roots using sterile scissors. If there’s a long neck (a bare stem between the roots and the foliage), you can bury it partially when repotting to support stability and stimulate new root growth. Always be gentle to avoid bruising the leaves or snapping the delicate stems. Careful handling at this stage preserves the plant’s vitality.
6. Rejuvenate the Plant by Removing Old Leaves and Suckers
While repotting, it’s a great opportunity to clean up your African violet. Remove any yellowed, damaged, or old outer leaves at the base. These aging leaves not only look unsightly but also sap energy from the plant. If you notice suckers (small plantlets forming at the base), gently pinch or cut them off unless you’re propagating them.
Removing these offshoots helps redirect energy into the main plant, encouraging it to grow fuller and bloom more abundantly. This rejuvenation process acts like a mini pruning session, giving your violet a fresh start in its new home.
7. Reposition the Plant at the Right Depth in the New Pot
Proper placement in the pot is essential for the plant’s stability and health. Center the African violet in the new pot and ensure the soil level sits just beneath the lowest leaves, avoiding any foliage contact with the soil surface to prevent rot. If the plant has developed a neck, bury it slightly to cover the exposed portion, which encourages root development from the stem. Gently fill around the root ball with fresh soil, pressing lightly to eliminate air pockets. Avoid packing the soil too tightly, as this can hinder drainage and root expansion.
8. Water Carefully After Repotting
After your plant is settled in its new pot, it’s time for a careful watering. Use room-temperature, dechlorinated water to moisten the new soil gently. Water from the bottom by placing the pot in a shallow dish of water, allowing the roots to absorb moisture upward through the drainage holes.
Avoid overhead watering during this sensitive time, as splashes on the leaves can cause spots or disease. Let the pot sit for about 30 minutes, then discard any remaining water in the dish. Proper initial hydration helps the plant acclimate to its new environment without becoming waterlogged.

9. Provide the Ideal Post-Repotting Environment
Following repotting, place your African violet in a location with bright, indirect light and consistent warmth—ideally between 65°F and 75°F. Avoid direct sunlight, drafts, and sudden temperature changes. Humidity should be moderate; if your home is dry, consider placing the pot on a humidity tray or near other plants to create a supportive microclimate.
Hold off on fertilizing for about 2–3 weeks post-repotting to avoid overwhelming the recovering roots. Giving the plant time to adjust with gentle care ensures successful reestablishment and prepares it for a new cycle of healthy growth and flowering.
10. Monitor and Resume Routine Care Gradually
In the weeks following repotting, watch your African violet closely. Some temporary wilting or slowed growth is normal due to transplant shock, but with stable conditions, the plant should perk up within 7–10 days. Resume your regular watering schedule based on soil moisture—not calendar dates—to avoid overwatering.
Once the plant shows signs of new leaf growth, you can begin light fertilization with a diluted African violet-specific formula every 2–4 weeks. Consistent monitoring helps you catch potential issues early and allows the plant to flourish in its rejuvenated environment. Regular repotting, combined with attentive care, will keep your African violet thriving for years to come.

Conclusion
In conclusion, caring for African violets requires a balance of proper watering, appropriate lighting, regular fertilization, and timely repotting. By following these guidelines, you can ensure your plants remain healthy, vibrant, and full of blossoms. With patience and attention to detail, African violets can be a rewarding addition to your indoor garden, bringing beauty and joy for many years. In this blog post, we’ll walk you through the steps on how to repot african violet plants so that you can get back to using it in no time! So grab your tools, and let’s get started!