To repot Aptenia, gently remove the plant from its current container and shake off any excess soil. Place the plant in a larger pot filled with fresh potting mix, ensuring the roots are covered, and lightly press the soil around the base of the plant.

Credit: www.istockphoto.com
Repotting is an important aspect of plant care that helps provide sufficient space and nutrients for the growth of plants like Aptenia. Aptenia, commonly known as the baby sun rose, is a low-maintenance and versatile succulent that thrives in various climates.
Whether you want to repot your Aptenia to encourage better growth or refresh the soil, this article will guide you through the process. By following simple steps and taking care of the plant’s delicate roots, you can ensure your Aptenia stays healthy and vibrant. So let’s dive in and learn how to repot Aptenia efficiently and effectively.
Choosing The Right Time To Repot Aptenia
Repotting Aptenia requires careful timing to ensure its successful growth and development. Factors to consider for repotting timing include the plant’s growth rate and overall health. Signs to look for in an overgrown Aptenia include overcrowded roots and restricted growth.
When the plant is visibly outgrowing its current pot, it’s time to consider repotting. Check for roots appearing at drainage holes or circling the bottom of the pot. This indicates that the plant has outgrown its current container. Additionally, if the topsoil is constantly drying out or the plant becomes rootbound, repotting is necessary.
By choosing the right time to repot Aptenia, the plant will have the space it needs to thrive and flourish in its new container.
Preparing The Aptenia Plant For Repotting
Repotting your Aptenia plant requires some careful preparation. Start by cleaning the plant thoroughly, removing any dirt or debris from its leaves and stems. Next, trim any overgrown parts, ensuring a balanced and neat appearance. This helps the plant to thrive in its new pot.
Remember that brief, concise sentences are essential for an easily readable and engaging blog post. By following these guidelines, you can successfully repot your Aptenia and promote its growth and health.
How to Repot Aptenia : Step by Step Guide
Repotting Aptenia can be a simple process if you have the right pot and soil. Choose a pot that allows proper drainage and is slightly larger than the current one. Gently remove the plant from the old pot, being careful not to damage the roots.
Preparing the new pot is essential for the plant to thrive, so add fresh soil that is well-draining. Transfer the Aptenia to the new pot, ensuring that it sits at the same level as before. After repotting, water the plant thoroughly and place it in a location with adequate sunlight.
Remember to keep the soil slightly damp, but avoid overwatering. Additionally, provide post-repot care by monitoring the plant for signs of stress or wilting. By following these steps, you can successfully repot your Aptenia.
Selection Of The Right Pot And Soil
Selection of the Right Pot and Soil is crucial when it comes to repotting Aptenia. Choosing an appropriate pot size is the first step. Consider the size of the plant and its root system to determine the pot’s dimensions. Next, the soil requirements for Aptenia should be taken into account.
This plant thrives in well-draining soil that is slightly acidic. Aptenia prefers a potting mix that is rich in organic matter and perlite for better drainage. When repotting, it is recommended to use a suitable potting mix specifically designed for succulents.
In conclusion, using the right pot size and soil mix will provide your Aptenia with the perfect environment to grow and flourish.
Removing The Plant From The Current Pot
Repotting Aptenia involves gently removing the plant from its current pot, focusing on techniques for gentle removal. First, detangle the roots, ensuring their proper separation. This aids in the plant’s healthy growth. Dealing with root-bound plants is another crucial step.
Address this issue by gently loosening the compacted roots, allowing them to spread out and establish in the new pot. By following these steps, you can successfully repot Aptenia, promoting its overall well-being and vibrant appearance. Optimal care and attention during the repotting process are essential for the plant’s long-term growth and success.
Remember to handle the plant delicately to minimize any stress or damage. With proper care and attention, your Aptenia will flourish in its new pot, adding beauty to your space.
Preparing The New Pot
Preparing the new pot for repotting aptenia starts with cleaning the new pot thoroughly.
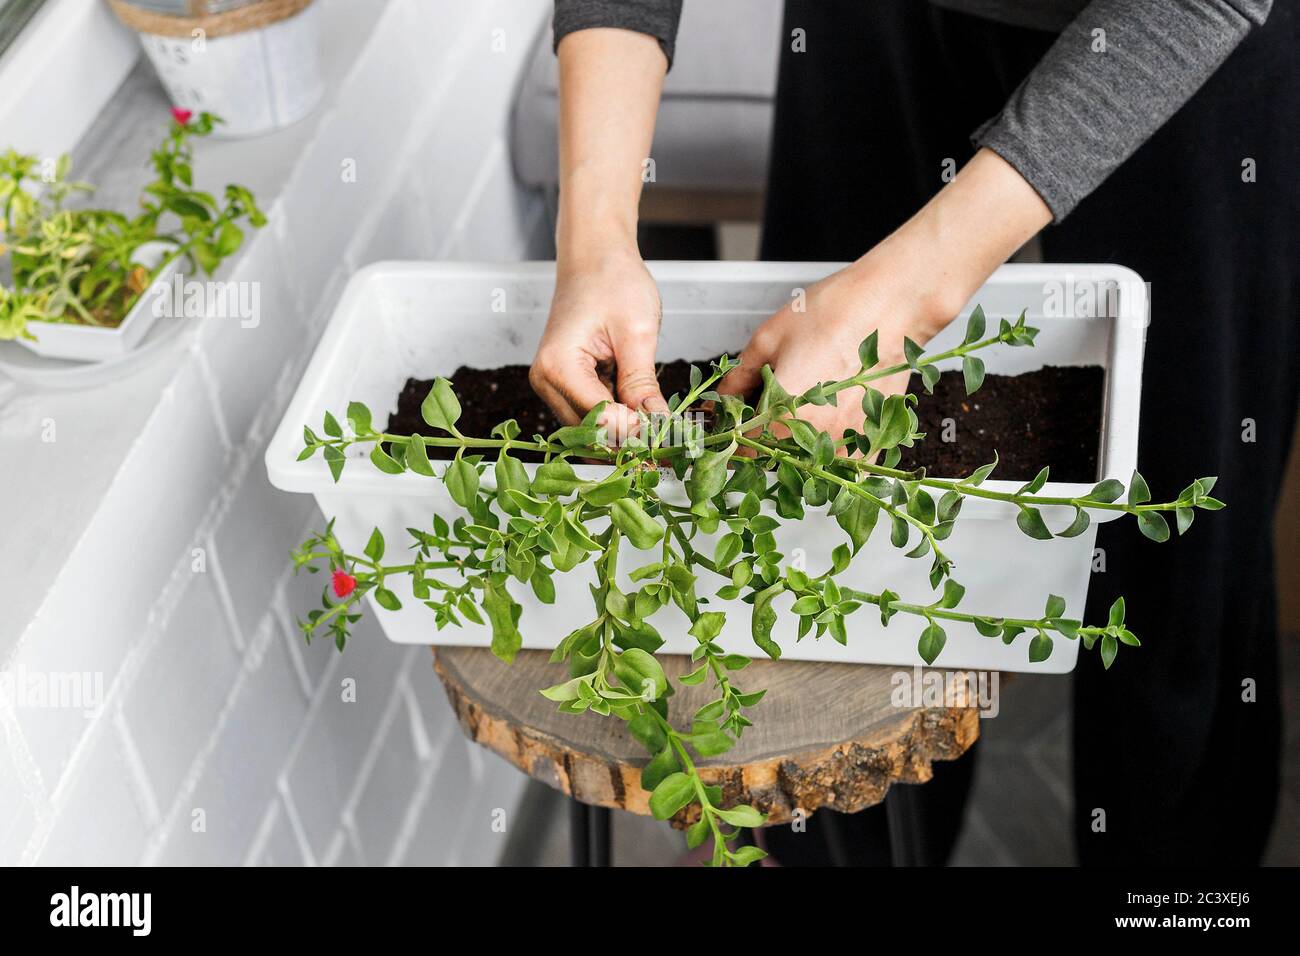
Transferring The Aptenia To The New Pot
Transferring your Aptenia to a new pot is a simple process. Start by placing the plant in the center of the pot, ensuring it is at the same depth as before. Gently add soil around the roots, making sure to spread it evenly.
Press the soil down firmly to secure the plant. Water the soil thoroughly but don’t overdo it. Place the pot in a spot that receives sufficient sunlight. Remember to regularly water and prune your Aptenia to keep it healthy and thriving.
With these steps, you can successfully repot your Aptenia and provide it with a fresh start in its new pot.
Watering And Post-Repot Care Tips
After repotting your Aptenia, it is crucial to water it properly. The amount of water needed depends on the plant’s size and growth stage. Give it a thorough watering until water drains from the bottom. Avoid overwatering as it can lead to root rot.
Ensure the soil is consistently moist but not waterlogged. Depending on the climate, water your Aptenia once or twice a week. When exposed to sunlight, the plant thrives. However, it also requires some shade during the hottest part of the day.
Consider placing it in a location where it gets at least 6 hours of sunlight. Lastly, maintain the plant’s shape and prevent it from becoming leggy by pruning regularly. Remove dead or yellow leaves, and trim back any excessive growth.
By following these care tips, your repotted Aptenia will flourish in its new home.
Common Mistakes To Avoid When Repotting Aptenia
Repotting Aptenia can be a simple task if you avoid common mistakes. Overwatering is a big no-no. Using inadequate potting soil hinders proper drainage. Repotting too frequently can stress the plant and hinder its growth. When repotting, assess the moisture level before watering.
Use a well-draining soil mix to prevent root rot. Ensure the new pot has sufficient drainage holes. Repot Aptenia only when it has outgrown its current container. By avoiding these mistakes, you can successfully repot your Aptenia and promote its health and growth.
Happy gardening!
Frequently Asked Questions (Faq)
Repotting Aptenia should be done every 1-2 years for optimal growth. It is advisable to wait until the flowering stage passes before repotting to avoid disturbing the plant’s growth. When repotting, it is best to use a well-draining succulent or cactus mix instead of regular garden soil.
The use of a specialized soil mix will provide the necessary nutrients and prevent waterlogged roots. After repotting, Aptenia typically takes a few weeks to recover fully. During this time, it is crucial to provide the plant with adequate sunlight, water, and proper care.
Avoid overwatering, as excessive moisture can lead to root rot. With the right conditions, Aptenia will soon thrive in its new pot, displaying its vibrant foliage and producing beautiful flowers.
Frequently Asked Questions For How To Repot Aptenia
What Soil Does Aptenia Need?
Aptenia thrives in well-draining soil rich in organic matter.
Do Aptenia Plants Like Sun Or Shade?
Aptenia plants prefer full sun and thrive in bright, direct light.
How Do You Care For An Aptenia Plant Indoors?
To care for an Aptenia plant indoors: 1. Place it in a location with bright, indirect light. 2. Water it moderately, allowing the soil to dry slightly between waterings. 3. Use well-draining soil to prevent root rot. 4. Apply a balanced liquid fertilizer monthly during the growing season.
Can You Grow Aptenia From Cuttings?
Yes, Aptenia can be grown from cuttings.
Conclusion
After following these steps to repot your aptenia, you can ensure the health and vibrancy of your plant for years to come. By choosing the right potting mix, selecting a suitable pot or container, and providing proper drainage, you can create an ideal environment for your aptenia to thrive.
Take care to gently remove the plant from its old container, carefully untangle the roots, and replant it in the newly prepared pot. Be sure to water your aptenia thoroughly after repotting and provide it with adequate sunlight to promote growth.
Regularly monitor its health and make adjustments as needed, such as trimming back excessive growth or relocating it to a sunnier or shadier spot. With these tips in mind, you can successfully repot your aptenia and enjoy its beauty for years to come.