To repot Pilea pups, carefully remove them from the mother plant and plant them in a new pot with well-draining soil.
Credit: www.modandmint.com
Understanding Pilea Pups: A Quick Overview
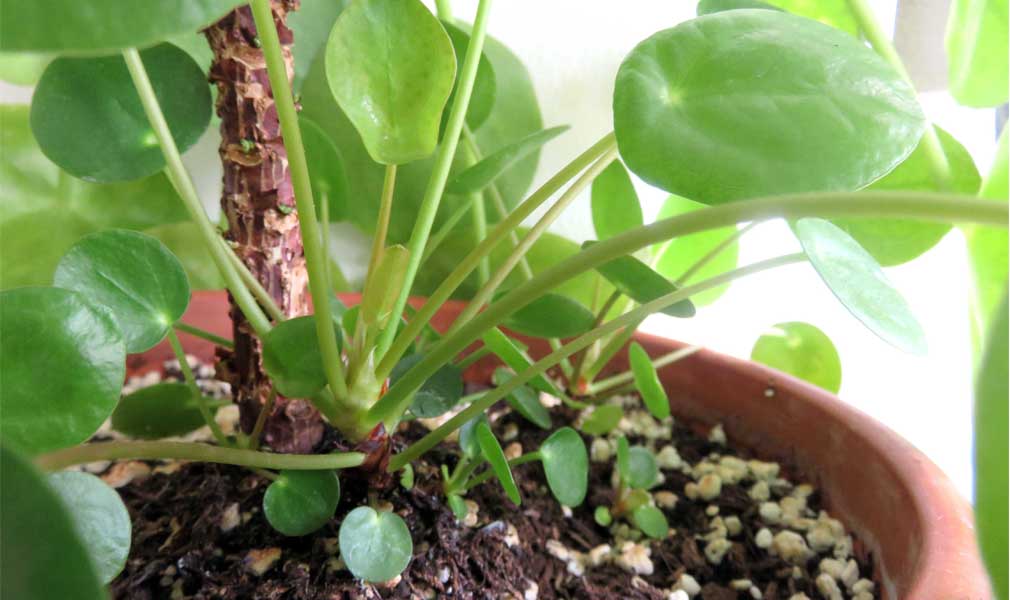
Pilea Pups refer to the small offshoots or baby plants that grow from the base of the main Pilea plant. These adorable little plants are essentially new growths that can be carefully separated and repotted to propagate more Pilea plants.
Repotting Pilea Pups plays a crucial role in the plant’s overall health and growth. It allows the pups to establish their own root systems and absorb nutrients from fresh soil. By repotting, you provide them with ample space to expand, preventing overcrowding in the main pot. This not only supports the pups’ development but also enhances the aesthetics of your Pilea collection.
When repotting Pilea Pups, it is important to handle them gently to avoid damage. Carefully separate the pups from the mother plant using a sterilized tool, such as a sharp knife or scissors. Once separated, plant the pups in individual pots filled with well-draining soil, ensuring proper watering and lighting conditions.
When To Repot Pilea Pups
Repotting pilea pups is an essential part of their growth and development. One important aspect to consider is the timing of repotting, which can greatly impact the success of the process. Observing signs of root-bound pups is a key indicator that it’s time to repot. Look for overcrowded roots, stunted growth, or roots growing out of the drainage holes as signs that the plant has outgrown its current pot.
Additionally, identifying the suitable time for repotting can be determined by the overall health and condition of the plant. Ideally, repotting should be done during the active growth phase of the plant, which is typically during the spring or early summer. By repotting at the right time, you can ensure that your pilea pups have the optimal conditions to thrive and continue growing.
Step-By-Step Guide: How To Repot Pilea Pups
Gathering the necessary tools and materials is the first step in repotting Pilea pups. You will need a suitable potting mix, a new pot, scissors or pruners, and a clean towel or cloth. Prepare a potting mix by combining well-draining soil with peat moss or perlite to provide adequate drainage for the Pilea.
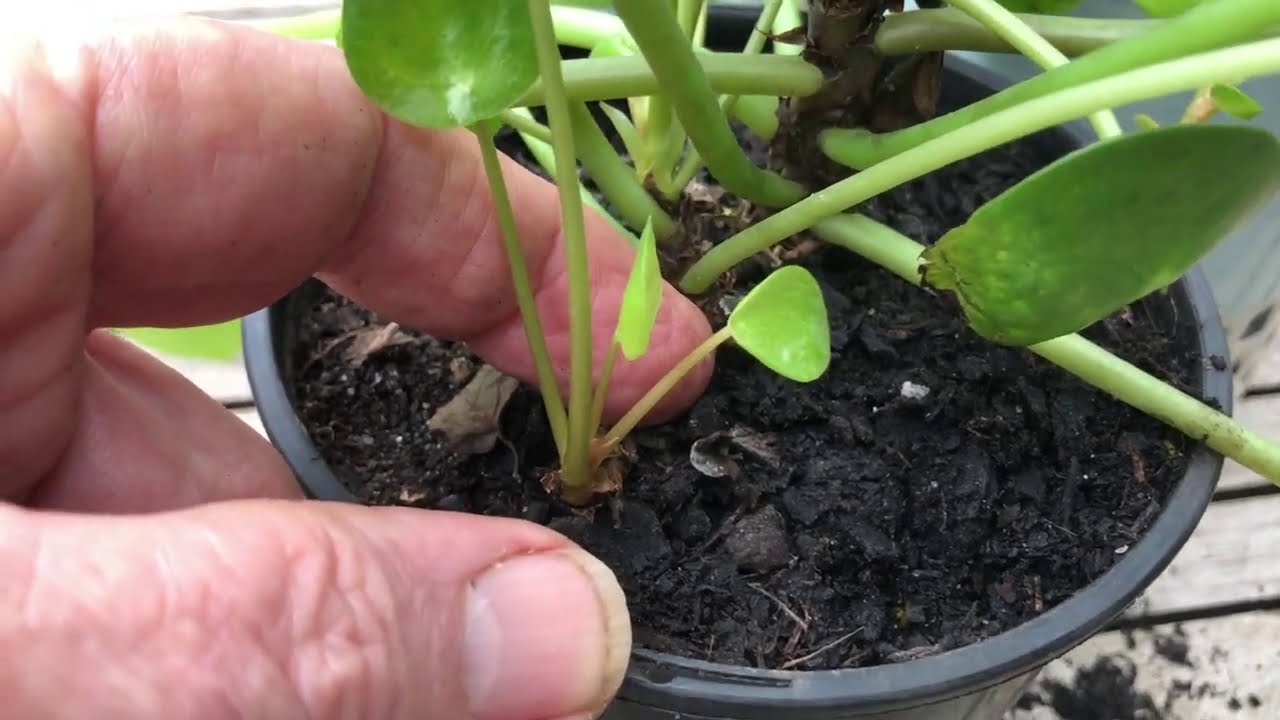
To gently remove the Pilea pups from the mother plant, hold the base of the pup between your fingers and carefully separate it from the main stem. Be sure to avoid damaging the roots or pulling too forcefully, as this can harm the pup. Next, evaluate the root system and untangle any tangled roots gently using your fingers or a small tool, such as a toothpick or tweezers.
Once the roots are untangled, place the Pilea pups in a new pot with fresh potting mix. Position the pups in the pot, ensuring that the roots are covered with soil and the plant is secure. Lightly press the soil around the base of the plants to provide stability. Water the repotted Pilea pups thoroughly but avoid overwatering. Place the pot in a bright location with indirect sunlight and continue to care for the pups by regularly watering and monitoring their growth.
Mistakes To Avoid During Repotting
| Overhandling the fragile Pilea Pups: |
| Baby Pilea plants, also known as pups, are delicate and can easily be damaged when handled too much. When repotting, it’s important to handle them with care and avoid touching their delicate stems or roots as much as possible. Gentle support is enough to guide them into their new pots. |
| Using the wrong soil or pot size: |
| Choosing the right soil and pot size is vital for the health and growth of Pilea plants. Avoid using heavy soil that retains too much moisture, as it can lead to root rot. Instead, opt for well-draining soil that allows excess water to escape. Additionally, using a pot that is too large can cause overwatering problems, so select a pot that is just slightly larger than the root ball. |
| Overwatering or underwatering the plant: |
| Proper watering is crucial for the well-being of Pilea plants. Overwatering can suffocate the roots and lead to root rot, while underwatering can cause the leaves to wilt and the plant to suffer. Strike a balance by checking the moisture level of the soil regularly and watering only when the top inch feels dry. Adjust the frequency of watering based on the plant’s needs and environmental conditions. |
Troubleshooting Common Issues
Yellowing or wilting foliage can be a common issue when repotting Pilea Pups. This may indicate a lack of nutrients or excessive moisture. To address this, ensure that the new pot has proper drainage and use well-draining soil. Water the plant appropriately, allowing the soil to dry out between waterings. If yellowing continues, consider adjusting the lighting conditions.
Root rot or fungal infections may also occur during repotting. Prevent this by providing good airflow around the plant’s roots and using a sterilized potting mix. If you notice any signs of rot, remove affected roots and repot the Pup in fresh soil.
Stunted growth or lack of new growth could be due to inadequate lighting or incorrect watering. Pilea Pups thrive in bright, indirect light, so ensure they receive enough sunlight. Consistent watering is essential, but avoid overwatering as it can lead to root problems.
Tips For Successful Repotting
When repotting Pilea pups, providing the ideal growing conditions is essential. These plants thrive in bright, indirect light, so it’s important to choose a spot with ample sunlight. Additionally, make sure to use well-draining soil to prevent root rot.
Maintaining proper watering and fertilization is crucial for the health of your Pilea pups. Water them when the top inch of soil feels dry and avoid overwatering, as it can lead to root rot. Fertilize the plants regularly during the growing season using a balanced, water-soluble fertilizer to promote healthy growth.
Monitoring for pests and diseases is also important. Pilea pups can be susceptible to pests such as mites and mealybugs. Inspect your plants regularly and treat any infestations promptly to prevent damage.
Frequently Asked Questions (Faqs)
Can I repot Pilea Pups immediately after propagation?
It is generally recommended to wait at least a few weeks before repotting Pilea Pups after propagation. This allows the pups to develop a stronger root system and adjust to their new environment. If repotting them right away, they may experience stress and face difficulties in establishing new roots, hindering their growth.
How often should I repot my Pilea Pups?
The frequency of repotting Pilea Pups depends on their growth and the size of the container they are currently in. Generally, repotting every 1-2 years is recommended to provide sufficient growing space and fresh soil for their expanding root systems. However, if you notice the roots becoming densely packed or the plant showing signs of being root-bound, it is advisable to repot sooner.
Can I separate multiple Pilea Pups in one pot?
Yes, it is possible to separate multiple Pilea Pups in one pot. However, it is crucial to ensure that each pup has its own root system and enough space to grow. Separating them carefully and planting each pup in its separate container will allow for better growth and prevent competition for resources. It is also essential to provide adequate care, including proper watering and fertilization, to ensure the healthy development of each individual pup.
Frequently Asked Questions On How To Repot Pilea Pups
Should I Remove Pilea Pups?
Remove Pilea pups if you want to control growth or propagate new plants. Removing pups promotes healthy growth and helps prevent overcrowding.
How Do You Separate Pilea Puppies?
To separate Pilea puppies, gently remove them from the mother plant using clean, sharp scissors or a knife. Ensure each puppy has some roots attached. Plant them in separate pots with well-draining soil and provide adequate light and water. Congratulations on expanding your Pilea family!
How Do You Know When To Repot Pilea?
Repot your Pilea when its roots outgrow the current pot and start poking out of the drainage holes. Look for slowed growth, yellowing leaves, or roots circling the pot’s surface. Ideally, repot your Pilea during its active growing season, usually in spring.
Use a slightly larger pot with well-draining soil.
Can I Leave Pilea Pups?
Yes, you can leave Pilea pups as they are capable of growing into new plants.
Conclusion
To conclude, repotting Pilea pups is a crucial step in their growth and development. By following the simple steps outlined in this blog post, you can ensure that your Pilea plants thrive and flourish. Remember to choose the right potting mix, provide adequate drainage, and place them in a suitable location.
With proper care and attention, your Pilea pups will continue to be a beautiful addition to your indoor plant collection. So, don’t hesitate to give them the attention they deserve and watch them thrive!