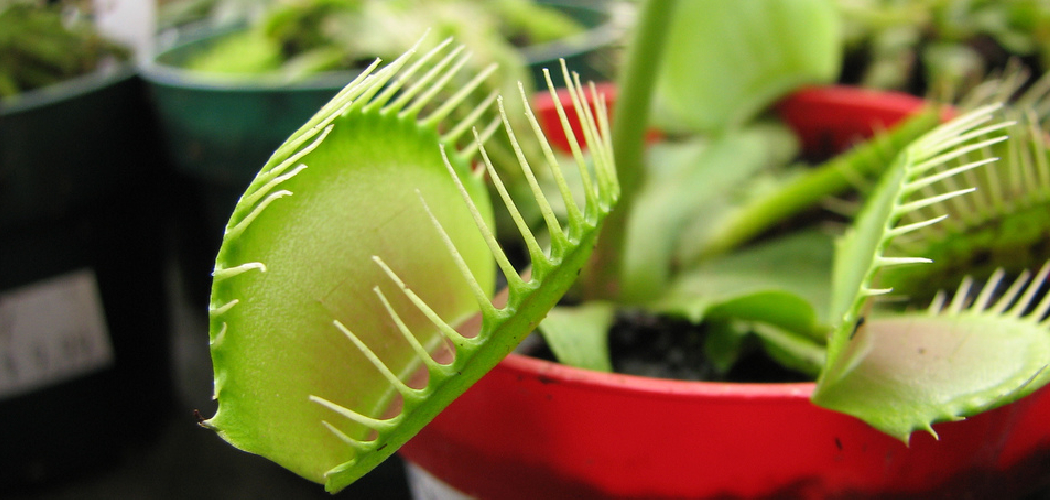
Are you considering repotting your Venus flytrap? Are you a new owner of this unique plant and unsure about the process? Fear not, because in this guide, we will go over everything you need to know about repotting your Venus flytrap.

How to repot venus fly trap is an essential task to ensure the plant’s continued health and growth. Over time, the plant’s soil can become compacted or depleted of nutrients, and its roots may outgrow the current pot, leading to stunted development. Properly repotting your Venus Fly Trap not only provides it with fresh, nutrient-rich soil but also allows you to inspect and maintain healthy roots.
By following a few simple steps, you can create an optimal environment for your plant to thrive and catch its next prey.
What are the Benefits of Repotting a Venus Fly Trap?
There are several benefits to repotting your Venus flytrap, including:
- Fresh Soil: As mentioned before, repotting allows you to provide your plant with fresh soil. This is important as the plant’s natural habitat is moist and nutrient-rich soils, which can be difficult to replicate in an indoor setting.
- Better Drainage: With time, the potting mix in which the Venus Fly Trap sits can become compacted and prevent proper drainage. Repotting helps to loosen up the soil and create better drainage for your plant.
- Bigger Pot = Bigger Plant: As your Venus Fly Trap grows, it will need more space for its roots to spread out and absorb nutrients. Repotting into a larger pot allows for growth and helps your plant stay healthy.
- Control Over Potting Mix: When repotting, you have the opportunity to choose the best potting mix for your Venus flytrap. This can include adding materials like sphagnum moss or perlite to create a more suitable environment for your plant.
- Opportunity for Division: As your Venus Fly Trap grows, it may produce multiple growth points or “clumps”. Repotting allows you to carefully divide these clumps and create new plants, giving you the opportunity to expand your collection or share with fellow plant enthusiasts.
What Will You Need?
To repot your Venus Fly Trap, you will need the following materials:
- Fresh potting mix (preferably a carnivorous plant-specific mix)
- A larger pot (2-3 inches wider in diameter than the current pot)
- A tray or saucer to catch excess water
- Gloves (optional, but recommended)
- Pruning shears
- A newspaper or a drop cloth to prevent a mess
- A watering can or spray bottle for watering after repotting

Once you have gathered all your materials, you can begin the repotting process.
10 Easy Steps on How to Repot Venus Fly Trap
Step 1: Prepare Your Workspace
Before you begin repotting your Venus flytrap, it’s essential to set up a clean, organized, and well-lit workspace. Choose a flat surface, like a table or countertop, and cover it with newspaper or a drop cloth to protect it from dirt and water. This will make cleaning up afterward much easier. Place all your tools and materials within easy reach to avoid unnecessary interruptions.
If you’re working indoors, ensure the area is ventilated to avoid any discomfort. If you’ve opted for gloves, put them on now to protect your hands from dirt and to provide a better grip while handling the plant and tools. By preparing your workspace thoroughly, you’ll ensure the process is smooth and efficient, minimizing stress for both you and your Venus Fly Trap.
Step 2: Water the Plant
Watering your Venus flytrap is a crucial step to ensure its health and growth. Use only distilled water, rainwater, or reverse osmosis water, as these plants are highly sensitive to the minerals and chemicals found in tap water, which can harm them over time. Gently pour the water directly into the soil, ensuring it is moist but not waterlogged.
Alternatively, you can use the tray method by placing a shallow tray of water underneath the pot, allowing the plant to absorb moisture from the bottom. Maintain a consistent watering routine, keeping the soil damp but avoiding standing water for prolonged periods, as this can lead to root rot.

Step 3: Remove the Plant from Its Current Pot
To remove the plant from its current pot, start by gently loosening the soil around the edges of the container. You can use a small trowel or your fingers to carefully break up compacted soil, ensuring you don’t damage the roots. Turn the pot on its side and lightly tap the sides to help release the plant. If the plant is stuck, you can try squeezing the sides of flexible pots or tapping the bottom of rigid ones. Once the plant is loose, carefully lift it out by holding the base of the stem or plant crown, avoiding pulling directly on delicate stems or leaves.
Step 4: Inspect the Roots
Inspect the roots carefully to assess the plant’s health. Healthy roots are usually white or light tan and have a firm, pliable texture. If you notice roots that are dark, mushy, or have a foul odor, this could be a sign of root rot or disease. Trim away any damaged or unhealthy roots using clean, sharp pruning shears to prevent further issues. If the roots are densely packed and form a tight mass, gently tease them apart with your fingers to encourage new growth. Taking the time to inspect and address root issues will help ensure the plant thrives in its new environment.
Step 5: Prepare the New Pot
Choose a pot that is slightly larger than the previous one, ensuring it has adequate drainage holes. Proper drainage is crucial to prevent water from accumulating at the bottom, which can cause root rot. Fill the pot one-third of the way with fresh, well-draining potting mix.
Depending on your plant’s needs, you may consider a mix enriched with nutrients or moisture-retaining elements. Make a small depression in the center of the soil to accommodate the root ball, ensuring there is enough space around the sides for further growth. Preparing the pot correctly sets the foundation for a healthy and flourishing plant.
Step 6: Position the Plant
Carefully remove the plant from its current container, gently loosening the roots if they are compacted. Place the root ball into the prepared depression in the soil, ensuring the plant sits at the same depth as it did in its previous pot. Adjust the placement so the plant is upright and centered, with the roots evenly distributed. This step is crucial for encouraging balanced growth and ensuring the plant adapts well to its new environment.
Step 7: Add More Potting Mix
Once the plant is positioned properly, begin adding fresh potting mix to fill in the remaining space around the root ball. Use your hands or a small trowel to gently pack the soil, ensuring there are no air pockets while avoiding overly compacting it. Add enough potting mix so that the surface is level with the top of the root ball, leaving a small gap around the edges for watering. This step creates a stable and nutrient-rich environment for your plant to thrive.

Step 8: Water Thoroughly
Water the plant thoroughly immediately after potting to help settle the soil and eliminate any remaining air pockets around the roots. Use a watering can with a gentle spout or a hose with a diffuser to avoid disturbing the soil surface. Ensure the water reaches the root zone and drains freely from the bottom of the pot, indicating proper drainage. Avoid overwatering, but make sure the soil is evenly moist to give your plant a strong start in its new environment.
Step 9: Place in an Appropriate Location
Choose a location that best suits the specific light requirements of your plant. Some plants thrive in bright, indirect light, while others may need direct sunlight or low-light conditions. Consider factors such as humidity, temperature, and airflow when selecting a spot, as these elements can significantly impact the health of your plant. Avoid placing your plant near drafts, heating vents, or air conditioners, as sudden temperature fluctuations can be harmful.
Step 10: Monitor and Care
Regular monitoring and proper care are essential to ensure the health and vitality of your plant. Check the soil moisture regularly to avoid overwatering or underwatering, as both can lead to issues such as root rot or dehydration. Inspect the leaves for signs of pests, discoloration, or wilting, which may indicate underlying problems like nutrient deficiencies or infestations.
Prune your plant as needed to remove dead or damaged leaves and encourage new growth. Additionally, clean the leaves occasionally to prevent dust buildup, which can block sunlight and hinder photosynthesis.
By following these steps, your Venus flytrap will have the ideal conditions to continue thriving!

Conclusion
How to repot venus fly trap may seem intricate, but with patience and care, it is a manageable process that greatly benefits your plant’s health.
By selecting an appropriate pot and soil, gently handling the roots, and ensuring proper hydration, you create a stable environment for the plant to thrive. Regularly monitoring its condition after repotting is essential, as this allows you to address any issues early.
With a diligent approach, your Venus flytrap will adapt well to its new home and continue to flourish.