To root a Monstera plant, you need to follow these steps: place a stem cutting in water until roots develop, then transfer it to a pot with well-draining soil. Welcome to the world of Monstera plants!
These tropical beauties have gained popularity for their glossy green leaves and distinctive fenestrations. If you’re wondering how to propagate and establish new Monstera plants, the process is relatively simple. By rooting a Monstera, you can create new plant babies to expand your indoor garden or share with friends.
Credit: extension.umn.edu
We will guide you through the process of rooting a Monstera plant, step by step. So, let’s get started and grow some lush and thriving Monstera babies!
Choosing The Right Monstera Plant
When it comes to rooting a Monstera plant, choosing the right variety and ensuring its health are crucial first steps. Selecting a healthy plant will set the foundation for successful rooting, while identifying the ideal Monstera variety will determine the plant’s growth potential. Let’s explore these essential factors in detail to set you on the right path for rooting your Monstera plant.
Selecting A Healthy Plant
Before diving into the process of rooting, it’s essential to start with a healthy Monstera plant. This will ensure that your plant has the vigor and resilience needed to thrive post-rooting. When selecting a Monstera, examine the leaves for any signs of damage, yellowing, or discoloration. A healthy plant will boast vibrant, green leaves, free from blemishes or irregularities.
Identifying The Ideal Monstera Variety
Not all Monstera plants are the same, and choosing the right variety can significantly impact your rooting journey. While the Monstera Deliciosa is the most popular option, other varieties, such as the Monstera Adansonii or Monstera Borsigiana, offer unique leaf shapes and growth patterns. Assess your preferences for leaf size and structure to determine the most appealing variety for your rooting project.
Preparing The Rooting Environment
One of the essential steps in successfully rooting a Monstera plant is ensuring that you create the right environment for its roots to thrive. This involves selecting the right potting mix, choosing an adequate container, and creating proper drainage. Let’s dive deeper into each of these aspects.
1. Selecting The Right Potting Mix
When it comes to choosing a potting mix for your Monstera plant, it’s crucial to select one that provides the necessary nutrients and moisture retention. Here are a few options to consider:
- All-Purpose Potting Mix: A versatile choice that contains a blend of various organic materials, such as peat moss, coconut coir, and perlite.
- Soilless Mix: Made of materials like peat moss, vermiculite, and perlite, this mix is lightweight and allows for excellent drainage.
- DIY Mix: If you prefer a more customized approach, you can create your own potting mix by mixing equal parts of peat moss, perlite, and well-rotted compost.
Remember to moisten the potting mix before use, ensuring it’s damp but not overly saturated.
2. Choosing An Adequate Container
When selecting a container for your Monstera plant, consider its size and material. Here’s what you need to keep in mind:
- Size: Choose a container that allows for the plant’s roots to spread comfortably. As Monstera plants have extensive root systems, opt for a container that is wider rather than deeper.
- Material: Opt for containers made of terracotta or ceramic, as they provide better airflow and promote moisture regulation. These materials also tend to be more durable.
Ensure that the container has drainage holes to prevent water from pooling at the bottom, which can lead to root rot.
3. Creating Proper Drainage
Proper drainage is crucial to prevent waterlogged soil, which can suffocate the roots of your Monstera plant. Here are a few steps to ensure adequate drainage:
- Layer of Pebbles: Place a layer of small pebbles or stones at the bottom of the container. This will create a space for excess water to accumulate without saturating the soil.
- Perforated Liner: Consider using a perforated liner made of landscape fabric or a coffee filter on top of the layer of pebbles. This will prevent the potting mix from seeping into the drainage layer.
- Avoid Overwatering: It’s essential to water your Monstera plant sparingly to prevent waterlogged conditions. Allow the top inch of the potting mix to dry out before watering again.
By following these steps, you will be able to create an optimal rooting environment for your Monstera plant, setting it up for growth and development. Remember, a healthy root system will contribute to the overall health and vitality of your plant!
How to Root a Monstera Plant : Step by Step Guide
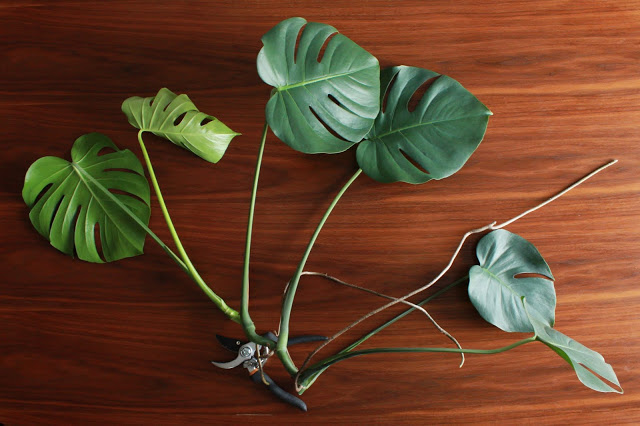
Taking The Cuttings
Rooting a Monstera plant is an exciting way to multiply your collection or share the joy of gardening with friends. One of the most common methods to propagate Monstera plants is by taking cuttings. This process involves removing a part of the plant stem and allowing it to develop roots, eventually becoming a new plant. In this guide, we will walk you through the steps of taking cuttings from a Monstera plant for successful propagation.
Identifying The Best Stems To Cut
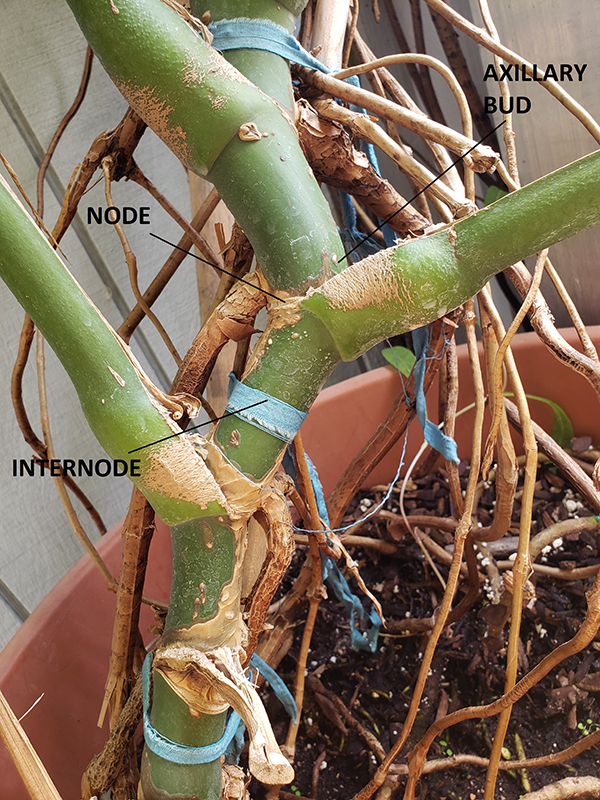
When it comes to selecting the stems for cuttings, you’ll want to choose healthy, mature stems from your Monstera plant. Look for stems that have at least two nodes—a node is where a leaf or an aerial root emerges. Nodes are important for root development as they contain cells that can produce new roots.
Additionally, opt for stems that have several leaves. Choose stems that are neither too young, as they may not have sufficient energy to develop roots, nor too old, as they may take longer to root. The ideal stem for propagation should be firm and not mushy or discolored.
Using Clean And Sharp Tools
Before you begin the cutting process, it’s crucial to ensure your tools are clean and sharp. This prevents the introduction of harmful bacteria or diseases into the Monstera plant. Using clean pruning shears or a sharp knife, disinfect the blades with rubbing alcohol or a solution of one part bleach to nine parts water. This step helps eliminate any potential pathogens that could hinder root formation.
Making A Clean Cut
Once you have identified the best stems to cut and have prepared your tools, it’s time to make a clean cut. With a swift motion, cut the selected stem just below a leaf node. Ensure the cut is clean and smooth, as ragged or jagged edges may take longer to heal and develop into roots.
Remember to remove any excess leaves or aerial roots from the lower end of the cutting. This allows the plant to focus its energy on developing roots rather than maintaining unnecessary foliage. Once you have made a clean cut, you are ready to move on to the next step of rooting your Monstera plant!
Rooting The Cuttings
Rooting the cuttings of a Monstera plant is an essential step in propagating new plants. By following the proper techniques for rooting the cuttings, you can ensure the successful growth of new Monstera plants. This section will guide you through the process of rooting Monstera cuttings, including placing the cuttings in water, monitoring water quality, optimizing light and temperature, and maintaining humidity.
Placing The Cuttings In Water
When placing the cuttings in water, it’s crucial to use clean and transparent containers to allow proper visibility of the roots. Fill the container with filtered water or rainwater to prevent any harmful chemicals from affecting the growth of the roots. Submerge the cuttings at least a few inches into the water, ensuring the nodes are completely submerged.
Monitoring Water Quality
Regularly check the water quality by ensuring it remains clear and free from any foul odors. Change the water every 7-10 days to prevent the growth of bacteria and algae, which can hinder root development. Maintain a consistent water level to provide stability and nutrients for the growing roots.
Optimizing Light And Temperature
Place the containers with cuttings in a warm, brightly lit area, but avoid direct sunlight to prevent the water from heating up excessively. The ideal temperature for rooting Monstera cuttings is around 70-75°F. Consider using a propagation heat mat to provide consistent warmth if the ambient temperature fluctuates.
Maintaining Humidity
To maintain humidity, cover the containers with plastic bags or use a humidity dome to create a greenhouse effect. This will help retain moisture and create an optimal environment for root development. Ensure to ventilate the containers occasionally to prevent excessive humidity buildup that can lead to mold or rot.
Transplanting The Rooted Cuttings
Once your Monstera cuttings have successfully rooted in water, it’s time to transplant them into soil. This crucial step will ensure the continued growth and health of your new plants. Follow these simple guidelines for a successful transplant.
Preparing The New Planting Medium
Before transferring your Monstera cuttings to soil, it’s important to have the right planting medium ready. Create a well-draining mixture by combining equal parts of potting soil, perlite, and peat moss. Make sure the soil is moist but not overly wet before proceeding.
Gently Removing The Cuttings From Water
With your planting medium ready, carefully remove the Monstera cuttings from the water. Be gentle to avoid damaging the roots that have formed. This step requires patience and precision, as the new roots can be delicate.
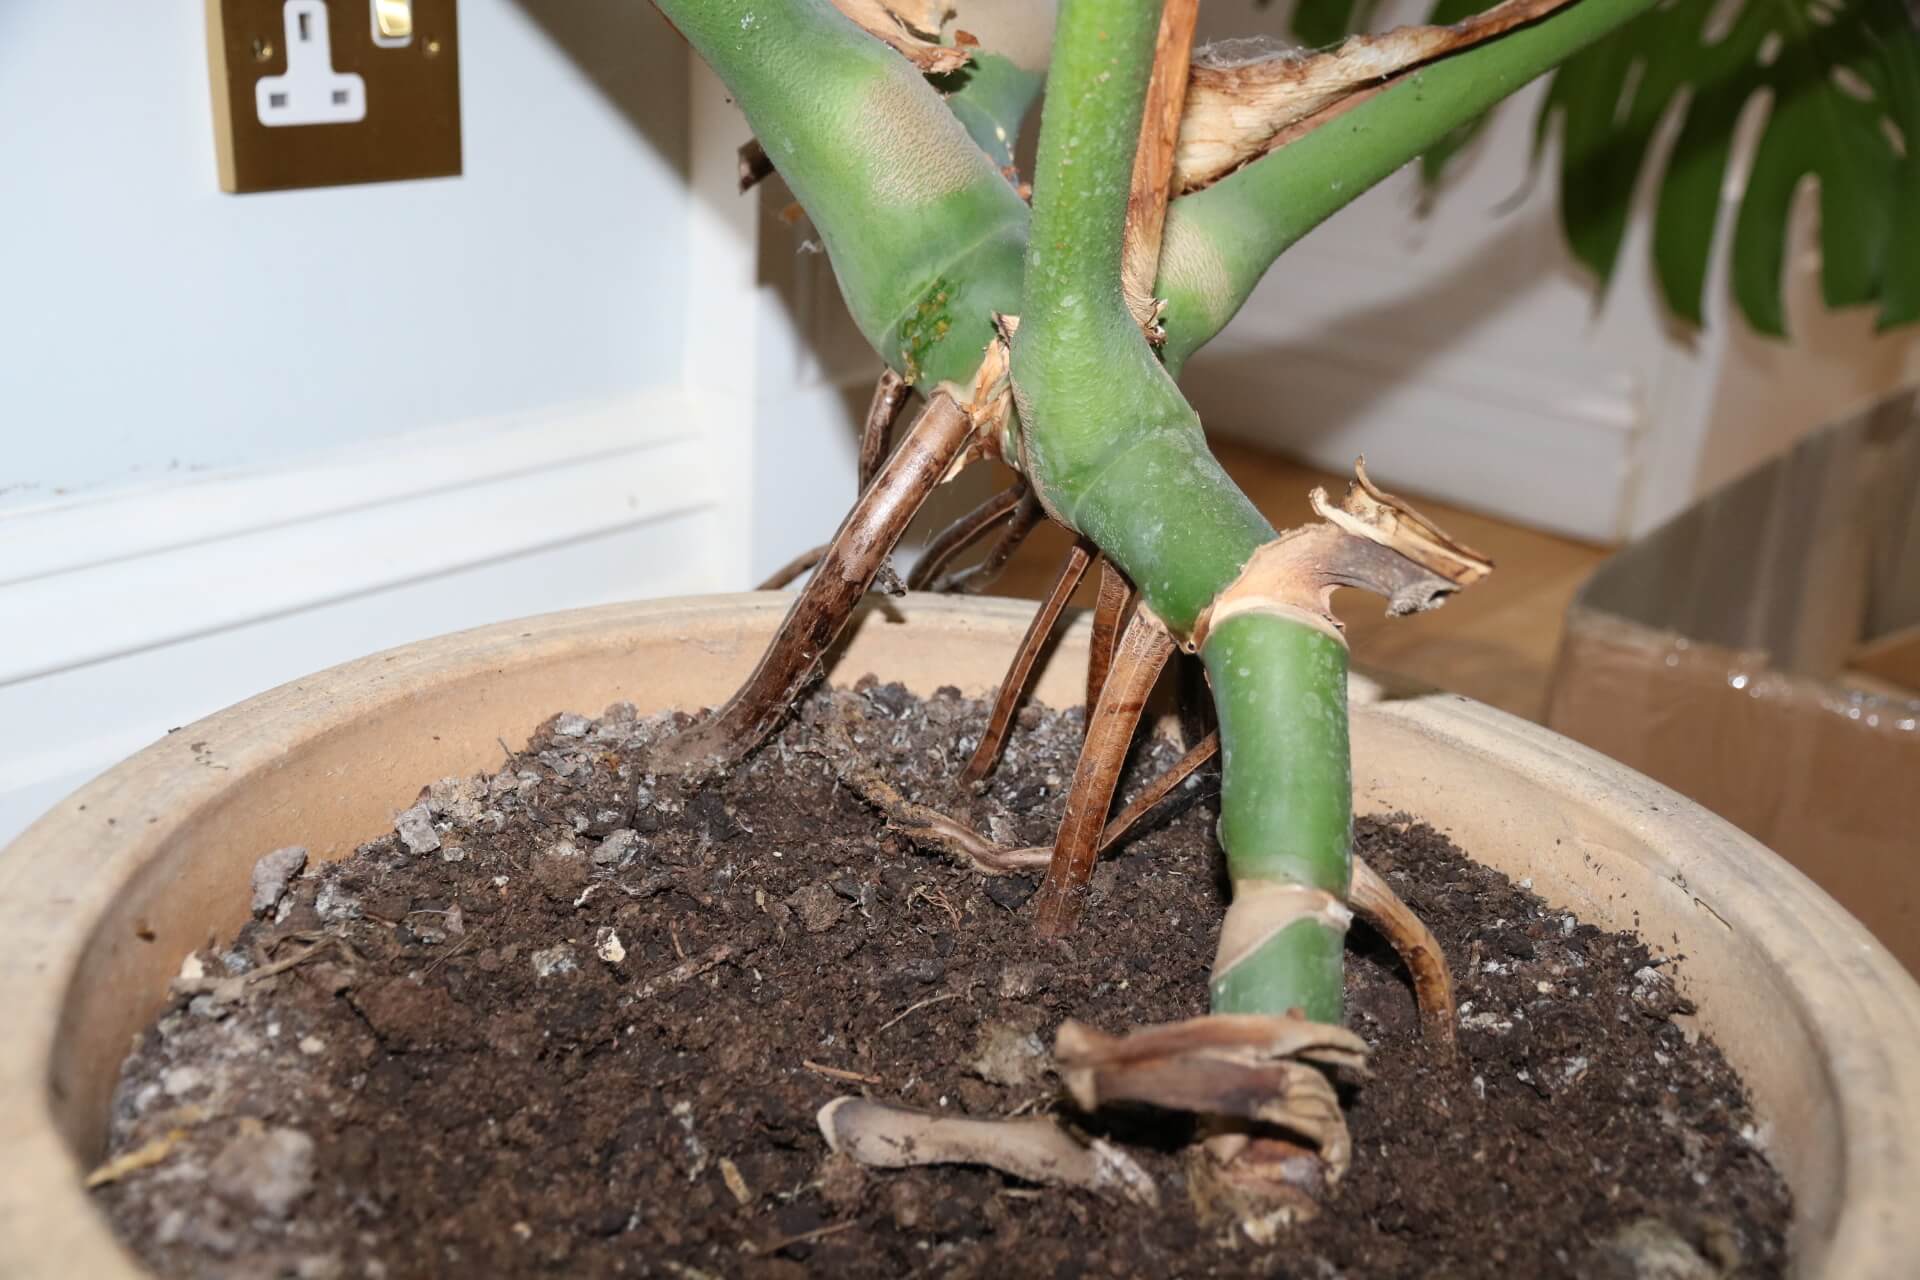
Planting The Cuttings In Soil
Once the cuttings are free from water, it’s time to plant them in their new home. Dig a hole in the prepared planting medium that is large enough to accommodate the roots. Place the cuttings in the hole and cover them with soil, gently firming it around the base of the plant. Ensure that the soil is level with the top of the roots.
Providing Care After Transplantation
After planting, take extra care to nurture your newly transplanted Monstera cuttings. Place them in a location that receives bright, indirect sunlight. Avoid exposing the plants to direct sunlight, as this can lead to burn and stress. Keep the soil consistently moist, but be cautious not to overwater, as this can cause root rot.
Additionally, it’s beneficial to create a humid environment for your Monstera cuttings to thrive. Mist the leaves regularly or place a tray of water near the plant to increase humidity. Monitor the moisture levels and adjust accordingly.
With proper care and attention, your Monstera cuttings will continue to grow and flourish in their new soil home. Enjoy the satisfaction of successfully transplanting your plants and watch them thrive as they continue their journey.
:max_bytes(150000):strip_icc()/GettyImages-1391463101-de49db580def4a2380a18fe273c1c065.jpg)
Credit: www.thespruce.com
Credit: www.teabreakgardener.co.uk
Frequently Asked Questions On How To Root A Monstera Plant
Can You Root Monstera In Water?
Yes, you can root Monstera in water. Simply cut a stem below a node and place it in water. Change the water regularly and wait for roots to grow before transferring it to soil.
Can You Propagate Monstera Straight Into Soil?
Yes, you can propagate Monstera directly into soil. Use a node-cutting from a healthy plant and plant it in well-draining soil. Keep the soil moist and provide indirect sunlight for optimal growth.
How Long Should Monstera Roots Be Before Planting In Soil?
Monstera roots should be around 3-4 inches long before planting in soil.
How To Root Monstera Without Aerial Root?
To root Monstera without aerial roots, cut a healthy stem just below a node and place it in water. Change the water every few days until roots appear. Transfer the plant to a container with well-draining soil and provide indirect sunlight and regular watering.
Conclusion
Rooting a Monstera plant is a simple and rewarding process. By following the tips and techniques outlined in this guide, you can successfully propagate your Monstera and expand your plant collection. With a little patience and care, you’ll soon be enjoying the beauty of new growth in your home.