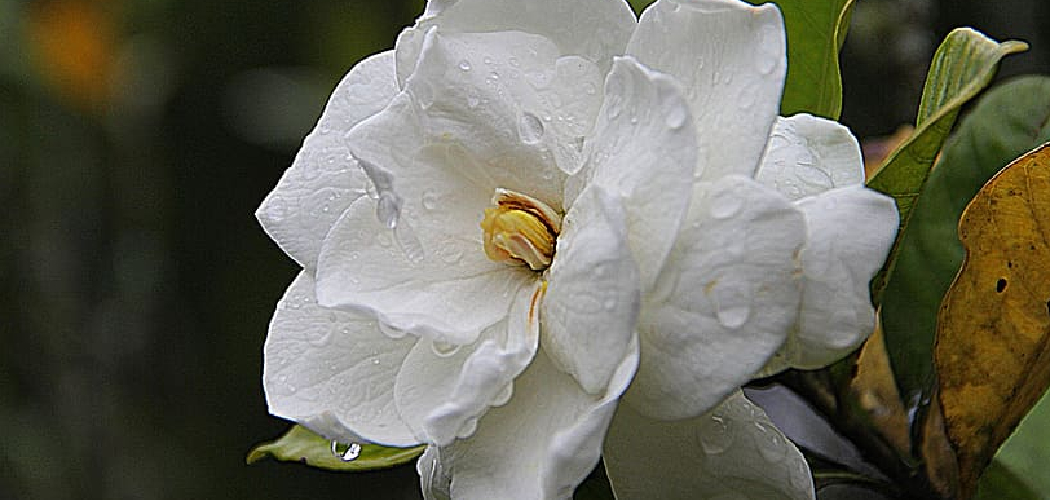
Are you a fan of the beautiful and fragrant gardenia plant? Have you ever wanted to propagate your gardenias from cuttings?
Rooting gardenia cuttings is a simple and rewarding way to propagate these beautiful, fragrant plants. Following the proper steps, you can create new gardenias from healthy parent plants, ensuring they thrive in your home or garden. This cost-effective method allows you to grow multiple plants with the same stunning flowers and lush foliage. Whether you are a novice gardener or experienced in propagation techniques, rooting gardenia cuttings is a valuable skill that can bring vibrancy and elegance to your outdoor space.

In this guide on how to root gardenia cuttings, we will discuss the steps and materials needed to successfully propagate your own gardenias.
What Are the Benefits of Rooting Gardenia Cuttings?
There are several benefits to rooting gardenia cuttings, including:
- Cost-effective: Buying multiple gardenia plants can be expensive. By propagating your own gardenias from cuttings, you can save money and grow as many plants as you want.
- Genetic Preservation: When you root gardenia cuttings from a healthy parent plant, you are preserving the genetic traits of that plant. This ensures that your new plants will have the same beautiful flowers and foliage as the parent plant.
- Fast Growth: While growing gardenias from seeds can take years, rooting cuttings allows for quicker growth and bloom time. This is especially beneficial for those in colder climates with shorter growing seasons.
- Easy Process: Rooting gardenia cuttings is a relatively simple process for novice gardeners. With the right materials and care, you can successfully propagate your own gardenias.
What Will You Need?
Before we dive into the steps for rooting gardenia cuttings, let’s first gather all the necessary materials. Here’s what you will need:
- Healthy Parent Plant: This is where you will take your cuttings from. Ensure that the parent plant is healthy and disease-free.
- Sharp Pruning Shears: Use clean, sharp ones to take your cuttings. Dull or dirty shears can damage the plant and affect rooting success.
- Rooting Hormone: This powder or liquid helps stimulate root growth. While it’s unnecessary, using a rooting hormone can increase your chances of successful propagation.
- Potting Mix: Choose a well-draining potting mix specifically designed for starting cuttings. Avoid using regular garden soil as it may contain pests or diseases that can harm the young plants.
- Pots or Containers: You will need small pots or containers to plant your cuttings in. Make sure they have drainage holes at the bottom to prevent waterlogging.
- Plastic Bag or Dome: To create a humid environment for your cuttings to root, you will need a plastic bag or dome to cover them.
- Spray Bottle: A spray bottle filled with water can help keep the cuttings and soil moist during rooting.
Once you have gathered all the necessary materials, it’s time to start rooting your gardenia cuttings.
8 Easy Steps on How to Root Gardenia Cuttings
Step 1. Select Healthy Cuttings:
Choose cuttings that are healthy, green, and semi-hardwood in nature. These cuttings should ideally be about 4 to 6 inches long and taken from a branch that is neither too old nor too young. Look for stems that have mature, firm leaves and no signs of disease, pests, or damage. Make your cut just below a leaf node using sterilized pruning shears to minimize the risk of introducing infection.

Removing any flowers or buds from the cutting is also crucial, as they can use up valuable energy that should instead be directed toward root development. Select your cuttings early in the morning when the plant is well-hydrated for the best results.
Step 2. Prepare the Cuttings:
After selecting your cuttings, remove the leaves from the lower half of the stem, leaving a few at the top to aid in photosynthesis. If the remaining leaves are huge, trim them in half to reduce water loss through transpiration. Next, make a small, shallow cut at the base of the stem to expose the inner layer, which can help encourage root growth.
For even better results, dip the cut end of the stem into rooting hormone powder or gel. This step can significantly enhance the chance of successful root development by promoting faster and stronger root formation.
Step 3. Plant the Cuttings:
Prepare a container with a well-draining potting mix, ideally a blend of peat moss and perlite or sand, to create the ideal environment for root growth. Using a pencil or similar tool, make a small hole in the soil for each cutting to avoid scraping off the rooting hormone during planting. Insert the cuttings into the holes and gently press the soil around them to provide stability.
Ensure the cuttings are spaced apart to allow for airflow, which helps prevent fungal issues. Once planted, mist the cuttings lightly with water and cover the container with a clear plastic bag or dome to maintain high humidity levels, mimicking a greenhouse effect. Place the container in a warm, bright spot out of direct sunlight, as excessive light can stress the cuttings.
Step 4. Maintain Proper Care:
Check the cuttings regularly to ensure the soil remains moist but not waterlogged. Open the plastic bag or dome briefly every few days to allow air circulation and prevent mold or rot. If any condensation builds up inside the covering, wipe it off to maintain a balanced humidity level.

After a few weeks, gently tug the cuttings to check for resistance, indicating root formation. Once roots have been established, gradually acclimate the cuttings to normal indoor conditions by removing the plastic covering for longer each day before transplanting them into individual pots.
Step 5. Transplant and Provide Long-Term Care:
Once the cuttings have developed a healthy root system, carefully transplant them into individual pots filled with well-draining potting soil. Choose containers with proper drainage holes to prevent waterlogging. Place the newly potted plants in a location with bright, indirect light and maintain consistent watering schedules to keep the soil moist but not soggy.
Fertilize sparingly with a diluted liquid fertilizer to encourage vigorous growth. Over time, monitor the plants for signs of stress or pests and adjust care as needed to ensure their long-term health and vibrancy.
Step 6. Pruning and Maintenance:
Regular pruning and maintenance are essential to keep your plants healthy and thriving. Remove any dead or yellowing leaves to prevent the spread of disease and redirect the plant’s energy toward new growth. Pinch back the tips of stems to encourage bushier growth and maintain the desired shape of the plant.
Periodically inspect your plants for pest infestations, such as spider mites or aphids, and treat them promptly with safe, plant-friendly remedies. Consistent care and attention will ensure your plants grow strong and remain a beautiful addition to your indoor or outdoor space.
Step 7. Repotting When Necessary:
Over time, your plants may outgrow their current containers or deplete the nutrients in the soil. To ensure continued healthy growth, repot your plants when necessary. Look for signs like roots growing out of the drainage holes, soil drying out too quickly, or stunted growth.

Choose a slightly larger pot with adequate drainage and fresh, nutrient-rich soil. Gently remove the plant from its current pot, loosen the roots, and place it in the new container. Fill in any gaps with fresh soil and water to help the plant settle into its new environment. Regular repotting will give your plants the space and resources they need to flourish.
Step 8. Pruning for Health and Aesthetics:
Pruning is a crucial practice to maintain the health and appearance of your plants. Regularly remove dead, yellowing, or damaged leaves to prevent diseases and pests from spreading. Additionally, pruning promotes better airflow and light penetration, which is essential for healthy growth. For bushier plants, trim leggy stems to encourage fuller growth and maintain an attractive shape. Always use clean, sharp pruning tools to avoid harming the plant. Incorporating pruning into your plant care routine ensures your plants stay vibrant and visually appealing.
With these steps, you can successfully propagate and care for your plants through cuttings.
5 Things You Should Avoid
- Using Old or Unhealthy Cuttings: Avoid selecting old, woody, or unhealthy cuttings. Gardenia cuttings should be fresh, green, and healthy for optimal rooting success.
- Skipping Proper Sanitization: Do not ignore the importance of sanitizing your tools. Pruning shears or scissors should be cleaned to prevent the spreading of diseases to the cuttings.
- Overwatering the Cuttings: Overwatering can lead to fungal growth and rot. Maintaining moist but not soggy soil during the rooting process is crucial.
- Placing Cuttings in Direct Sunlight: Direct sunlight can scorch or dehydrate the cuttings. Instead, put them in a warm, shaded area with indirect light.
- Neglecting Humidity Levels: Failing to provide adequate humidity can cause the cuttings to dry out. Covering them with a plastic bag or keeping them in a humid environment helps promote healthy rooting.

Conclusion
How to root gardenia cuttings requires attention to detail and proper care, but the results are highly rewarding.
By selecting healthy cuttings, maintaining sanitized tools, and ensuring ideal moisture and light conditions, you can create the perfect environment for successful rooting. Remember to monitor humidity levels to prevent dehydration and avoid overwatering to reduce the risk of rot.
With patience and consistency, you’ll soon be able to grow beautiful gardenias, adding elegance and fragrance to your garden.