Preparing your garden soil properly is essential for growing healthy plants, and rototilling is an effective way to achieve that. Rototilling helps break up compacted soil, mix in organic matter, and create an ideal environment for roots to thrive.

Whether you are starting a new garden or rejuvenating an existing one, learning how to rototill correctly can make all the difference in promoting plant growth and ensuring a productive garden. This guide will walk you through the steps of how to rototill a garden effectively.
What Is Rototilling?
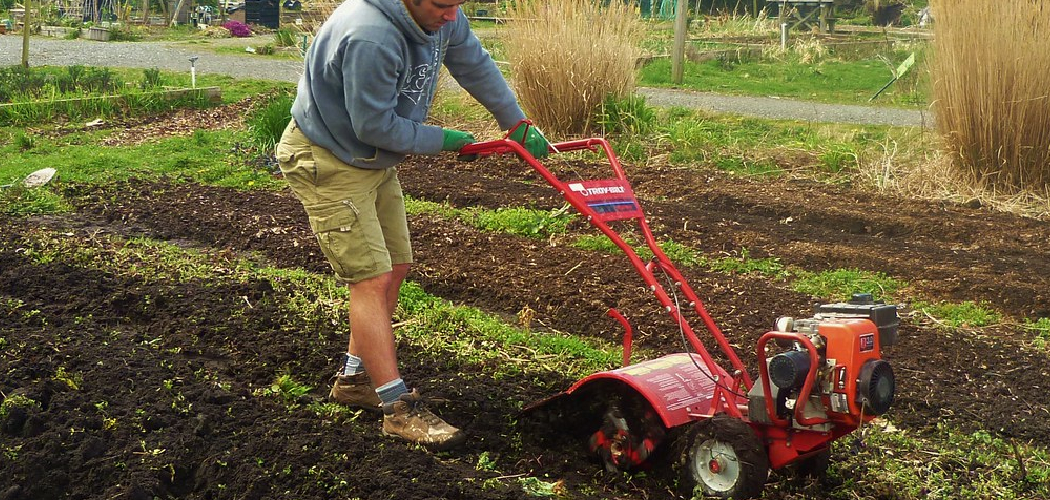
Rototilling is a gardening technique involving the use of a machine called a rototiller to break up and aerate soil. A rototiller is equipped with rotating blades or tines that churn through the soil, loosening compacted dirt and mixing in organic matter like compost or peat moss. This process helps create a well-aerated, nutrient-rich environment for plants to grow. Rototilling is particularly useful for preparing new garden beds, removing weeds, and improving drainage.
However, it’s important to use this method thoughtfully, as excessive rototilling can disrupt soil structure and harm beneficial microorganisms. When done correctly, rototilling is a powerful tool for cultivating a thriving and healthy garden.
When Is the Best Time to Rototill a Garden?
Timing is crucial when it comes to rototilling a garden to ensure the best results without damaging the soil. The ideal time to rototill is in the spring or fall when the soil is moist but not overly wet. After the last frost in spring, the soil begins to warm up and becomes easier to work with, making it an excellent time to prepare your garden for planting.

Similarly, rototilling in the fall allows you to incorporate organic materials, like compost, into the soil, enriching it for the following growing season. It’s essential to avoid tilling when the soil is too wet, as this can lead to compaction and the formation of clumps, which hinder root growth. By carefully selecting the right time to rototill, you can set the stage for a productive and healthy garden.
Tools and Materials You’ll Need
To ensure successful rototilling and soil preparation, having the right tools and materials is essential. Here are some items you’ll need:
- Rototiller: A reliable rototiller is crucial for breaking up and aerating the soil.
- Compost or Organic Material: Enrich the soil with nutrients by incorporating compost, aged manure, or other organic matter.
- Gardening Gloves: Protect your hands from blisters, dirt, and debris while working.
- Rake: Use a sturdy rake to level the soil and remove larger debris after tilling.
- Hoe or Hand Trowel: Handy for addressing smaller, hard-to-reach areas that may need additional attention.
- Moisture Meter: A tool to check soil moisture before tilling, ensuring optimal conditions.
- Sturdy Boots: Proper footwear will protect your feet and provide traction as you work in different soil conditions.
Having these tools and materials ready before starting your rototilling project will make the process smoother and more efficient.
10 Methods How to Rototill a Garden
1. Choose the Right Time to Rototill
Timing is crucial when it comes to rototilling. The best time to till your garden is when the soil is moist but not saturated. To check, squeeze a handful of soil; if it crumbles easily, it’s ready. If it forms a muddy ball, wait a few days.
Spring and fall are generally the best seasons to rototill. In spring, wait until the soil has thawed and dried out to prevent compacting wet earth. In fall, rototilling helps break down organic matter and prepare the ground for winter. Rototilling when the soil is too wet or too dry can damage its structure, leading to clumping or dust-like consistency.
2. Clear the Area of Debris and Vegetation
Before rototilling, remove all debris, including rocks, sticks, and large weeds. These obstacles can damage the rototiller blades or get tangled, causing unnecessary delays. Use a rake or garden fork to clear the surface.
If your garden is overgrown, mow down tall weeds and grasses to ground level. This reduces resistance and makes tilling smoother. For stubborn perennials, dig them out manually, as their roots can wrap around the tines, reducing the efficiency of the machine. Clearing the area also ensures that the rototiller can break up the soil evenly without any blockages.

3. Prepare the Soil by Moistening It
To facilitate easier tilling, lightly water the soil the day before you plan to work. Moistening the soil helps the rototiller penetrate the ground more effectively, reducing dust and strain on the machine.
Avoid overwatering, as muddy soil can stick to the tines and create a compacted mess. A gentle sprinkling with a hose or watering can is usually sufficient. Testing the moisture level with the squeeze test mentioned earlier will help determine if the soil is adequately prepared.
4. Mark the Tilling Area
Clearly mark the area you plan to till using garden stakes and twine. This helps guide your tilling path, ensuring that you cover the entire garden without missing spots or overworking sections.
Divide larger plots into smaller, manageable zones to make tilling more systematic. A marked path also helps you maintain straight rows, which is especially important if you plan to plant in organized beds afterward. Proper planning at this stage saves time and effort during the actual tilling process.
5. Adjust the Rototiller Settings Appropriately
Rototillers come in various sizes and styles, including front-tine, rear-tine, and mini-tillers. Adjust the depth settings based on your soil type and the purpose of tilling. For breaking new ground, a depth of 6 to 8 inches is ideal. For mixing compost or soil amendments, 4 to 6 inches suffices.
Rear-tine tillers are more powerful and suitable for larger plots, while front-tine tillers are better for smaller gardens and light soil. Make sure the tines are sharp and well-maintained to cut through soil efficiently. Setting the machine to the correct depth ensures thorough mixing without overly disturbing subsoil layers.
6. Use the Correct Tilling Technique
Start at one end of your garden and move in straight, parallel rows. Overlap each pass slightly to ensure complete coverage. Let the rototiller do the work—avoid forcing or pushing it forward. The machine’s weight and tines are designed to dig and move naturally.
Keep a firm grip on the handles to maintain control, but avoid straining yourself. Moving too fast can cause the tiller to bounce and miss areas, while moving too slowly can overly pulverize the soil. Aim for a consistent speed, allowing the machine to work at its intended pace.

7. Incorporate Organic Matter as You Till
To enrich the soil, add compost, aged manure, or organic fertilizers just before or during rototilling. Spread these materials evenly over the garden surface. As you move through each row, the tiller will mix the organic matter into the soil, improving texture and nutrient content.
If you’re incorporating cover crops or green manure, mow them down first and let the clippings dry for a few days. Tilling these materials directly into the soil boosts fertility and structure, making the ground more hospitable for planting.
8. Avoid Over-Tilling to Preserve Soil Structure
One common mistake is over-tilling, which can break down soil aggregates, leading to compaction and erosion. A single pass is often sufficient for established garden beds. If you are breaking new ground, two passes at most should do the job.
Too much tilling can destroy beneficial organisms and cause soil degradation. After the initial pass, check the soil’s texture and adjust your technique if it appears too fine or dusty. Over-tilling reduces soil stability, so aim for a crumbly, aerated consistency rather than a powdery one.
9. Level the Soil After Tilling
After rototilling, the soil may appear uneven or clumpy. Use a garden rake to smooth out the surface, breaking up large clods and distributing soil evenly. Raking helps create a uniform planting bed, which is essential for seed germination and even watering.
If you find deep furrows from the tiller, fill them with loosened soil to maintain a level surface. Tamping lightly with the back of the rake can also help settle the soil without compacting it too much. A well-leveled garden bed facilitates planting and reduces water pooling.
10. Allow the Soil to Settle Before Planting
Give the freshly tilled soil a few days to settle before planting. This period allows air pockets to collapse and the soil structure to stabilize. During this time, monitor the garden for weeds that might emerge, as rototilling can bring dormant seeds to the surface.
Raking the area once more before planting can help eliminate any newly sprouted weeds. Allowing the soil to rest also gives organic matter time to integrate fully, promoting healthier root development when you eventually sow your seeds or transplant seedlings.

Conclusion
Rototilling your garden is a valuable technique for preparing the soil, but it requires careful planning and execution to be effective. By selecting the right time, preparing the area, using proper tilling methods, and incorporating organic matter, you can create a fertile, well-aerated bed for your plants.
Avoiding over-tilling and giving the soil time to settle afterward helps maintain a balanced environment that supports plant growth. With these ten methods, you can ensure that your rototilling efforts contribute positively to your garden’s health and productivity. Thanks for reading, and we hope this has given you some inspiration on how to rototill a garden!