To start luffa seeds indoors, fill seed trays with potting mix, plant the seeds and keep them in a warm and sunny location. Starting luffa seeds indoors is a great way to ensure a head start on the growing season.
By starting indoors, you can control the temperature and provide the seeds with optimal conditions for germination. Luffa plants thrive in warm and sunny environments, so finding a sunny location is crucial. This article will guide you in starting your luffa seeds indoors, allowing you to enjoy an abundant harvest of this unique and versatile vegetable.
With a few simple steps, you’ll be on your way to growing your own luffas in no time.

Credit: savvygardening.com
How to Start Luffa Seeds Indoors: Step by Step Guide
Selecting The Right Luffa Seeds
When starting luffa seeds indoors, selecting the right variety is crucial for successful growth. Begin by researching reputable seed suppliers to ensure high-quality seeds. Consider the specific characteristics of each luffa variety, such as size, texture, and color, to determine which one suits your indoor growing conditions best. Some popular varieties for indoor cultivation include Chinese Okra, Vietnamese Okra, and Egyptian Luffa.
Factors to consider when choosing luffa seeds include the space you have available, the temperature and humidity levels in your indoor environment, and your personal preference for the type of luffa you want to grow. For smaller indoor spaces, compact or dwarf varieties may be more suitable. Additionally, consider the days to maturity for each variety, as shorter maturity periods are desirable for indoor growing.
By carefully selecting the right luffa seeds and considering various factors, you can set yourself up for a successful indoor gardening experience.
Preparing The Indoor Growing Space
Growing luffa seeds indoors requires proper preparation of the growing space to ensure successful and healthy seedlings. Ensuring adequate space for luffa seedlings is crucial for their growth and development. It is recommended to grow each seedling in separate containers to avoid overcrowding.
Providing the necessary lighting conditions is essential for luffa seedlings to thrive. They require bright and direct sunlight for at least 6 to 8 hours a day. If natural sunlight is limited, using artificial grow lights can be a great alternative. Hang the lights above the seedlings to simulate natural sunlight and maintain a distance of about 6 to 12 inches for optimal light exposure.
| Temperature | Humidity |
|---|---|
| Creating a suitable temperature is important for luffa seedlings. They prefer a warm environment with temperatures between 75°F and 90°F (24°C and 32°C). Use a heating mat or adjustable thermostat to regulate the temperature if needed. | Maintaining adequate humidity levels is crucial for luffa seedlings. Aim for a humidity level between 60% and 70% to promote healthy growth. Use a humidifier or mist the seedlings regularly to maintain the desired humidity. |
Germinating Luffa Seeds
To ensure optimal germination of luffa seeds, it is important to follow a few key steps. Start by soaking the luffa seeds in a container filled with lukewarm water. Let them soak for about 24 hours, which will help to soften the seed coat and promote faster germination.
Next, prepare a well-draining germination medium by combining equal parts of high-quality potting soil and perlite or vermiculite. This will provide the seeds with the ideal balance of moisture retention and adequate drainage.
When planting the seeds, make sure to provide them with warmth and moisture to encourage germination. Plant the seeds about 1-2 inches deep in the germination medium and keep them consistently moist. Consider using a plastic dome or a plastic bag to create a greenhouse-like environment that helps to retain moisture and warmth.
In a few days, you should start to see the luffa seeds germinate and sprout. At this point, you can gently remove the dome or plastic bag and provide the sprouts with plenty of bright, indirect light to help them grow into healthy seedlings.
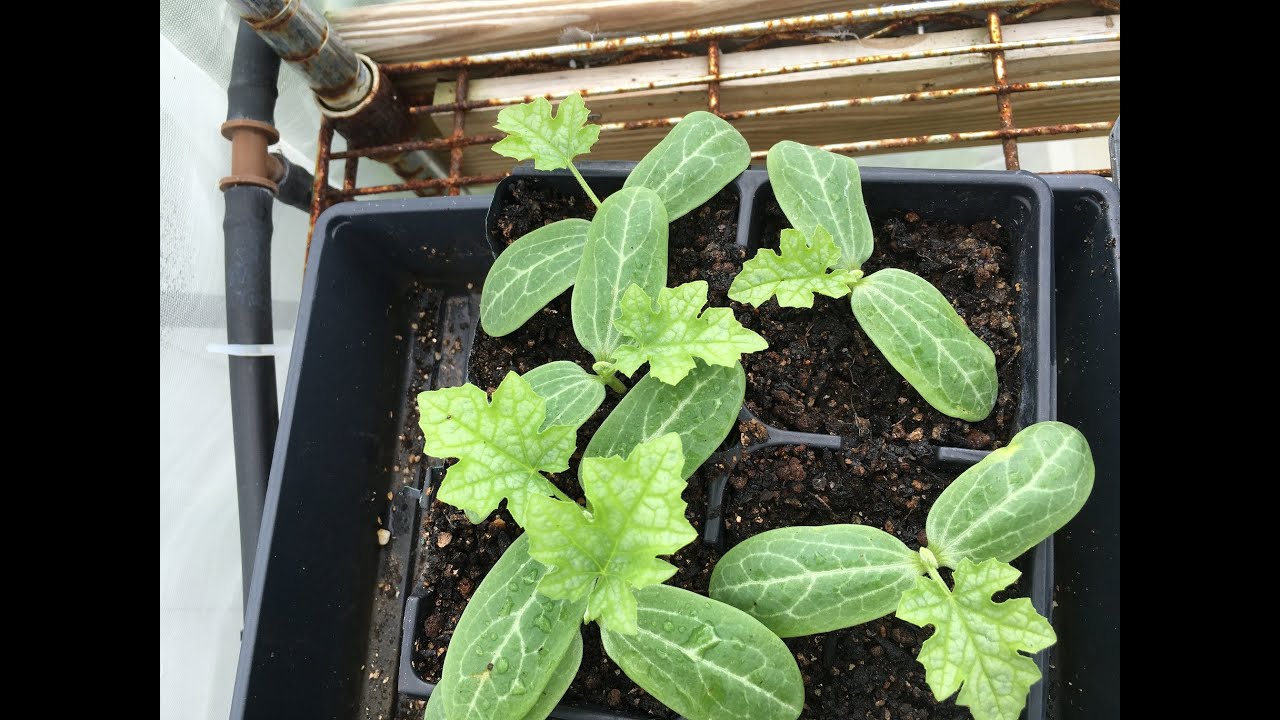
Caring For Luffa Seedlings
Starting luffa seeds indoors can be a rewarding way to ensure a successful harvest. When caring for luffa seedlings, it is important to monitor and maintain ideal temperature and humidity levels. Luffa plants thrive in warm and humid environments, so keeping the temperature between 70-85°F (21-29°C) and humidity around 70% is crucial for their growth.
Providing sufficient light is also essential for the seedlings. Place them in a bright location where they can receive at least 6-8 hours of direct sunlight or use fluorescent grow lights if natural sunlight is limited.
In addition to light and environmental conditions, regularly watering and fertilizing the luffa seedlings is necessary for their development. Keep the soil consistently moist but avoid overwatering, which can lead to root rot. Apply a balanced fertilizer every two weeks to provide the necessary nutrients for healthy growth.
Transplanting Luffa Seedlings
Transplanting luffa seedlings is a crucial step in successful indoor gardening. Determining the appropriate transplanting time is essential to ensure the seedlings are mature enough to handle the move. This usually happens when the seedlings have developed their first true leaves and the threat of frost has passed.
To prepare the transplanting containers, choose pots that will accommodate the seedlings’ root systems comfortably. It’s essential to use a well-draining medium such as a mix of potting soil and perlite to prevent waterlogged roots. Before transplanting, water the seedlings thoroughly to ease their removal from the initial containers.
Make sure to handle the seedlings gently by their leaves or root ball. Transplant them into the larger pots with enough space for growth. Firmly press the soil around the seedlings to provide support. After transplanting, water the seedlings again to settle the soil.
Remember to place the newly transplanted seedlings in a warm and bright location, ensuring they receive adequate sunlight or artificial light. Regularly monitor the soil moisture levels and water as necessary to promote healthy growth.
Nurturing Luffa Plants Indoors
Starting luffa seeds indoors: Growing luffa plants indoors can be a rewarding experience. For successful germination, begin by soaking the luffa seeds in water overnight. Next, fill seed trays with a well-draining seed starting mix and plant the seeds at a depth of about half an inch. Keep the soil moist by watering regularly, but avoid overwatering, as it can lead to fungal diseases. Once the seedlings emerge, provide ample light and warmth by placing them near a south-facing window or using grow lights.
Nurturing luffa plants: As the luffa plants grow, they will need support to climb and encourage upward growth. Consider using a trellis or stakes for this purpose. Regularly fertilize the plants with a balanced organic fertilizer to promote healthy growth.
Watering and fertilizing the growing luffa plants: Keep the soil evenly moist, but avoid waterlogging. Water the plants regularly and deeply to ensure the roots receive sufficient moisture. Fertilize every two weeks with a liquid organic fertilizer to provide the necessary nutrients for optimal growth.
Managing pests and diseases: In an indoor environment, luffa plants are less prone to pests and diseases compared to outdoor cultivation. However, it’s important to remain vigilant and inspect the leaves regularly for any signs of pests or diseases. If necessary, treat with organic pest control methods such as insecticidal soap or neem oil.
Hardening Off And Acclimating Luffa Plants
Starting luffa seeds indoors is a great way to get a head start on your growing season. However, it’s important to properly harden off and acclimate the plants before transplanting them outside. Hardening off involves gradually exposing the luffa plants to outdoor conditions, such as sunlight and wind. This process should be done over a period of 7-10 days, starting with just a few hours outside and gradually increasing the time each day.
During this time, it’s crucial to protect the plants from sudden temperature changes, as they can be sensitive to cold weather. If the weather is forecasted to be particularly cold, you might want to cover the plants with a blanket or bring them indoors overnight.
Monitoring and adjusting the plants’ exposure to outdoor elements is also important. Pay attention to how they are responding to the outdoor conditions. If they are showing signs of stress, such as wilting or yellowing leaves, you may need to reduce their exposure or provide additional protection.
Harvesting Luffa Gourds
Harvesting luffa gourds requires recognizing the signs of maturity. When the gourds turn yellow and feel lightweight, they are ready for harvest. They should be firm, indicating a fully developed gourd. It is important to harvest the gourds at the right time to prevent overripening, which can lead to tough and fibrous skin.
After harvesting, proper cleaning and storing of luffa gourds is essential. Start by removing the outer peel to reveal the fibrous interior. Scrubbing the gourds with a brush can help remove any remaining dirt or debris. Rinse thoroughly and allow them to dry in a well-ventilated area. Once dry, store the gourds in a cool, dry place to prevent molding or rotting.
Troubleshooting Common Issues
Starting luffa seeds indoors can be a rewarding and enjoyable experience. However, there are common issues that may arise during the process that need to be addressed for successful seedling growth. One issue is seedling damping-off, which can be identified by the sudden collapse and wilting of seedlings. To prevent this, it’s important to use well-draining soil and provide proper air circulation. Nutrient deficiencies are another concern for luffa plants.
Ensuring a balanced nutrient mix and regularly monitoring the plants for symptoms such as yellowing leaves or stunted growth can help address this issue. Additionally, managing pests and diseases specific to luffa gourds is crucial to maintain healthy plants. Using organic pest control methods and providing good sanitation practices can greatly minimize the impact of these issues. By being proactive in identifying and addressing common issues, you can set your luffa seedlings up for success.
Frequently Asked Questions For How To Start Luffa Seeds Indoors
Should You Soak Luffa Seeds Before Planting?
Soaking luffa seeds before planting is not necessary. Luffa seeds can be directly sown into the soil. Watering them after planting is sufficient.
How Do You Start A Loofah Indoors?
To start a loofah indoors, follow these steps: 1. Soak loofah seeds overnight in water. 2. Fill a small pot with seed-starting mix. 3. Plant the soaked seeds, covering them with a thin layer of soil. 4. Place the pot in a warm, sunny area and keep the soil moist.
5. Once seedlings appear, transplant them to larger pots or your garden.
When Can I Start Loofah Indoors?
You can start growing loofah indoors once the risk of frost has passed and the soil temperature reaches around 70°F. Ensure you have a sunny spot, adequate space for the vines to climb, and well-draining soil. Water regularly and provide support for the plants to thrive.
How Long Does It Take For Luffa Seeds To Germinate?
Luffa seeds typically take 7 to 10 days to germinate, provided they are kept in a warm and moist environment. However, it can vary depending on factors such as temperature and humidity.
Conclusion
Starting luffa seeds indoors is a simple and rewarding process. By following the steps outlined in this guide, you can ensure that your luffa plants get a healthy head start. Remember to provide adequate lighting, maintain proper humidity levels, and transplant them outdoors at the right time.
With a little patience and care, you’ll soon be enjoying the abundance of luffa in your own backyard. Happy gardening!