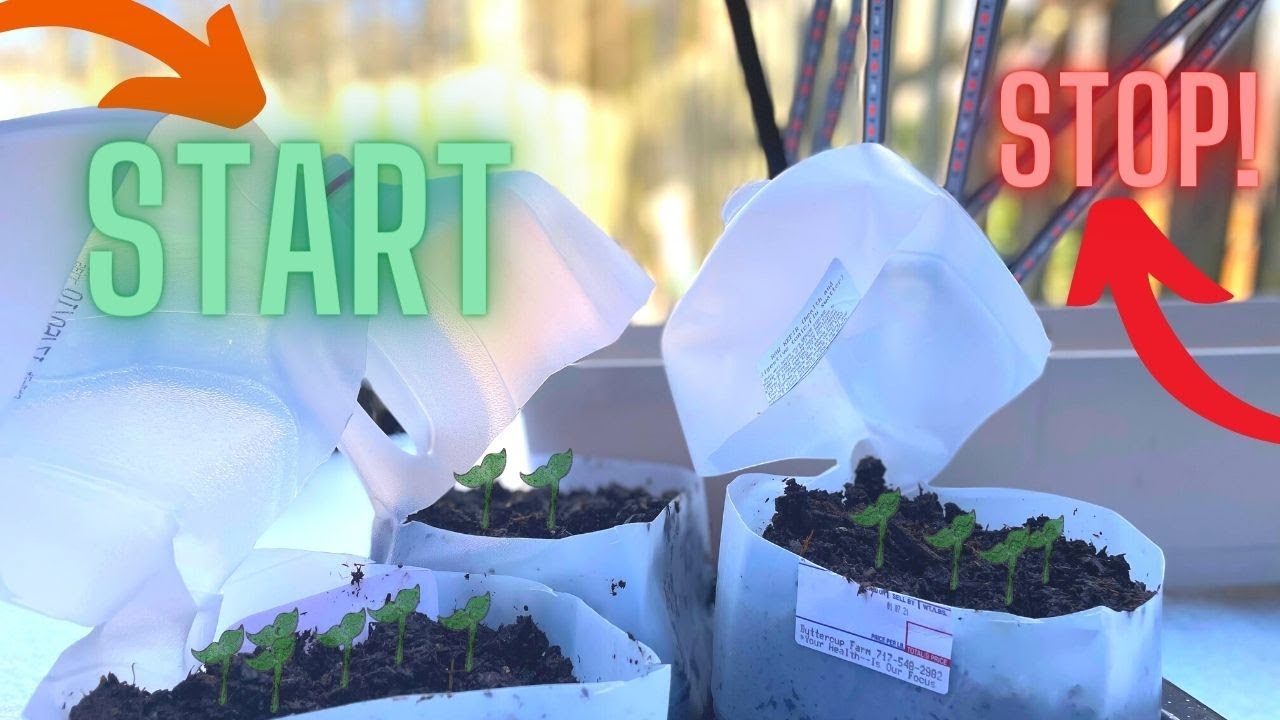
To start seeds in milk jugs, cut the top off a clean, empty milk jug and make small holes on the bottom for drainage. Fill the jug with potting soil, plant the seeds, water them, and place the jug in a sunny spot.
Credit: morningchores.com
The Benefits Of Starting Seeds In Milk Jugs
The benefits of starting seeds in milk jugs are numerous. First and foremost, starting seeds in milk jugs means fewer expenses on purchasing seedlings. Instead of buying plants from a nursery, you can simply collect milk jugs from your own kitchen or ask friends and neighbors to save them for you. This not only saves money but also reduces waste.
Another benefit is the ability to grow a wider variety of plants. By starting seeds in milk jugs, you are not limited to the selection offered by nurseries. You can experiment with different types of vegetables, herbs, and flowers, allowing for a diverse and interesting garden.
Furthermore, starting seeds in milk jugs gives you control over the entire growing process. You can choose the type of soil, control the amount of water and sunlight, and monitor the growth of the seedlings closely. This level of control ensures optimal conditions for the plants to thrive.
How to Start Seeds in Milk Jugs: Step by Step Guide
Preparing The Milk Jugs For Seed Starting
Cleaning the milk jugs thoroughly is an essential step in preparing them for seed starting. Make sure to wash the jugs with warm soapy water to remove any dirt or residue that might hinder the growth of your seeds. Once cleaned, the next step is to create drainage holes at the bottom of the jugs. These holes will allow excess water to drain out and prevent waterlogging, which can be detrimental to seed germination.
Use a sharp knife or scissors to carefully cut several small holes in the bottom of each jug. Furthermore, cutting the jugs for easier access is recommended. You can remove the top part of each jug to create a wide opening, allowing for easy planting and maintenance of your seeds. Remember to label each jug with the type of seeds you are planting for easy identification. With these preparations, your milk jugs are now ready for seed starting!
Choosing The Right Seeds For Milk Jug Planting
Choosing the right seeds for milk jug planting is crucial to ensure successful growth and development. One important factor to consider is the climate and season of your location. Different plants have specific temperature and sunlight requirements, so it is essential to choose seeds that are suitable for your local weather conditions.
Another consideration is opting for quick-growing varieties. Milk jugs provide a limited space for plant growth, so selecting seeds that germinate and mature quickly is advantageous. These fast-growing plants will adapt well to the confined environment of the milk jug and produce bountiful results in a shorter period.
Soil Mix For Milk Jug Seed Starting
Starting seeds in milk jugs is an affordable and effective way to kickstart your garden. When it comes to choosing the right soil mix, there are a few important factors to consider. Good drainage and aeration are crucial for seed germination and root development. Use a mix that is well-draining, such as a combination of peat moss, perlite, and vermiculite. This will ensure that excess water can easily drain away and prevent the roots from becoming waterlogged. Balancing nutrients and pH levels is also essential for successful seed starting.
Opt for a soil mix that is enriched with organic matter and contains a balanced combination of essential nutrients. Additionally, make sure the pH level of the mix is suitable for the seeds you are planting. Most seeds prefer a slightly acidic to neutral pH level. By choosing the right soil mix, you can give your seeds the best possible start and set them up for healthy growth.
Planting Seeds In Milk Jugs
Sowing the seeds at the correct depth is crucial for successful germination. Each type of seed requires a specific depth, typically indicated on the seed packet or accompanying instructions. It’s important not to plant the seeds too deep or too shallow, as this can hinder their growth. Providing appropriate spacing between seeds is also essential. Seeds need room to expand and develop roots without being crowded by neighboring plants.
Refer to the seed packet or guidelines to determine the recommended spacing for optimal growth. Moistening the soil before planting aids in seed germination. The soil should be damp but not overly wet. Using a spray bottle or watering can with a fine nozzle helps to evenly distribute the water and prevent dislodging the seeds.
Caring For Seedlings In Milk Jugs
Starting seeds in milk jugs is an inexpensive and convenient way to kickstart your garden. Once the seedlings have sprouted, it’s crucial to provide the right care for their growth. To keep the milk jugs in a suitable location, choose an area with consistent temperatures and good air circulation. Avoid placing them in direct sunlight, as this can overheat the seedlings. Alternatively, monitor the moisture levels regularly to ensure the soil remains damp but not waterlogged.
It’s essential to strike a balance to prevent mold and root rot. Additionally, providing adequate sunlight or artificial light is vital for the seedlings’ development. Aim for at least 12-16 hours of light per day, positioning the milk jugs near a south-facing window or using grow lights.
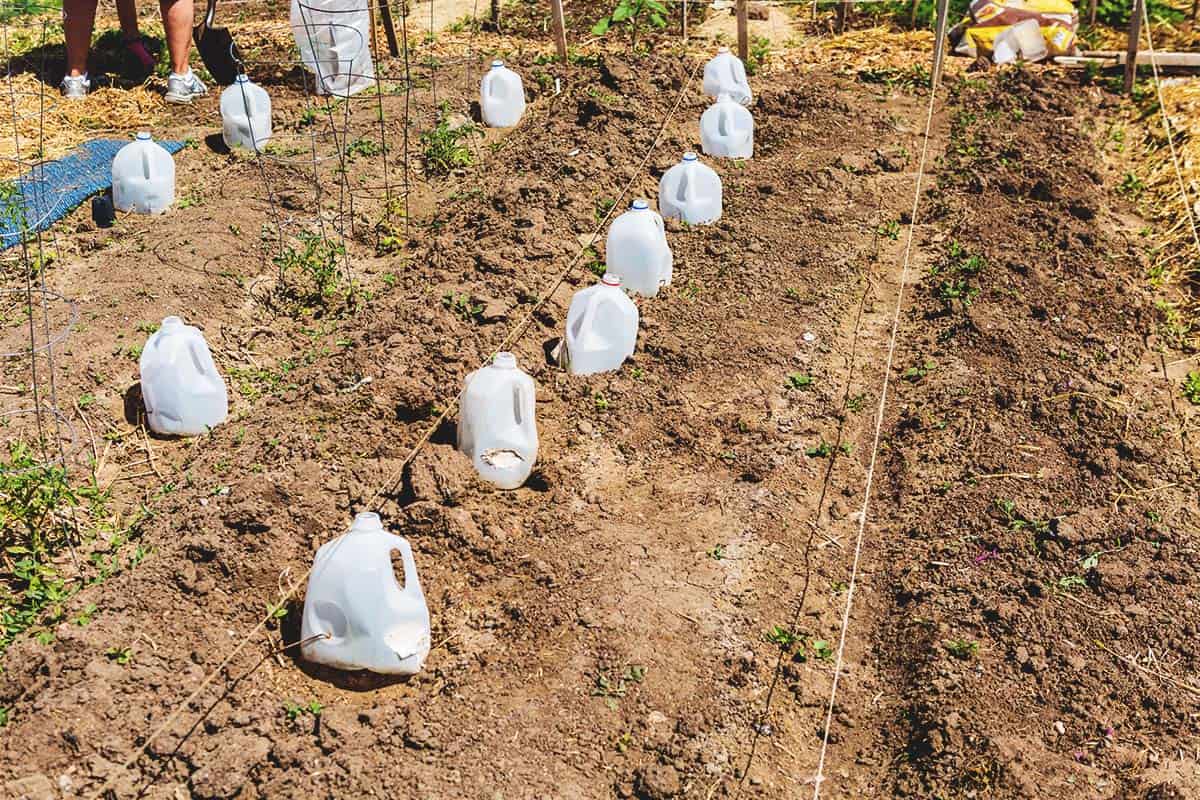
Transplanting Seedlings From Milk Jugs
Transplanting seedlings from milk jugs is a crucial step in the process of starting seeds in milk jugs. Before transplanting, it is important to harden off the seedlings to acclimate them to outdoor conditions. This involves gradually exposing them to sunlight and lower temperatures over a period of several days.
To ensure successful transplantation, preparing the planting site in the garden is essential. Clear the area of any weeds or debris and amend the soil if necessary. Choosing a location with well-drained soil and the appropriate amount of sunlight is important for the seedlings’ growth.
When it’s time to transplant the seedlings, it’s crucial to handle them carefully to minimize root disturbance. Gently loosen the soil around the seedling, grasp it by the leaves, and carefully lift it from the milk jug. Make a hole in the prepared planting site and gently place the seedling in, ensuring that the roots are properly covered with soil.
Troubleshooting Common Issues In Milk Jug Seed Starting
Starting seeds in milk jugs can be a cost-effective and environmentally friendly way to jumpstart your garden. However, a few common issues may arise during the seed starting process:
Preventing fungal diseases
Fungal diseases can quickly spread and hinder seed germination. To prevent fungal diseases:
- Ensure proper ventilation by opening the milk jug caps occasionally.
- Avoid overcrowding seeds, as this can create a moist environment prone to fungal growth.
- Use well-draining soil and consider adding perlite or vermiculite to improve drainage.
- Apply a natural fungicide or homemade solution made from neem oil or baking soda.
Addressing pest infestations
Pests like aphids or gnats can damage young seedlings. Here’s how to address pest infestations:
- Inspect seeds and soil for any signs of pests before starting.
- Keep a watchful eye for any infestations during the seed starting process.
- Consider using natural pest control methods, such as insecticidal soap or neem oil sprays.
- Introduce beneficial insects like ladybugs or lacewings to control pest populations.
Managing nutrient deficiencies
Seedlings may sometimes lack essential nutrients needed for healthy growth. Address nutrient deficiencies by:
- Using a well-balanced seed starting mix or adding organic compost to provide necessary nutrients.
- Employing a liquid fertilizer or plant food specifically formulated for seedlings.
- Monitoring seedling growth and adjusting fertilizer application accordingly.
Harvesting From Milk Jug Seedlings
Knowing when to harvest your produce from milk jug seedlings is crucial for maximizing taste and nutritional value. One way to determine the appropriate time for harvest is by **observing the plant’s growth stage**. Keep an eye out for **mature fruit** or **ripe vegetables**, as they will be more flavorful. **Gently twist or cut** the produce from the plant to avoid damaging it.
Once harvested, make the most out of your plants by utilizing them in various ways. **Incorporate freshly picked herbs** into your cooking to add a burst of flavor to your meals. **Freeze fruits and vegetables** for later use in smoothies or as ingredients for homemade preserves. You can also **dry herbs and flowers** to create your own teas or potpourri. Experiment with different recipes and preservation methods to fully enjoy the fruits of your labor.
Frequently Asked Questions On How To Start Seeds In Milk Jugs
What Seeds Are Best To Start In Milk Jugs?
The best seeds to start in milk jugs are spinach, lettuce, peas, and beans. These seeds are perfect for container gardening as they thrive in limited space and can easily adapt to the environment inside the milk jugs.
Can You Use Milk Jugs To Start Seeds?
Yes, milk jugs can be used to start seeds. They provide a protected environment for seed germination and can be easily repurposed. It’s a cost-effective and sustainable method for starting seeds indoors.
When Should I Start Winter Sowing In Milk Jugs?
Start winter sowing in milk jugs as soon as the weather starts to cool, typically in late winter or early spring.
How Do You Start Milkweed Seeds In Milk Jugs?
To start milkweed seeds in milk jugs, follow these steps: 1. Fill a milk jug with moist soil. 2. Plant the seeds about 1/4 inch deep and cover with a thin layer of soil. 3. Place the jug in a sunny spot and water regularly.
4. Watch for germination, which usually occurs within a few weeks. 5. Once the seedlings are big enough, transplant them outdoors.
Conclusion
Starting seeds in milk jugs is an innovative and cost-effective method for any beginner gardener. By repurposing milk jugs, you can create mini-greenhouses that provide the ideal environment for seed germination. This method is simple, accessible, and can yield remarkable results.
With just a few materials and some patience, you can kickstart the growth of your garden and enjoy a bountiful harvest. Give it a try and watch your seeds flourish into thriving plants. Happy gardening!