To sterilize soil in the sun, spread it evenly on a tarp and leave it in direct sunlight for several weeks, turning it regularly. Sterilizing soil is a crucial step in ensuring healthy plant growth, as it eliminates harmful pests, diseases, and weeds.
While there are various sterilization methods available, exposing soil to the natural power of the sun can be an effective and environmentally friendly option. By harnessing the sun’s heat and uv radiation, you can disinfect soil without the need for chemical solutions.
This method is particularly useful for small-scale gardening projects or when organic practices are preferred. In this article, we will explore how to sterilize soil in the sun and discuss its benefits and limitations. So, let’s dive in and learn how to make your soil pathogen-free with the help of the sun’s rays.

Credit: www.youtube.com
Benefits Of Sterilizing Soil In The Sun
Sterilizing soil in the sun offers several benefits. Firstly, it provides protection against harmful pathogens, ensuring plant health and growth. Additionally, the sunlight sterilization process effectively eliminates weed growth, which can otherwise hinder plant development. By subjecting the soil to the sun’s rays, you can enhance the overall quality of the soil, ensuring optimal conditions for root growth and nutrient absorption.
This method is not only natural but also cost-effective since it eliminates the need for chemical treatments. Moreover, soil sterilization in the sun is a simple and accessible process that can be easily implemented in both large-scale agriculture and home gardening.
With its numerous advantages, sterilizing soil in the sun is an effective practice for achieving healthier, thriving plants.
Methods To Sterilize Soil In The Sun
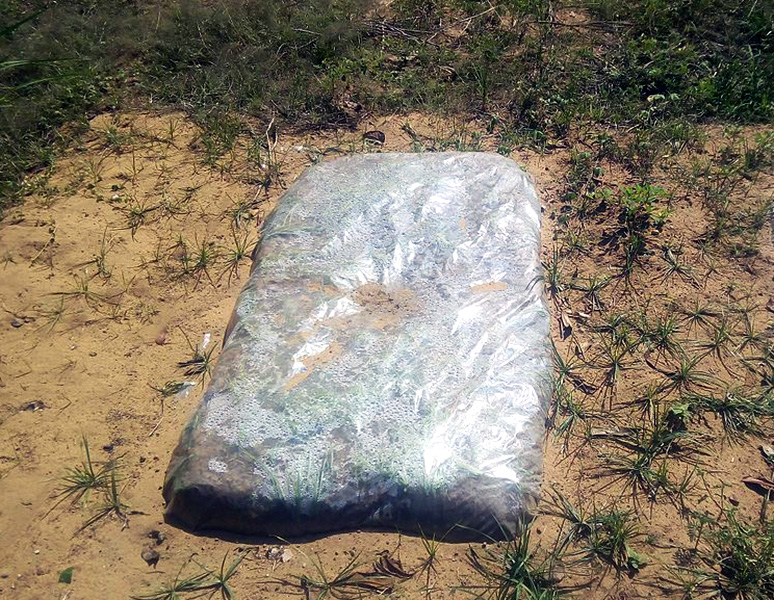
To sterilize soil in the sun using the solarization technique, start by gathering necessary supplies. Clear the area of any debris and remove any vegetation. Next, moisten the soil thoroughly with water to ensure even heat distribution. Once the soil is ready, cover it with a transparent plastic sheet, making sure to secure the edges to keep it in place.
Leave the plastic sheet in place for several weeks, allowing the sun’s heat to build up and kill off any pathogens, weed seeds, or pests in the soil. During this time, the sunlight will help raise the temperature under the plastic sheet, effectively sterilizing the soil.
After the recommended period, remove the plastic sheet and allow the soil to cool down before using it for planting.
Step-By-Step Guide For Solarization Technique
Sterilizing soil in the sun is a simple and effective technique known as solarization. The process involves a step-by-step approach to ensure optimal results. Firstly, clear the designated area by removing any debris or overgrown weeds. Next, moisten the soil to increase heat conductivity.
Then, cover the soil with a clear plastic tarp, making sure to secure the edges tightly. Allow the sun’s rays to heat the soil for a recommended period of time. During this process, monitor the temperature to ensure it reaches the desired level for sterilization.
Finally, remove the tarp and test the sterilized soil for pathogens or weed seeds. By following these steps, you can effectively sterilize soil using the sun’s natural energy, promoting healthier plant growth without the use of harmful chemicals.
Alternative Methods For Soil Sterilization
Soil sterilization is essential for maintaining healthy plant growth and preventing the spread of diseases. If you are looking for alternative methods to sterilize soil without using chemicals, heat treatment can be a viable option. One way to achieve this is by using a stove or oven.

Simply place the soil in a heat-resistant container and heat it in the oven at a temperature of at least 180°f for 30 minutes. Another method is chemical sterilization using disinfectants. Mix a suitable disinfectant solution with water and thoroughly soak the soil.
Allow it to sit for a few hours before rinsing it off. Additionally, soil steaming is another effective technique. This involves applying steam to the soil to kill any potential pathogens and weed seeds. By following these alternative methods, you can ensure that your soil is sterilized and ready for healthy plant growth without relying on chemicals or expensive equipment.
Ensuring Effective Soil Sterilization
Effective soil sterilization can be achieved by following a few crucial steps. Timing the sterilization process is key to ensure maximum effectiveness. Maintaining optimal soil temperature throughout the process is of utmost importance. Another important aspect is maximizing sunlight exposure, as sunlight helps in killing the harmful organisms present in the soil.
Lastly, it is essential to prevent recontamination of sterilized soil by taking necessary precautions. By adhering to these instructions, you can effectively sterilize soil in the sun and create a healthy environment for your plants to grow. Remember, timing, temperature, sunlight exposure, and prevention of recontamination are all vital for successful soil sterilization.
So, follow these steps diligently and enjoy the benefits of cleaner and healthier soil for your plants to thrive.
Precautions To Take During Soil Sterilization
To ensure proper soil sterilization in the sun, it is essential to take necessary precautions. First, wearing personal protective equipment (ppe) is crucial for safety. This includes gloves, goggles, and a mask to protect against harmful substances. Additionally, it is important to avoid excessive soil moisture, as it can affect the sterilization process.
Properly drying out the soil before sterilization is recommended. Furthermore, keeping children and pets away from the sterilization area is vital. The high temperatures and chemicals used during the process can pose a risk to their health. Maintaining a safe distance will prevent any potential accidents or exposure.
By following these precautions, you can ensure effective and safe soil sterilization under the sun.
Reusing Sterilized Soil
Reusing sterilized soil is a great way to save money and maintain soil health. To ensure proper storage of sterilized soil, remember to store it in a cool, dry place away from direct sunlight. It’s important to maintain the fertility of sterilized soil by adding complementary soil amendments such as organic matter, compost, or fertilizers.

These amendments will replenish nutrients and enhance the soil’s structure, promoting healthy plant growth. By following these steps, you can effectively sterilize and reuse soil, creating a sustainable gardening practice. So, the next time you’re faced with the challenge of sterilizing soil, keep these tips in mind for successful soil reuse without compromising its quality.
Frequently Asked Questions Of How To Sterilize Soil In The Sun
How Long Does It Take To Sterilize Soil In The Sun?
It typically takes about 4 to 6 weeks of consistent sun exposure to effectively sterilize soil. The duration may vary based on factors such as sunlight intensity, soil type, and the presence of pathogens or pests.
Can I Sterilize Soil By Baking It In The Sun?
While exposing soil to high temperatures in the sun can help kill some pathogens and weed seeds, it may not fully sterilize the soil. Baking the soil in the sun can be one step in the sterilization process but may not be sufficient on its own for complete sterilization.
What Are The Benefits Of Sterilizing Soil In The Sun?
Sterilizing soil in the sun helps eliminate harmful bacteria, fungi, and pests that can affect plant health. It also reduces the number of weed seeds, promoting better plant growth. Sun sterilization is a natural and environmentally friendly method to prepare soil for gardening or planting.

Are There Any Downsides To Sterilizing Soil In The Sun?
While sun sterilization is a cost-effective method, it may not completely eliminate all soil-borne pathogens and pests. Additionally, prolonged sun exposure can deplete beneficial microorganisms and organic matter in the soil. It’s essential to ensure a balance between sterilization and maintaining soil health.
Can Any Soil Be Sterilized In The Sun?
Most types of soil can be sterilized in the sun, including garden soil, potting mix, and compost. However, soils with high clay content may be more challenging to sterilize effectively, as clay can trap moisture and retain heat, making it difficult to reach the necessary temperatures for sterilization.
How To Safely Handle Sterilized Soil After Sun Exposure?
After sterilizing soil in the sun, allow it to cool before handling. Use gloves when working with the soil to prevent contamination. Consider adding organic matter and beneficial microorganisms back into the soil to restore its fertility and promote healthy plant growth.
Conclusion
So there you have it – a straightforward guide on how to sterilize soil in the sun. By following these steps, you can effectively eliminate harmful pathogens and pests, ensuring healthy and thriving plants in your garden. Remember to choose a sunny spot, loosen the soil, and lay it out in a thin layer.
Allow the sun’s heat to do its magic for at least four to six weeks, ensuring all microorganisms are destroyed. During this time, monitor the moisture levels and turn the soil regularly to ensure consistent sterilization. Once the soil is sterilized and cooled down, you can safely use it for planting.
Sterilizing soil in the sun is an eco-friendly and cost-effective method that guarantees the success of your gardening endeavors. Happy gardening!