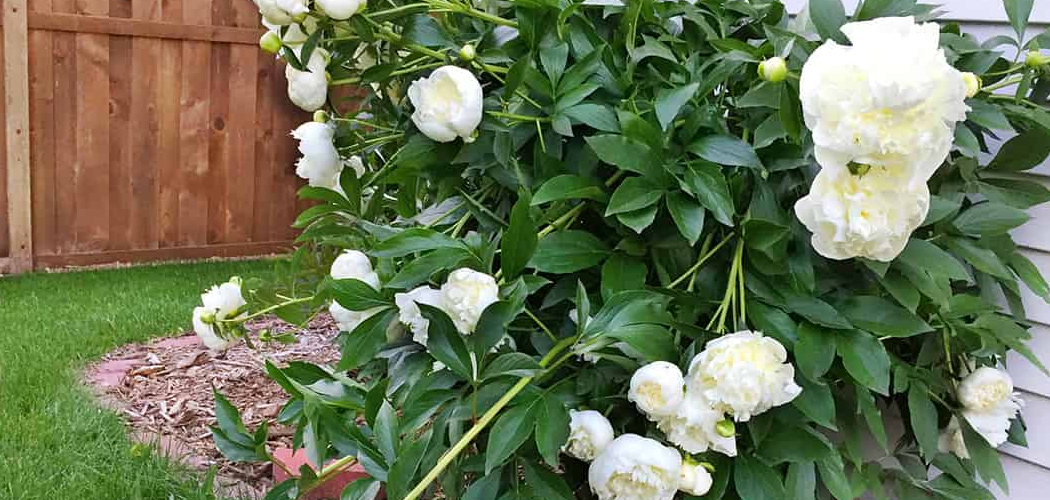
Peonies hold a cherished place in many gardens, renowned for their lush, fragrant blooms that paint spring landscapes with elegance and grace. Behind every vibrant display lies the humble peony bulb, the vital foundation for next season’s breathtaking flowers. For gardeners who want to relocate peonies, divide overgrown clumps, or protect prized bulbs from harsh winter weather, knowing how to store peony bulbs is an invaluable skill.

Proper storage preserves the health and vigor of your bulbs, ensuring a strong start come planting season and rewarding you with years of gorgeous blooms. This guide offers a detailed, step-by-step approach for anyone hoping to master the art and science of storing peony bulbs, highlighting the tools, timing, and careful handling needed to protect these garden treasures during their dormant period.
Understanding Peony Bulbs and Their Lifecycle
Peony bulbs, often referred to as tuberous roots, play a pivotal role in the development and survival of these remarkable plants. Their lifecycle is defined by alternating periods of active growth and vital dormancy. In spring and early summer, bulbs channel stored energy into shoots, leaves, and ultimately, brilliant flowers. With the arrival of autumn, however, growth slows and peonies enter dormancy, conserving resources underground to weather adverse conditions.
Dormancy and Storage Needs
Dormancy is a natural adaptation that makes proper storage of peony bulbs possible. During this time, the bulbs rest, requiring protection from rot, freezing, pests, and premature sprouting. Gardeners frequently dig up peony bulbs at this stage to divide mature clumps, transplant flowers to new locations, or simply shield bulbs from extreme weather or soil issues.
Understanding these rhythms is essential for timing storage correctly and safeguarding the potential locked inside each bulb.
Preparing for Storage: Tools and Materials
Success in storing peony bulbs begins with having suitable tools and materials on hand. Cleanliness and precision are key—dull, dirty tools can damage bulbs and spread disease.
Essential Tools for Safe Handling
A sturdy garden fork is preferred over a shovel, as it loosens soil gently and is less likely to slice through the delicate roots. Pruning shears come in handy for trimming away old stems or any damaged sections of tubers. Flexible rubber or leather gardening gloves protect your hands and help maintain a firm, safe grip.
Materials for Storage Success
For optimal storage, you’ll need breathable bags or boxes, labeling tags to keep varieties sorted, and packing media like peat moss, sawdust, or sand. Old newspapers can also work for wrapping bulbs individually. Always wash and disinfect your tools beforehand to minimize the risk of disease.
When to Dig Up Peony Bulbs
Getting your timing right when lifting peony bulbs is crucial for both bulb health and ease of handling. Digging should usually take place in late fall, preferably after the foliage has died back and the first frost has hit, but before the ground has frozen solid.
Recognizing the Right Stage
A wilting, browning, or fully collapsed top signals that all the plant’s energy has returned to the bulb, making it safe and effective to dig. Avoid digging too early, as removing bulbs while still actively growing can reduce their stamina for the next season. In milder regions or during unseasonable autumn weather, watch the foliage closely—the natural dieback is your cue.
Accounting for Regional and Seasonal Differences
Those in cold climates may need to act swiftly after the first frost, while in milder zones, waiting a few extra weeks ensures complete dormancy. Rain and soil moisture levels also influence the digging window—work when the soil is damp but not soggy, which makes extraction easier and reduces waterborne diseases.
How to Store Peony Bulbs: Digging Up Peony Bulbs Without Damage
Digging peony bulbs can be a delicate process, requiring time and care to avoid breaking or bruising the roots.
Techniques for Gentle Digging
Start by marking the perimeter about a foot from the base of the plant to avoid cutting into bulbs accidentally. Insert your garden fork and loosen the soil in a circular pattern. Once the earth yields, gently lift the clump, supporting the crown and roots as much as possible. If you discover multiple bulbs in a cluster, tease them apart slowly by hand rather than pulling forcefully.

Inspect each bulb for damage—a healthy bulb is firm, plump, and free from deep cuts or mushy spots. Handle with care, as bruising can lead to rot during storage.
Common Mistakes and How to Avoid Them
Avoid digging when the soil is saturated or frozen. Don’t rush the process; swift yanking may rip or split valuable roots. Always use a gentle, prying motion and stay patient throughout the extraction process.
Cleaning and Inspecting Peony Bulbs
After removing peony bulbs from the ground, cleaning and inspection are the next vital steps. Soil clinging to tubers harbors moisture and pathogens that can lead to rot, so a thorough cleaning is non-negotiable.
Cleaning Process
First, brush off loose earth with your hands or a soft brush. If you encounter stubborn dirt, rinse gently under cool water—but don’t soak. Allow bulbs to air-dry thoroughly on newspaper or mesh screens in a single, well-ventilated layer.
Inspection for Rot or Pests
Once clean, look for soft spots, mold, or other evidence of rot and decay. Discolored or shriveled sections should be trimmed away with sterile shears. Small wounds can be dusted with a fungicide or left exposed to air for a few hours to form a callus before storage. Removing all damaged portions now gives your healthy bulbs the best chance for safe storage.
Preparing Peony Bulbs for Storage
Thorough drying is essential in preparing bulbs for their dormant hiatus. Excess moisture is a primary cause of rot during extended storage. Space bulbs out on paper or racks in a dry, drafty room for several days, turning occasionally to promote even dehydration.
Applying Protective Treatments
Dusting bulbs with a mild fungicide gives further protection, especially if they’ll be kept in humid spaces. For an organic option, a sprinkle of cinnamon can help discourage fungal growth. Never store bulbs when still visibly damp—patience in this step extends their shelf life and increases successful replanting.

Final Pre-Storage Steps
Label each bulb or batch with plant variety and digging date to make spring planting simple. This is especially helpful when dealing with multiple peony types.
Selecting the Best Storage Method
Choosing the right storage technique depends on your available space and climate. The key is balancing moisture retention with ample airflow, as both overdrying and excessive moisture harm the bulbs.
Storage in Peat Moss, Sawdust, or Sand
Lightly bury the bulbs in slightly damp peat moss, sawdust, or sand inside a breathable container such as a cardboard box or mesh bag. This packing medium keeps bulbs moist enough to prevent shriveling, but not so wet as to cause rotting.
Ensuring Proper Airflow
Cover containers loosely and provide ventilation holes. Avoid plastic bags or sealed containers, as these trap moisture and quickly foster rot. Lay bulbs in a single layer where possible, and don’t pack them too tightly together.
Keeping Track of Varieties
Attach clear tags or notes so you can identify varieties or sequences, preventing confusion when the time to plant arrives.
Creating Optimal Storage Conditions
For long-term viability, peony bulbs need a cool, dry, and dark environment throughout winter.
The Ideal Storage Spot

Temperatures should remain between 35°F and 45°F (1.5°C to 7°C). Basements, unheated garages, enclosed porches, or a refrigerator’s vegetable drawer all work well if space and conditions permit. Humidity must be moderate—too dry and bulbs desiccate, too wet and they’ll rot. The area should also be pest-free and away from direct sunlight.
Monitoring and Adjusting Conditions
Place a thermometer nearby to monitor the storage temperature, adjusting bulbs’ locations if wide fluctuations occur. Avoid areas prone to rodent or insect attacks, as these pests can tear through bulbs and reduce viability.
Creative Storage Solutions
In limited spaces, small boxes or mesh bags can be hung from shelves or hooks. For especially humid climates, use desiccants like silica gel packets in boxes, but check regularly to prevent excessive drying.
Checking and Maintaining Bulbs During Storage
Inspection doesn’t end at storage—regular monitoring is required to address issues as they arise.
What to Look For
Open containers every few weeks and examine bulbs for softening, shrinkage, or discoloration. Remove any bulb that shows clear signs of decay to prevent the spread. If the packing medium feels wet, allow it and the bulbs to dry out before resealing. Should bulbs appear wrinkled or too dry, gently mist the medium with water—just enough to provide humidity, not dampness.
Quick Response Prevents Loss
Mid-storage intervention is often the difference between vibrant blooms and a failed planting. Don’t wait until spring to discover setbacks.
Preparing Bulbs for Planting After Storage
As winter wanes and the ground thaws, it’s time to ready your peony bulbs for outdoor replanting. Begin acclimating them by removing them from storage, dusting off the packing medium, and inspecting once again for spoiling or damage.
Acclimation Process

Let bulbs sit at room temperature for a day or two before planting. If necessary, trim the ends of shriveled roots to encourage new growth. Treat any cuts with fungicide or allow them to naturally callus.
Steps to Ensure a Strong Start
Before planting, soak very dry bulbs in room-temperature water for an hour to rehydrate (but skip this if bulbs are still plump). Prepare your planting site with well-drained, fertile soil and place bulbs at the correct depth. Water thoroughly after planting to settle the soil around the roots and support initial growth.
Conclusion
Knowing how to store peony bulbs properly unlocks healthier, more vigorous plants and breathtaking garden displays year after year. By understanding the plant’s lifecycle, using clean tools, following precise digging and preparation steps, providing excellent storage conditions, and regularly checking on your bulbs, you set the stage for abundant blooms and long-term garden satisfaction.
Good storage isn’t just about preservation—it’s about anticipation, setting every bulb up for future growth and success. Embrace these techniques as part of your gardening routine, and let the timeless beauty of peonies fill your landscape season after season.