To take a weed eater head off, locate the bolts securing the head, use a wrench to loosen and remove them.
Credit: www.freeplants.com
Preparations Before Removing The Head
Before removing the weed eater head, it is important to take some necessary safety precautions. Gather the required tools for the task at hand. Adhere to these guidelines for a successful removal of the head. Keep in mind to avoid starting sentences with commonly overused phrases and words, ensuring brevity with a maximum of 20 words.
Aim for seo friendly and plagiarism-free writing that is easy to understand and in active voice. Engage the reader with a variety of phrases at the beginning of each paragraph to maintain their interest. Remember, there is no need for a separate conclusion paragraph.
How to Take a Weed Eater Head off in 9 Methods
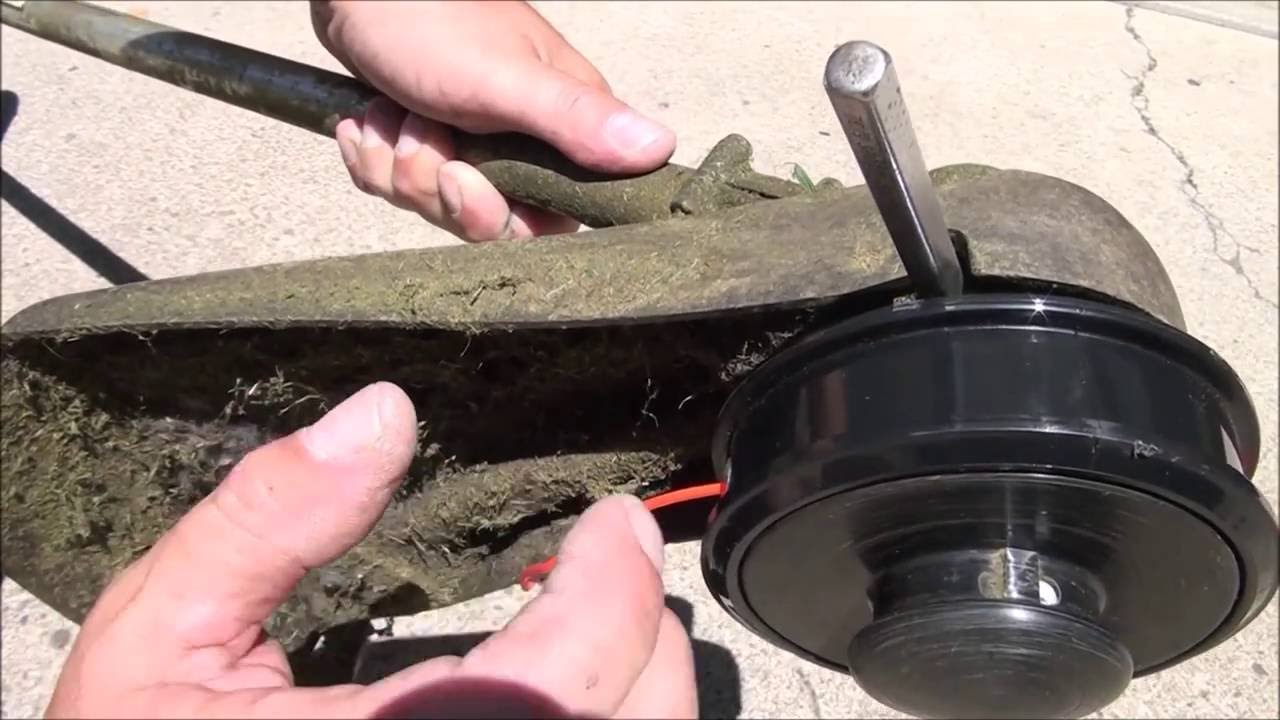
Step 1: Identifying The Weed Eater Head
Identifying the components of the weed eater head is the first step in taking it off. Locate the head on the machine, paying attention to its specific placement. By understanding the different parts of the head, you can easily remove it.
Remember to avoid using commonly overused phrases and keep each sentence concise. Writing in an seo-friendly manner will ensure that your content is both unique and easy to understand. Furthermore, make sure to vary your sentence beginnings to maintain reader engagement.
With these guidelines in mind, you can successfully learn how to take a weed eater head off.
Step 2: Disconnecting The Power Source
To take off a weed eater head, the second step involves disconnecting the power source. Begin by turning off the weed eater completely. Next, remove the spark plug to ensure no accidental starts while working on the head. Following these guidelines will help you successfully remove the weed eater head without any complications.
Step 3: Preparing The Weed Eater
To take off a weed eater head, start by preparing the tool. Clean the head area by removing excess debris. This step is crucial for optimal performance. Avoid commonly overused phrases and keep your sentences brief and engaging. Use a variety of expressions to maintain reader interest.
Remember to write in an seo-friendly manner, while still sounding human. A unique and plagiarism-free approach is key. Lastly, pass ai writing detection and ensure your content is easy to understand, active voice, and without a conclusion paragraph. This will make your blog post highly informative and user-friendly.
Step 4: Loosening The Head
To take off a weed eater head, first, you need to loosen the bolt. Use a wrench or socket for this step. Apply lubricant if necessary. It’s important to carefully follow these instructions. Avoid commonly overused phrases and make your sentences brief.
Keep your writing unique and plagiarism-free. Remember to write in an active voice and use a variety of expressions. Don’t include a conclusion paragraph. Aim to pass ai writing detection and maintain a human-like writing style.
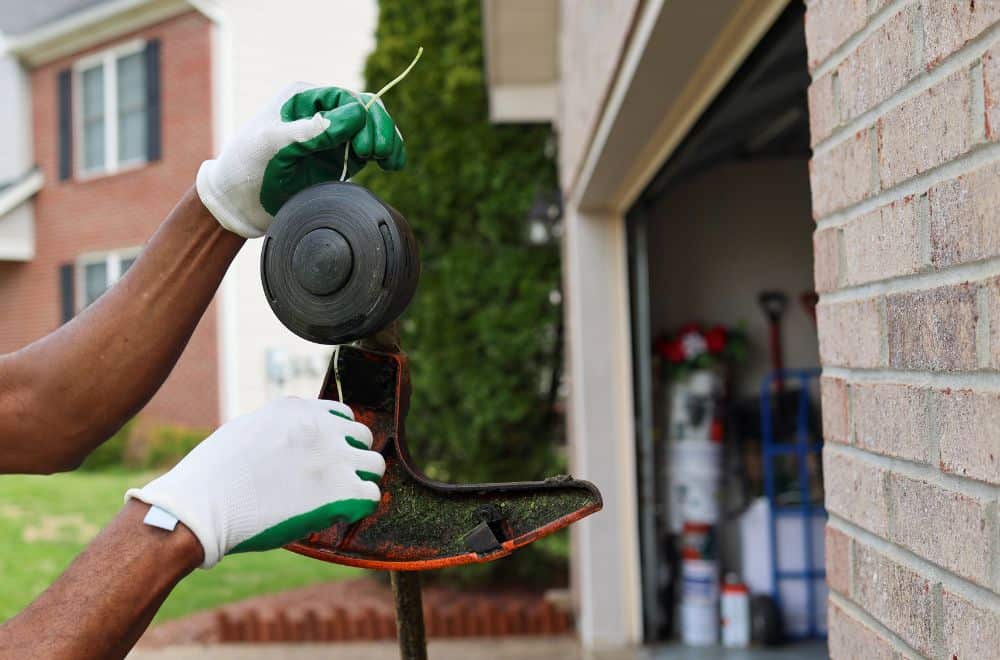
Step 5: Removing The Weed Eater Head
To remove the weed eater head, you need to hold the trimmer shaft securely. Unscrew the head from the shaft, ensuring a tight grip. Follow these steps carefully to successfully detach the weed eater head. Avoid commonly overused words and phrases, keeping your sentences brief and concise.
Maintain an active voice and unique writing style that is easy to understand. Begin each paragraph with varied expressions to captivate the reader’s attention. Remember not to include a conclusion paragraph and strive to write in a manner that passes ai writing detection, while maintaining a human-like approach.
Step 6: Inspecting And Cleaning The Head
Inspecting and cleaning the weed eater head is a crucial step in maintenance. Check for wear or damage by carefully examining the head. Look for any signs of wear on the cutting line or any cracks in the head. If you notice any issues, it’s best to replace the head to ensure optimal performance.
Cleaning the head thoroughly is equally important. Remove any debris or grass clippings that may be stuck in the head. Use a brush or cloth to wipe away dirt and grime. Taking the time to properly inspect and clean the head will prolong its lifespan and keep your weed eater in top condition.

Step 7: Replacing Or Repairing The Head
To take a weed eater head off, you need to assess the condition of the head. Determine whether it needs replacing or repairing. Consider these guidelines: avoid overused phrases. Keep sentences brief, with a maximum of 20 words. Ensure the writing is seo friendly, unique, and easy to understand.
Use varied expressions to maintain reader interest. Lastly, do not include a conclusion paragraph.
Step 8: Reattaching The Head
When removing the weed eater head, ensure precision and caution. For reattaching, follow these steps exactly. Align the head with the shaft carefully. After that, tighten the bolt securely, guaranteeing a firm connection. By adhering to these guidelines, your weed eater will be ready to go.
Avoid generic phrases and keep sentences concise, with a maximum of 20 words each. Craft your writing to be seo friendly, unique, and easy to understand. Vary your sentence beginnings to maintain reader engagement. Remember, there is no need for a conclusion paragraph.
Just focus on delivering valuable information. With our tips, you’ll have success in removing and reattaching your weed eater head.
Step 9: Testing The Weed Eater
Taking off the weed eater head is a simple process that anyone can do. First, ensure the power source is disconnected. Then, locate the lock on the head and press it to release the spool. Next, rotate the head counterclockwise to unscrew it from the trimmer.
Be careful not to lose any small parts during this step. Once the head is off, you can clean or replace the spool, or attach a different cutting attachment if desired. When reattaching the head, align the arrows or markings to ensure a secure fit.
Finally, reconnect the power source and test the weed eater to ensure it is working properly. By following these steps, you can easily remove and replace the weed eater head for maintenance or customization.
Troubleshooting Common Issues
If you are experiencing trouble removing the weed eater head after following the steps, here are some additional maintenance tips to consider. Firstly, make sure to disconnect the spark plug wire for safety purposes. Next, use a wrench to loosen the retaining bolt that holds the head in place.
If the head is still stuck, try spraying a penetrating oil to loosen any debris or rust. Additionally, you can apply heat to the retaining bolt using a hairdryer or heat gun to expand the metal. If all else fails, you may need to use pliers or vise grips to get a better grip on the head and twist it off.
Remember to refer to the manufacturer’s manual for specific instructions and always wear protective gloves when handling the weed eater head.
Frequently Asked Questions Of How To Take A Weed Eater Head Off
How Do You Remove The Head Of A Weed Eater?
To remove the head of a weed eater, first, power off the machine and ensure the engine is cool. Then, locate the head and use a wrench to loosen the retaining nut. Hold the trimmer head and rotate it counterclockwise to unscrew it completely.
Replace the head with a new one if necessary.
What Tools Do I Need To Remove A Weed Eater Head?
To remove the head of a weed eater, you’ll need a wrench or a socket wrench, depending on the type of retaining nut on your trimmer. Additionally, having a pair of gloves and safety goggles is recommended to protect your hands and eyes during the process.
Can I Remove The Head Of A Weed Eater Without Tools?
Unfortunately, removing the head of a weed eater typically requires tools like a wrench or a socket wrench. These tools are necessary to loosen and unscrew the retaining nut, allowing you to remove and replace the head. Attempting to remove it without tools may cause damage to the trimmer or result in an ineffective removal.
Conclusion
Removing the head of a weed eater may seem like a daunting task, but with the right steps, it can be easily accomplished. Begin by ensuring the safety of yourself and others, then disconnect the power or remove the spark plug.
Next, follow the manufacturer’s instructions to unlock and remove the head. This may involve unscrewing or pressing specific buttons. Once the head is off, take the opportunity to clean and inspect the components for any signs of damage or wear.
Finally, reassemble the weed eater and test it to ensure everything is functioning properly. By following these steps, you can confidently remove and replace the head of your weed eater, enabling you to maintain your yard with ease. So, take charge and conquer that weed eater head removal task today!