Daylilies are a popular and versatile addition to any garden, known for their vibrant blooms and ease of maintenance. With their ability to thrive in various climates and soil types, these perennials are a favorite among both novice and experienced gardeners. Proper care is essential to ensure they reach their full potential, providing stunning flowers year after year. This guide will outline the key steps of how to take care of daylily plants.

What Are Daylilies?
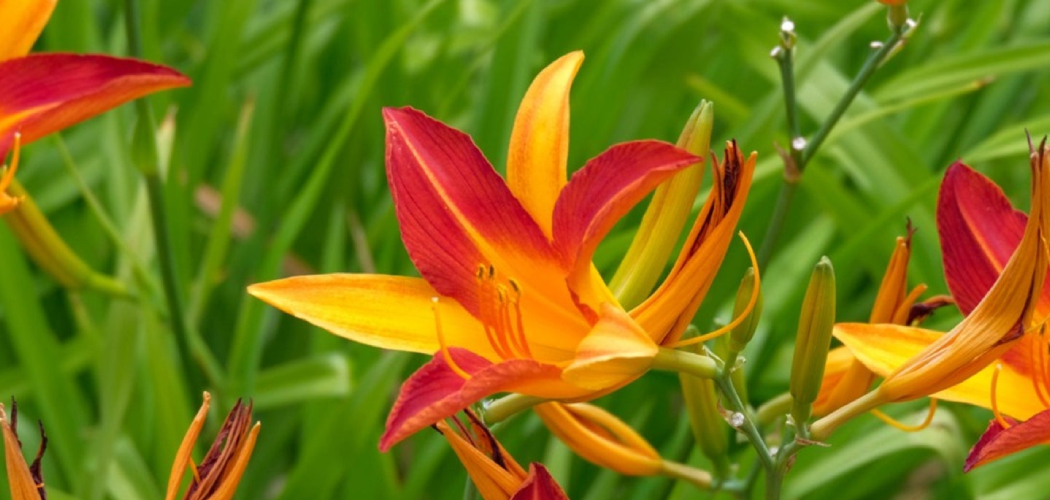
Daylilies (Hemerocallis) are hardy perennial plants prized for their striking, trumpet-shaped flowers that come in a wide variety of colors and patterns. Despite their name, daylily flowers typically last for just one day, with new blooms continuously appearing during their flowering season.
Native to Asia, these plants have been cultivated for centuries and are now widely appreciated worldwide for their adaptability and low-maintenance care. Daylilies thrive in both sunny and partially shaded areas, and their robust nature makes them resistant to drought, pests, and diseases, making them an excellent choice for almost any garden.
Best Planting Conditions for Daylilies
Daylilies are remarkably versatile plants that can adapt to a variety of environments, but certain conditions will help them thrive and produce the most vibrant blooms. Ideally, they should be planted in well-draining soil with a slightly acidic to neutral pH, ranging between 6.0 and 7.0. These plants perform best with at least six hours of direct sunlight each day, although they can tolerate partial shade, particularly in hotter climates.
When planting, ensure that the crown of the daylily, where the roots and leaves meet, is no more than an inch below the soil surface. Water the plants regularly during their first growing season to establish a strong root system, but once established, daylilies are drought-tolerant and require less water. Adding a layer of mulch around the base can help retain soil moisture and suppress weeds, ensuring optimal growing conditions.
10 Methods How to Take Care of Daylily Plants
1. Choose the Right Location
The success of daylily plants begins with selecting the right spot in your garden. These sun-loving perennials thrive in full sunlight, ideally receiving six or more hours of direct light per day. Morning sun followed by partial afternoon shade can also work well, especially in regions with intense summer heat. A location with good air circulation and open space also helps prevent disease.

Placing daylilies in areas that receive plenty of light not only encourages blooming but also enhances the richness of flower color and stem strength.
2. Plant in Well-Drained Soil
Daylilies are forgiving, but they perform best in fertile, well-drained soil that retains moisture without becoming soggy. Sandy loam is ideal, but if your soil is heavy clay or too sandy, amend it with compost or aged manure to improve drainage and structure. Avoid low spots where water may pool, as this can cause root rot. Before planting, loosen the soil to a depth of 12 inches, mix in organic matter, and rake it smooth.
A slightly acidic to neutral pH (around 6.0 to 7.0) supports optimal nutrient absorption.
3. Water Regularly but Wisely
Newly planted daylilies need consistent moisture to establish roots, so water them deeply two to three times a week for the first month. Once established, they are relatively drought-tolerant but will bloom best with weekly deep watering, especially during hot, dry spells. Water early in the day at the base of the plant to reduce evaporation and avoid wetting the foliage, which can promote fungal diseases.
A 2–3 inch layer of mulch can help retain moisture, suppress weeds, and keep the soil temperature stable.
4. Fertilize for Health and Bloom
While daylilies are not heavy feeders, a balanced diet encourages lush foliage and an abundance of flowers. Apply a slow-release fertilizer in early spring when new growth emerges. A balanced formula like 10-10-10 or one slightly higher in phosphorus (the middle number) can enhance bloom production.

Avoid over-fertilizing, as this can lead to excessive leafy growth with few flowers. You can supplement with compost tea or fish emulsion during the growing season, but taper off feeding by late summer to prepare the plant for dormancy.
5. Deadhead Spent Blooms
To maintain a tidy appearance and promote continuous blooming, remove spent flowers promptly—a process known as deadheading. While each daylily bloom lasts only a day, the plant often produces multiple buds on each stalk. Removing the wilted flowers prevents energy from being diverted into seed production and instead supports the development of new buds. You can also trim the flower stalks (scapes) once all blooms on them have faded, encouraging the plant to focus its energy on root and foliage health.
6. Divide Clumps Periodically
Daylilies grow in clumps and, over time, can become overcrowded, leading to fewer blooms. To rejuvenate the plants and ensure continued vigor, divide them every 3 to 5 years. The best time to divide is in early spring or immediately after flowering in late summer to early fall. Carefully dig up the clump, shake off excess soil, and gently separate the fans (clusters of leaves) with healthy roots attached. Replant them at the same depth as before, water well, and mulch to reduce transplant shock.
7. Mulch to Maintain Moisture and Reduce Weeds

Mulching around daylily plants provides multiple benefits: it helps retain soil moisture, regulates soil temperature, and minimizes weed growth that competes for nutrients. Use organic mulches like shredded bark, pine needles, or straw, and apply a 2–3 inch layer around the base of the plant, keeping it a few inches away from the crown to prevent rot. Mulching also reduces the need for frequent watering and adds organic matter to the soil as it breaks down over time.
8. Watch for Pests and Diseases
Although daylilies are relatively pest-resistant, they can occasionally fall victim to aphids, thrips, spider mites, or daylily rust—a fungal disease that causes orange streaks on leaves. Check plants regularly for signs of damage, such as stippling on leaves or distorted buds. Use insecticidal soap or neem oil to treat infestations, and remove any infected foliage to stop the spread of disease. Maintaining good air circulation and keeping leaves dry during watering helps minimize the risk of fungal problems.
9. Support Bloom Cycles with Proper Pruning
Daylilies benefit from seasonal pruning to keep them looking their best. In early spring, remove dead foliage from the previous year to allow new growth to emerge cleanly. During the growing season, deadhead spent blooms and remove yellowing leaves to maintain the plant’s appearance and health. In late fall, after the first frost, you can cut the foliage back to about 3–4 inches above ground to tidy up the garden and reduce overwintering pests, especially in colder regions.
10. Prepare for Winter and Protect in Harsh Climates
In zones where winters are mild, daylilies can remain evergreen or semi-evergreen, requiring little extra care. In colder regions, however, they may go fully dormant. To prepare for winter, cut back foliage after it has naturally died down and apply a thick layer of mulch (such as straw or shredded leaves) to insulate the roots. Potted daylilies should be moved to sheltered spots or wrapped in burlap for protection.
Come spring, gradually remove mulch as temperatures rise, allowing new shoots to push through easily.
Common Mistakes to Avoid
When caring for daylilies, there are a few common mistakes gardeners should steer clear of to ensure healthy growth and vibrant blooms. One mistake is overwatering, which can lead to root rot and other water-related diseases. While daylilies are hardy, they prefer well-drained soil and do not thrive in soggy conditions.

Another misstep is planting them too deeply; the crown of the plant should remain just at or slightly above the soil line to prevent fungal issues. Neglecting to deadhead spent blooms is another error, as it can redirect energy away from producing new flowers. Finally, failing to divide crowded clumps every 3 to 5 years can reduce flowering and hinder overall plant health. Staying mindful of these pitfalls will help your daylilies flourish year after year.
Safety Considerations
When working with daylilies, it’s important to keep a few safety considerations in mind. Always wear protective gloves when handling plants to prevent skin irritation, as some individuals may have sensitivities to plant sap. Additionally, be cautious when using tools for planting, dividing, or weeding to avoid accidental cuts or injuries.
If you have pets, ensure that daylilies are not ingested, as they can be toxic to cats and potentially harmful to other animals. Proper tool maintenance, including sharpening and cleaning, can also help prevent accidents and promote safe gardening practices. Prioritizing safety will ensure a more enjoyable and hazard-free gardening experience.
Conclusion
Daylilies are remarkably resilient and low-maintenance, making them a favorite among gardeners of all skill levels. With their rainbow of color options and long blooming periods, they provide vibrant beauty with relatively little effort.
By following these ten detailed care methods—from choosing the right location and watering wisely to fertilizing, dividing, and pruning—you can ensure that your daylilies remain healthy, vibrant, and a true showpiece in your landscape. Now that you know how to take care of daylily plants, try it yourself today and feel good about completing such a big DIY job!