To transplant Ashwagandha, dig a hole twice the size of the root ball and carefully remove the plant from its current location without damaging the roots. Gently place the plant in the new hole, backfill with soil, and water thoroughly.
By following these simple steps, you can successfully transplant your Ashwagandha plant to a new location. Ashwagandha, also known as Withania somnifera, is a popular herb in Ayurvedic medicine known for its numerous health benefits. Transplanting Ashwagandha allows you to relocate the plant to a more suitable spot in your garden or to a larger pot if it has outgrown its current container.
It is important to ensure a smooth and careful transition to minimize stress on the plant and promote healthy growth. We will provide you with a step-by-step guide on how to transplant Ashwagandha effectively.

Credit: ravensongherbals.com
Choosing The Right Time And Location For Transplanting Ashwagandha
Transplanting Ashwagandha plants can be a beneficial technique for ensuring their optimal growth and development. When it comes to selecting the right time for transplanting Ashwagandha, it is essential to consider the ideal period that would promote successful transplantation. Typically, the best time for transplanting Ashwagandha is during the cooler months of spring or fall, when the weather is mild and the plant is semi-dormant. This allows the plant to settle in and establish roots without the stress of extreme temperatures.
Additionally, choosing an appropriate location for transplanting Ashwagandha greatly influences its growth and survival. Factors to consider include the amount of sunlight the plant will receive, as Ashwagandha thrives in full sun or partial shade. The soil should be well-draining, loamy, and rich in organic matter. Providing adequate space between plants is crucial for proper airflow and preventing the spread of diseases.
| Ideal time for transplanting Ashwagandha: | Spring or fall |
|---|---|
| Factors to consider when selecting a location: |
|
How to Transplant Ashwagandha: Step by Step Guide
Preparing Ashwagandha For Transplantation
To successfully transplant your Ashwagandha plant, it is essential to assess its health condition. Inspect the plant for any signs of diseases, pests, or nutrient deficiencies. Ensure that the plant has a strong and sturdy stem with vibrant leaves.
| Pruning and trimming requirements: |
| Regularly prune and trim dead or damaged branches to promote healthier growth. Remove any yellow or discolored leaves to prevent the spread of diseases. It is important to maintain the desired size and shape of the plant through careful pruning. |
Before transplanting, prepare the soil to provide the best growing conditions for your Ashwagandha. Ensure that the soil is well-draining by adding organic matter such as compost or aged manure. Clear any weeds or debris from the area to reduce competition for resources. Consider adjusting the pH of the soil to the optimal range of 6.0-7.5 for Ashwagandha cultivation. Providing a fertile and suitable soil environment will enhance the success of your transplanted Ashwagandha plant.
Transplanting Ashwagandha
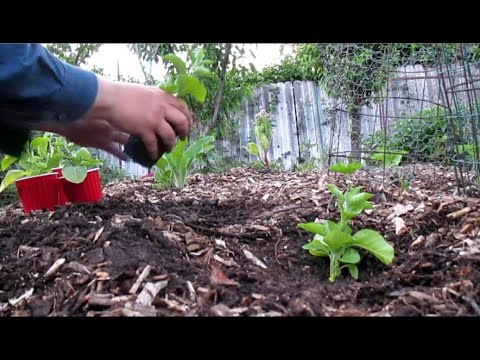
Transplanting Ashwagandha requires following step-by-step instructions to ensure the successful relocation of the plant. Start by digging a hole that is suitable in size for the plant, considering its root system and potential growth. Carefully remove the Ashwagandha plant from its current location, ensuring you minimize any damage to the roots. Next, transfer the plant to its new location, placing it gently into the prepared hole. Backfill the hole with soil, making sure to firmly pack it around the plant to provide stability.
Properly firming the soil helps avoid air pockets that can impact root development. After transplanting, it is essential to water the Ashwagandha thoroughly. Ensure the plant receives adequate moisture during the establishment period. Additionally, consider fertilizing the transplanted Ashwagandha to promote healthy growth. By following these steps, you can successfully transplant your Ashwagandha plant.
Caring For Transplanted Ashwagandha
When transplanting Ashwagandha, it is crucial to provide adequate water and sunlight. The plant requires regular watering, especially during the initial stages of transplantation to help establish its root system. Adequate sunlight is also essential, as Ashwagandha is a sun-loving plant.
Furthermore, protecting the transplanted Ashwagandha from extreme weather conditions is important for its survival. Strong winds and frost can damage or even kill the plant, so it is recommended to provide some sort of windbreak and cover the plant during colder months.
Pests and diseases can pose a threat to the health of transplanted Ashwagandha. Regular monitoring and proactive management are necessary to keep these issues under control. Using organic pest control methods and promptly addressing any signs of disease can help maintain the plant’s overall health.
Finally, pruning and regular maintenance practices are crucial for the healthy growth of transplanted Ashwagandha. Removing dead or damaged leaves, promoting air circulation, and shaping the plant as desired can help encourage proper development.
In conclusion, caring for transplanted Ashwagandha involves providing adequate water and sunlight, protecting the plant from extreme weather conditions, monitoring and managing pests and diseases, as well as implementing proper pruning and maintenance practices.
Ensuring Successful Transplantation: Tips And Tricks
Transplanting ashwagandha successfully requires a few important considerations. Acclimatization plays a crucial role in ensuring the plant’s survival after transplantation. Gradually exposing the plant to its new environment helps it adjust and thrive. Another important aspect is to use mulch, which helps retain moisture in the soil while preventing weed growth that can compete with the plant for nutrients. Organic fertilizers can supplement the nutrient needs of ashwagandha, promoting healthy growth.
However, it’s essential to observe the plant closely and adjust care practices accordingly. Monitoring the plant’s response to water, sunlight, and nutrients allows for necessary modifications to ensure its well-being. By carefully following these tips and tricks, you can increase the chances of a successful ashwagandha transplant.
Troubleshooting Transplantation Issues
Transplanting Ashwagandha can sometimes be challenging, but by understanding and addressing common issues, you can ensure the success of the transplantation process.
One common issue during transplantation is transplant shock. This occurs when the plant experiences stress due to the transplanting process. To address transplant shock, make sure to carefully handle the plant’s roots during transplanting and provide it with adequate water and sunlight afterwards.
Another problem you might encounter is root damage during transplantation. To minimize this, prepare the new planting hole in advance so that the roots spend less time exposed to air. Additionally, carefully remove the plant from its original container to avoid damaging the roots.
| Common Mistakes to Avoid |
|---|
| Avoid transplanting Ashwagandha during extreme weather conditions such as extreme heat or cold. |
| Don’t overwater the plant after transplantation, as it can cause root rot. Water it sufficiently but not excessively. |
| Avoid placing the plant in direct sunlight immediately after transplantation, as it can further stress the plant. Gradually introduce it to full sunlight. |
| Don’t neglect regular watering and fertilization once the plant has recovered from transplant shock. This will promote healthy growth. |
By being aware of these issues and following the necessary precautions, you can successfully transplant Ashwagandha with minimal stress to the plant.
Harvesting And Utilizing Transplanted Ashwagandha
Timing is crucial when it comes to harvesting Ashwagandha roots. It is best to wait for at least six to eight months after transplanting before digging up the entire plant. When the leaves of the Ashwagandha start turning yellow and the berries become orange or red, it is a sign that the plant is ready for harvesting.
Drying the roots properly is essential for preserving their medicinal properties. After harvesting, wash the roots to remove any dirt and cut them into smaller pieces for faster drying. Place the Ashwagandha roots in a well-ventilated area away from direct sunlight. Allow them to dry for a couple of weeks until they become brittle.
Once dried, store the Ashwagandha roots in an airtight container or a glass jar. Keep them in a cool, dry place to maintain their potency. The dried roots can be ground into a powder and used in various forms such as capsules, teas, or added to smoothies and recipes.
Frequently Asked Questions For How To Transplant Ashwagandha
Can You Grow Ashwagandha From Cuttings?
Yes, you can grow ashwagandha from cuttings. It is a simple process where you cut a healthy stem, remove the leaves from the bottom, and plant it in well-drained soil. Keep it moist and in a warm place for it to root and grow into a new plant.
What Are The Propagation Techniques Of Ashwagandha?
Ashwagandha can be propagated through various techniques, such as seeds, division of root clumps, and stem cuttings. Seeds are sown in a well-drained potting mix, while root clump divisions should be done during the dormant period. Stem cuttings are taken from mature plants, and rooting hormone is used for successful propagation.
Does Ashwagandha Come Back Every Year?
Yes, ashwagandha is a perennial plant, meaning it comes back every year.
How Do You Extract Ashwagandha From A Plant?
Ashwagandha is extracted by grinding its roots and leaves into a fine powder. This powder is then mixed with a solvent, such as water or alcohol. The mixture is filtered to remove impurities, and the liquid is evaporated to obtain the concentrated extract.
Conclusion
To ensure successful ashwagandha transplantation, follow the steps outlined in this guide. By carefully preparing the new location, choosing the right time to transplant, and providing optimal care, you can ensure the plant’s smooth transition. Remember to water them adequately and monitor their progress.
With proper attention, your ashwagandha plants will thrive in their new home, bringing you their medicinal benefits in abundance. Happy gardening!