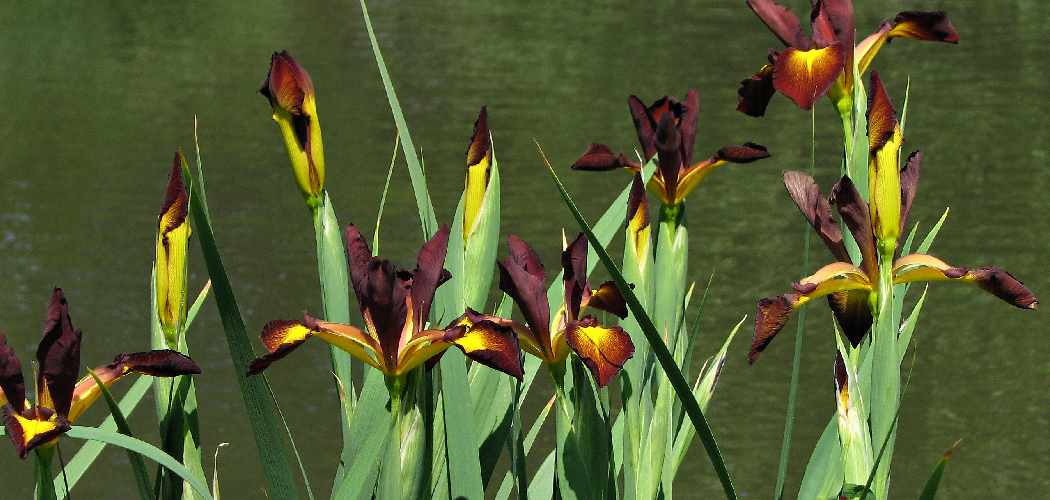
Transplanting iris plants is a straightforward gardening task that helps rejuvenate your plants and encourages healthy growth. Over time, iris rhizomes can become overcrowded, which may affect their ability to produce vibrant blooms. This guide explores the key aspects of how to transplant iris plants. By learning the proper techniques for transplanting, you can ensure your irises thrive year after year, adding beauty and color to your garden.

Best Time of Year to Transplant Iris
The best time to transplant iris plants is during the late summer to early fall, typically 6 to 8 weeks after the blooming period. During this time, the plants have finished flowering and have entered a dormant phase, making it less stressful for them to be moved and replanted.
Cooler temperatures and adequate rainfall in the fall provide optimal conditions for the rhizomes to establish their roots in their new location before winter. Avoid transplanting irises in the spring or during peak growing periods, as this can disrupt their growth and reduce flowering potential. Planning your transplanting efforts around this window ensures healthier plants and more abundant blooms in the following growing season.
Signs Your Iris Plants Need Transplanting
Recognizing when your iris plants need transplanting is essential to maintaining their health and vibrancy. One key sign is overcrowding, where the rhizomes start to clump together tightly, leaving little room for new growth. This often results in fewer blooms and smaller flowers. Another indicator is when the center of the plant begins to die out, leaving a bare, empty spot surrounded by healthier growth. Additionally, if your irises are struggling with poor drainage or showing signs of disease, such as soft, rotting rhizomes, it may be time to relocate them to a more suitable area. Regularly monitoring your iris plants for these symptoms will help you determine when they need to be transplanted for optimal health and flourishing blooms.
10 Methods How to Transplant Iris Plants
1. Choosing the Right Time for Transplanting
The best time to transplant irises is late summer to early fall, typically six to eight weeks after they finish blooming. This period allows the plants to establish strong roots before winter dormancy, reducing transplant shock. If you transplant irises too late in the fall, they may not have enough time to root properly, making them more susceptible to frost damage. In warmer climates, you may have more flexibility, but always avoid the peak of summer when high temperatures can stress newly transplanted plants.

2. Preparing the New Planting Site
Before digging up your iris plants, prepare their new home by choosing a location with well-draining soil and full sun exposure. Irises thrive in areas with at least six hours of direct sunlight daily. If the soil is heavy or clay-like, amend it with compost, sand, or organic matter to improve drainage. Poor drainage can cause rhizome rot, which is a common issue with irises. Loosen the soil to a depth of at least 12 inches and remove any weeds or debris to create the ideal environment for healthy growth.
3. Digging Up the Iris Clumps Carefully
Use a garden fork or shovel to carefully dig around the iris clump, keeping a distance of at least 6 inches from the base to avoid damaging the rhizomes. Gently lift the entire clump from the ground, shaking off excess soil to expose the rhizomes. If the roots are deeply entangled, use your hands or a hose to rinse away soil, making it easier to separate the individual sections. Handle the rhizomes with care to prevent unnecessary breakage or bruising.
4. Dividing the Rhizomes for Healthier Growth
Once the iris clump is removed, inspect the rhizomes for signs of overcrowding, disease, or rot. Healthy rhizomes should be firm and have visible roots and leaf fans. Use a sharp, sterilized knife to divide the clump into smaller sections, ensuring that each division has at least one healthy fan of leaves and a firm rhizome. Remove any soft, mushy, or dried-out parts to prevent disease from spreading to the newly transplanted sections. Allow the cut edges to air dry for a few hours before replanting to minimize the risk of fungal infections.

5. Trimming the Leaves for Reduced Stress
Before replanting, trim the iris leaves to about 6 inches in length. Cutting the leaves reduces water loss and transplant shock, helping the plant focus its energy on root establishment rather than maintaining long foliage. Use clean, sharp garden shears to make even cuts, removing any damaged or diseased leaves in the process. This practice also prevents the leaves from bending over and disturbing the newly planted rhizomes.
6. Positioning the Rhizomes Correctly in the Soil
Irises require shallow planting for healthy growth. Unlike bulbs that need to be buried deep, iris rhizomes should be partially exposed to sunlight. Dig a shallow trench and create a small mound of soil in the center. Position the rhizome on top of the mound with its roots spread outward, and cover them lightly with soil. The top of the rhizome should remain slightly above the ground level to prevent rotting. Space each plant about 12-18 inches apart to allow for proper airflow and future growth.
7. Watering Properly After Transplanting
Once planted, water the irises thoroughly to help settle the soil around the roots and eliminate air pockets. For the first few weeks, keep the soil slightly moist but not soggy. Overwatering can lead to root rot, especially if the soil does not drain well. As the irises establish themselves, gradually reduce watering frequency. In most climates, irises are drought-tolerant once established and require minimal watering beyond natural rainfall.
8. Adding Mulch for Moisture Retention and Weed Control

A light layer of mulch around the newly transplanted irises can help retain moisture, regulate soil temperature, and suppress weeds. However, avoid placing mulch directly on top of the rhizomes, as this can lead to excessive moisture retention and increase the risk of rot. Instead, spread a thin layer of mulch around the base of the plants, leaving the top of the rhizomes exposed. Organic mulch such as pine needles, straw, or shredded bark works well for irises.
9. Monitoring for Pests and Diseases
After transplanting, keep an eye on your irises for signs of pests or disease. Iris borers, aphids, and fungal infections can quickly damage new plantings. Check the leaves and rhizomes for holes, discoloration, or soft spots. If you notice any problems, treat them promptly with organic insecticides, neem oil, or a fungicide if necessary. Good air circulation, proper spacing, and avoiding excessive moisture will help prevent many common iris problems.
10. Providing Ongoing Care for Long-Term Success
Successfully transplanted irises require ongoing care to thrive in their new location. In the first season after transplanting, avoid fertilizing too heavily, as excessive nitrogen can promote leafy growth at the expense of flowers. Instead, apply a balanced, low-nitrogen fertilizer in early spring to encourage blooming. Keep the planting area weed-free to prevent competition for nutrients, and divide your irises every 3-4 years to prevent overcrowding. With proper care, your irises will reward you with vibrant, healthy blooms for years to come.

Maintenance and Upkeep
Maintaining irises after they are established is relatively simple, but it requires consistent care to ensure long-term health and vibrant blooms. Regularly inspect your plants for signs of pests, diseases, or stress and take corrective action when necessary. Deadheading spent blooms not only improves the plant’s appearance but also encourages the rhizome to focus energy on nourishment and growth rather than seed production. Remove yellowing or dead leaves to prevent the buildup of debris that could harbor pests or fungi.
Water your irises sparingly once they are established, as they are drought-tolerant and prefer slightly dry soil conditions. During prolonged dry spells in the growing season, supply occasional deep watering to keep the soil moderately moist. Apply a layer of fresh mulch annually, taking care to leave the rhizomes exposed, and continue to weed the area diligently. Additionally, avoid over-fertilizing, as excessive nutrients can lead to weaker stems and reduced blooming.
Dividing overcrowded iris clumps every 3-4 years is vital for preventing competition and promoting healthy growth. Perform this division during the late summer or early fall, as described previously, to maintain vibrant and prolific flowering. With proper upkeep and attention, your irises will remain a striking feature in your garden for years to come, offering beauty and charm with every flowering season.
Conclusion
Transplanting irises is an essential gardening task that ensures their continued health and beauty. By choosing the right time, preparing the new site properly, dividing the rhizomes carefully, and planting them at the correct depth, you can create the perfect conditions for thriving irises. Regular monitoring, proper watering, and ongoing maintenance will keep your transplanted irises flourishing season after season. Thanks for reading our blog post on how to transplant iris plants! We hope you found it helpful and informative.