
Cactus plants are renowned for their resilience and unique beauty, but proper care, including regular trimming, is crucial to maintain their long-term health and aesthetic appeal. Trimming cactus plants serves multiple purposes, including removing dead or damaged parts, encouraging new growth, and maintaining a manageable size. Overgrown cacti may become unbalanced, less attractive, or prone to damage, making trimming a necessary part of their maintenance. For enthusiasts looking to propagate, trimming also provides an excellent opportunity to create new plants from cuttings.

This article will act as a complete guide on how to trim cactus plants, covering everything you need to know for safe and effective trimming. From selecting the right tools and determining the optimal time to trim to proper techniques and essential aftercare, we’ll guide you through the process step-by-step, ensuring your cactus remains healthy and thriving for years to come.
Understanding When and Why to Trim
Why Trim a Cactus?
Trimming a cactus serves several purposes that contribute to its overall health and appearance. Regular trimming helps improve the aesthetic appeal of the plant, ensuring it maintains its shape and remains visually pleasing. It is also essential to remove any parts of the cactus that are rotting, diseased, or damaged, thereby preventing these issues from spreading to healthy areas. Additionally, trimming encourages healthier growth by redirecting the plant’s energy toward robust development. For cactus enthusiasts looking to propagate, trimming can also create new opportunities to grow additional plants from cuttings.
When to Trim
The best time to trim a cactus is in the spring or early summer when the plant is in its active growth phase. During this period, the cactus can recover more quickly from the cuts and continue growing strong. It’s essential to avoid trimming during dormancy, which typically occurs in fall and winter, as the plant is less equipped to handle the stress and may struggle to heal properly.
Signs It’s Time to Trim
Knowing when to trim your cactus is crucial for its care. Key indicators include an overgrown or leaning plant that could become unstable, as well as discolored, mushy pads or arms that may signal rot or disease. Overcrowding, where parts of the cactus are competing for space, is another sign that trimming is necessary to ensure proper airflow and growth.
Tools and Safety Gear Needed
Proper tools and safety gear are essential when trimming your cactus to ensure both effective work and personal protection.
Essential Tools
For most cacti, pruning shears, sharp knives, or small saws are ideal, depending on the size and thickness of the plant. Shears work well for smaller pads or arms, while larger or woody cacti may require a sturdy knife or saw. Tongs are also helpful for safely handling large pads or sections with spines, reducing the risk of injury.
Safety Gear
To protect yourself, always wear thick gloves made of leather or another puncture-resistant material. These will shield your hands from sharp spines and prevent painful injuries. For species with long or abundant spines, wear long-sleeved clothing and eye protection to guard against accidental scratches or spines snapping and flying off during trimming.
Sanitizing Tools
Keeping your tools clean is crucial to prevent the spread of disease between plants. Before and after trimming, sanitize blades using rubbing alcohol or a diluted bleach solution. This step helps ensure your cactus stays healthy and promotes better healing after trimming. Proper preparation with these tools and precautions guarantees a smoother, safer cactus-trimming experience.

How to Prepare the Cactus for Trimming
Step 1: Inspect the Plant
Begin by carefully inspecting your cactus to identify the parts that need trimming. Look for areas that are damaged, diseased, or overgrown. Removing these sections not only improves the plant’s appearance but also promotes overall health and prevents further spread of disease. Take note of any browning, soft spots, or areas with pests as these are prime candidates for removal.
Step 2: Choose a Stable Working Area
It’s essential to have a secure and stable working space before you start trimming your cactus. If your cactus is potted, ensure the pot is sturdy and placed on a flat, non-slip surface to prevent tipping over during the process. For cacti planted in the ground, ensure that the area around the base is clear of debris, allowing for easier and safer access to the parts that need care. Stability ensures the cactus remains unharmed while you work.
Step 3: Protect Yourself and the Plant
Cacti can be tough and prickly, so it’s vital to protect both yourself and the plant during trimming. Always wear thick gloves and protective clothing to shield against sharp spines. Work carefully to avoid cutting into healthy tissue or damaging the cactus unnecessarily. Ensuring a cautious and protective approach will make the process safer and more effective for both you and your plant.
How to Trim Cactus Plants: Trimming Techniques
Understanding the unique growth patterns of various cactus types ensures that you trim them effectively without causing harm. Below are specific techniques tailored to each type:
Columnar Cacti (e.g., Saguaro, Cereus)
For tall, columnar cacti, a clean, sharp saw is ideal for trimming excess height or removing unwanted arms. Always make straight cuts to promote proper callusing, which helps protect the plant from disease and pests. Avoid jagged or uneven cuts, as these can lead to complications during healing.

Pad Cacti (e.g., Prickly Pear)
Pad cacti are best trimmed at the joints where the pads connect. Use sharp shears or a knife to carefully twist or cut each pad, avoiding damage to the main stem. Leave a bit of space between the cut and the base to allow for healthy regrowth and minimize stress to the plant.
Round Cacti (e.g., Barrel Cactus)
Round cacti typically require minimal maintenance. Focus on removing any dead tissue or pups growing around the base if you prefer a cleaner appearance. Use a small knife to make precise cuts, ensuring you do not damage the parent plant.
Trailing or Segment Cacti (e.g., Christmas Cactus)
For trailing or segment cacti, pinch off segments at their natural joints to shape the plant or control its length. This method is gentle and effective for maintaining balance and promoting healthy growth. Be careful not to over-trim, as these cacti thrive when they retain a natural, slightly wild appearance.
Caring for the Cactus After Trimming
Let the Cuts Heal
After trimming, it is crucial to allow the cut surfaces to dry and form calluses before introducing any water to the plant. This process can take several days, depending on the size and type of cactus. Allowing the cuts to heal helps prevent diseases and infections from entering through the open wounds.
Avoid Immediate Watering
One of the most common mistakes after trimming is watering too soon. Newly trimmed cacti are particularly susceptible to root and stem rot if exposed to moisture before their cuts have sufficiently callused. To promote recovery and avoid complications, keep the plant completely dry during the healing process.
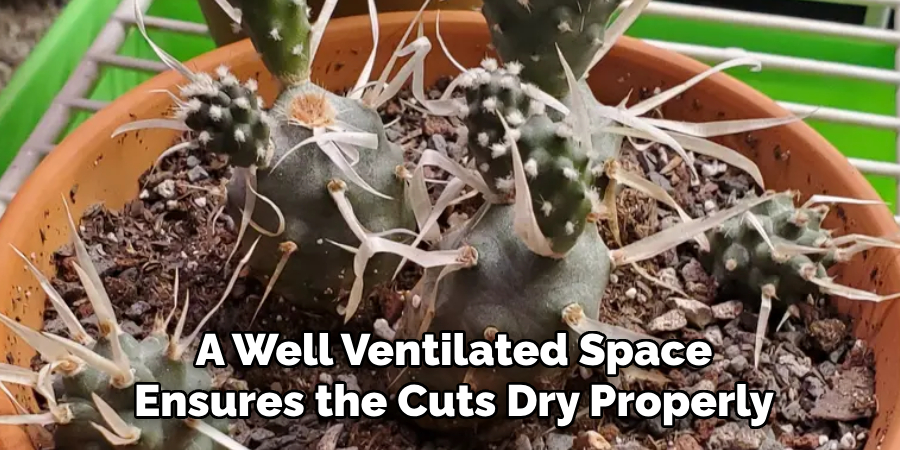
Place in a Safe Spot
While the cactus is recovering, choose a suitable location that provides indirect light and good air circulation. Avoid exposing the plant to direct sunlight or overly humid conditions during this period. A well-ventilated space ensures the cuts dry properly and reduces the chance of fungal growth or other issues. Once the cactus has fully healed, you can resume its typical care routine and look forward to its continued growth and vitality.
Propagating from Cuttings
Propagation from cuttings is a straightforward and effective method for growing new cacti. Follow these steps to ensure success:
Step 1: Let the Cutting Callus
After trimming the cactus, allow the cut end to dry and callus over for a few days. This step is crucial to prevent rot and infection when the cutting is planted. Place the cutting in a shaded, well-ventilated area during this time.
Step 2: Planting the Cutting
Once the cut end has hardened, plant the cutting in a well-draining cactus soil or a sandy potting mix. Insert the callused end about an inch into the soil, ensuring it is stable. Avoid watering immediately, as the cutting needs time to adjust and begin forming roots.
Step 3: Monitoring Growth
Check the cutting periodically for signs of rooting, which typically occurs within a few weeks. During this period, keep the soil dry to prevent overwatering, as excess moisture can lead to root rot. Once new roots are established and growth is visible, you can water sparingly and treat the new cactus like a mature plant.
With patience and proper care, your cutting will thrive and develop into a healthy, independent plant!

Conclusion
Learning how to trim cactus plants is essential for keeping them healthy, attractive, and under control. By using clean, sharp tools, trimming during the active growing season, and allowing cuts to properly callus, you ensure the best results for your cacti. Furthermore, trimming not only helps maintain the plant’s shape but also provides an opportunity for propagation. With patience and care, you can easily expand your cactus collection using cuttings from your trimmings. Proper trimming techniques ensure that your plants thrive and continue to bring their unique beauty to your home or garden.