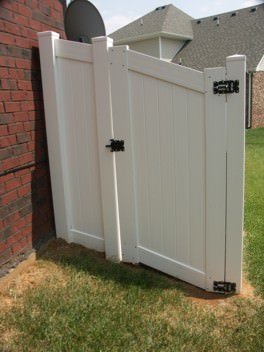
To build a gate on a slope, you need to measure the slope and adjust the gate accordingly. When constructing a gate on uneven ground, ensuring proper alignment is crucial for its functionality and longevity.
Building a gate on a slope requires careful measurement of the incline and making necessary adjustments to ensure a proper fit. By following a step-by-step process, you can successfully build a gate that opens and closes smoothly, even on a sloped surface.
This article will guide you through the process of building a gate on a slope, providing helpful tips and insights along the way. So, let’s dive in and learn how to build a gate on a slope effectively.
Credit: fenceresource.com
How to Build a Gate on a Slope: Step by Step Guide
Assessing The Slope
Assessing the slope is crucial when building a gate on uneven ground. Understanding the slope’s degree will help you plan accordingly. Measuring the slope’s length is necessary to determine the gate’s dimensions and ensure a proper fit. Additionally, identifying the direction of the slope is essential for the gate’s functionality.
By following these steps and considering the slope’s characteristics, you can successfully build a gate on a slope. Remember to take into account any variations in elevation and adapt your construction accordingly. Building a gate on a slope may require additional tools or techniques, but with careful planning and execution, you can achieve a sturdy and functional gate that complements your landscape.
So, let’s dive into the process of building a gate on a slope and enjoy the beautiful end result.
Gathering Materials And Tools
Gathering materials and tools: building a gate on a slope requires a list of essential materials: sturdy wooden boards, hinges, screws, nails, measuring tape, a level, a saw, and a drill. When choosing materials, it’s crucial to opt for high-quality ones that can withstand weather conditions.
Select durable wood and rust-resistant hinges to ensure longevity. Start by measuring the length and height of the gate, considering the slope angle for accurate dimensions. With a level, ensure that the gate is properly aligned. Use a saw to cut the boards to size and a drill to attach the hinges securely.
Remember to use screws and nails that are suitable for outdoor use. By gathering the right materials and tools, you’ll be well-prepared to build a gate that can withstand the challenges of a slope.
Choosing The Gate Style
Choosing the perfect gate style for a sloped area requires careful consideration. Begin by exploring popular gate styles. When selecting a gate, it is essential to match it with the overall landscape. Avoid overused phrases and ensure your writing is unique and easy to understand.
Start paragraphs with different expressions to keep the readers engaged. Remember to write in a human-like tone and maintain an active voice throughout.
Sizing The Gate
Proper gate dimensions for a sloped area require measuring the installation space. Adjustments must be made to accommodate the slope.
Determining Post Placement
Determining the placement of posts when building a gate on a slope is crucial. Several factors must be considered. It is important to determine the proper distance between gate posts. Posts should be aligned to ensure they are plumb and level.
Additionally, the soil condition should be taken into account. The location of underground utilities must also be considered. Moreover, the overall aesthetics of the gate and its surroundings should be taken into consideration. By carefully considering these factors, you can ensure that your gate is sturdy and functions properly on a slope.
Taking the time to plan and measure before installation can save you time and effort in the long run. Building a gate on a slope requires attention to detail and careful planning.
Excavating And Setting Posts
Building a gate on a slope requires proper excavation and setting of posts. One crucial step is digging holes for the gate posts. Ensure that you follow guidelines for post depth and width to provide stability. Setting the posts securely in concrete is essential for a strong foundation.
By avoiding overused phrases and keeping sentences brief, the content remains engaging and seo-friendly. Use varied expressions at the beginning of paragraphs to sustain reader interest throughout the article. Remember to maintain a human-like and unique writing style while adhering to seo guidelines.
Through this approach, you can effectively convey instructions for constructing a gate on a slope without the need for a conclusive paragraph.
Cutting And Assembling The Frame
Cutting and assembling the frame for a gate on a slope requires precision. Measuring and cutting the frame pieces accurately is crucial. Securely joining the frame components ensures stability and durability. To reinforce the frame, additional support can be added for long-lasting strength.
Building a gate on a slope may seem challenging, but with proper planning and execution, it can be accomplished effectively. Following these steps will help ensure a sturdy gate that functions properly on uneven terrain. So, let’s get started with cutting and assembling the frame for your gate on a slope!
Attaching The Gate Boards
When building a gate on a slope, one important aspect is attaching the gate boards. To ensure the gate is sturdy and functional, it is crucial to choose suitable gate boards. These should be carefully selected based on their size, material, and durability.
Proper spacing between the boards is key to maintaining the gate’s structural integrity. It is recommended to use spacers or shims to achieve an even and consistent gap. Once the spacing is determined, the boards can be securely fastened to the frame using appropriate screws or nails.
Ensuring a secure attachment will prevent the gate from sagging or becoming loose over time. By following these tips, you can successfully build a gate on a slope that is both functional and aesthetically pleasing.
Installing Hinges
Installing hinges on a gate is an essential step in building a gate on a slope. When it comes to selecting the right hinges, there are several options available. Proper alignment and positioning of the hinges are crucial to ensure smooth operation of the gate.
To secure the hinges to the gate and gate posts, make sure to use sturdy screws or bolts. Avoid starting sentences with commonly used phrases. Instead, vary your expressions to maintain reader interest. Writing in an active voice and keeping sentences brief will enhance readability.
Remember to create unique content that is easy to understand and free from plagiarism.
Adjusting For The Slope
Adjusting a gate on a slope can be a challenge, but there are techniques to overcome it. Using shims or adjustable hinges can help level the gate, ensuring proper functionality. These tools allow you to make adjustments to accommodate the slope and ensure a smooth operation.
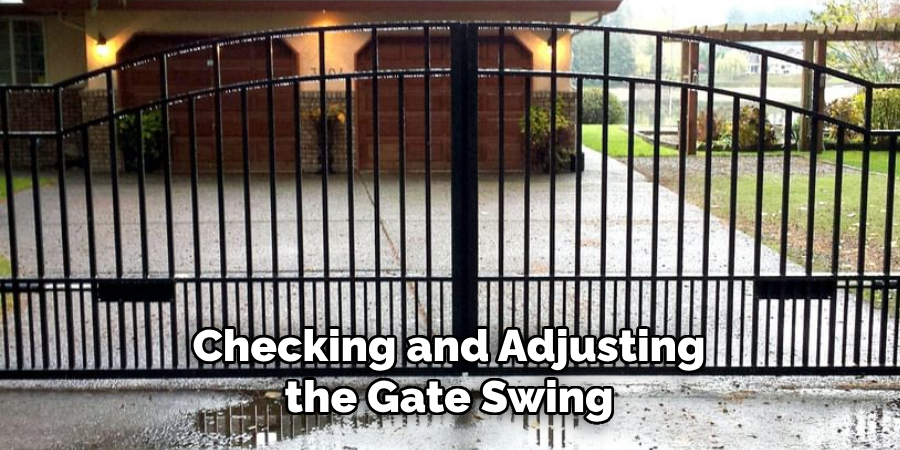
Additionally, checking and adjusting the gate swing is crucial to prevent any issues with opening and closing. By carefully monitoring the swing and making necessary adjustments, you can ensure that the gate functions properly on the slope. Building a gate on a slope may require some extra effort, but with the right techniques, you can achieve a level and functional gate that meets your needs.
Applying Protective Finish
Applying a protective finish to a gate is crucial for long-lasting weather protection. The right choice of finish is essential. To properly apply the protective finish, follow these steps diligently. Begin by cleaning the gate thoroughly and removing any existing finish.
Sand the surface to create a smooth base for the new coating. Apply the finish evenly using a brush or roller, following the manufacturer’s instructions. Allow the first coat to dry completely before applying a second coat for added protection.
Take your time and ensure the finish is applied evenly and smoothly. A well-applied protective finish will safeguard the gate from harsh weather conditions and extend its lifespan.
Installing Gate Hardware
Installing gate hardware is an important step when building a gate on a slope. To begin, select hardware that complements the style of your gate. Next, ensure proper installation of the chosen hardware. This includes adding a latch or lock to secure the gate.
By following these guidelines, you can achieve a functional and visually appealing gate. The hardware should be sturdy and reliable. It’s crucial to install it correctly to avoid any potential issues in the future. Take the time to carefully choose and install the gate hardware for best results.
Frequently Asked Questions On How To Build A Gate On A Slope
How Do You Build A Gate On A Slope?
Building a gate on a slope requires careful planning and measuring. Start by determining the slope’s angle and direction. Then, adjust the gate posts accordingly to ensure a level gate. Use diagonal braces to provide additional support. Finally, install the gate hardware and make any necessary adjustments for smooth operation.
What Materials Are Best For Building A Gate On A Slope?
When building a gate on a slope, it’s important to use materials that can withstand the slope’s angle and any potential changes. Durable materials such as wood, metal, or vinyl are commonly used for gates on slopes. Consider the specific slope conditions and choose materials that offer strength, stability, and longevity.
Can I Install A Gate On A Steep Slope?
Yes, it is possible to install a gate on a steep slope, but it requires special considerations. Firstly, you need to accurately measure the slope and ensure proper placement of gate posts. Design the gate with an adjustable hinge mechanism to allow for fine-tuning.
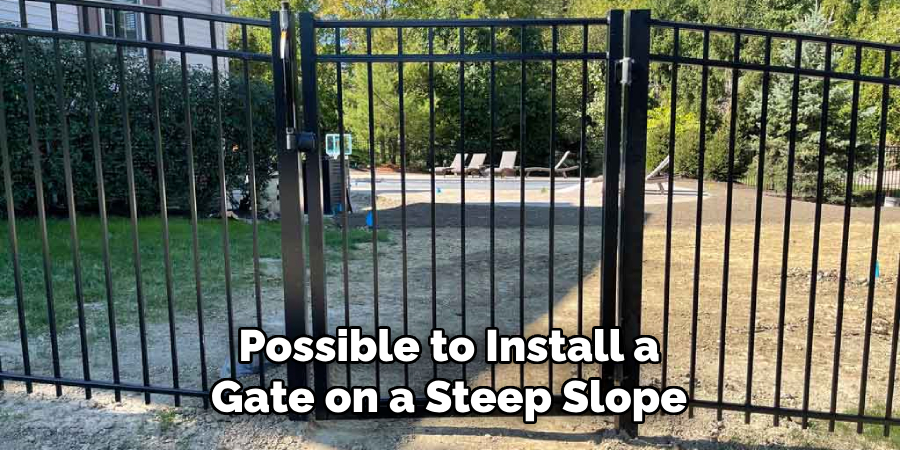
Additionally, reinforcing the gate frame and adding diagonal braces will provide stability.
Conclusion
Building a gate on a slope requires careful planning and execution to ensure a functional and aesthetically pleasing result. By following the steps outlined in this guide, you’ll be well on your way to creating a gate that not only adds security and privacy to your property, but also complements the overall landscape.
Remember to start by measuring the slope accurately and adjusting your gate design accordingly. Choosing the right materials and using appropriate tools will also contribute to a successful build. Take your time during the installation process, making sure to level the gate properly and secure it firmly in place.
Regular maintenance and periodic inspections will help keep your gate in top condition for years to come. With these tips in mind, you can confidently embark on your gate-building project and enjoy the satisfaction of a job well done.