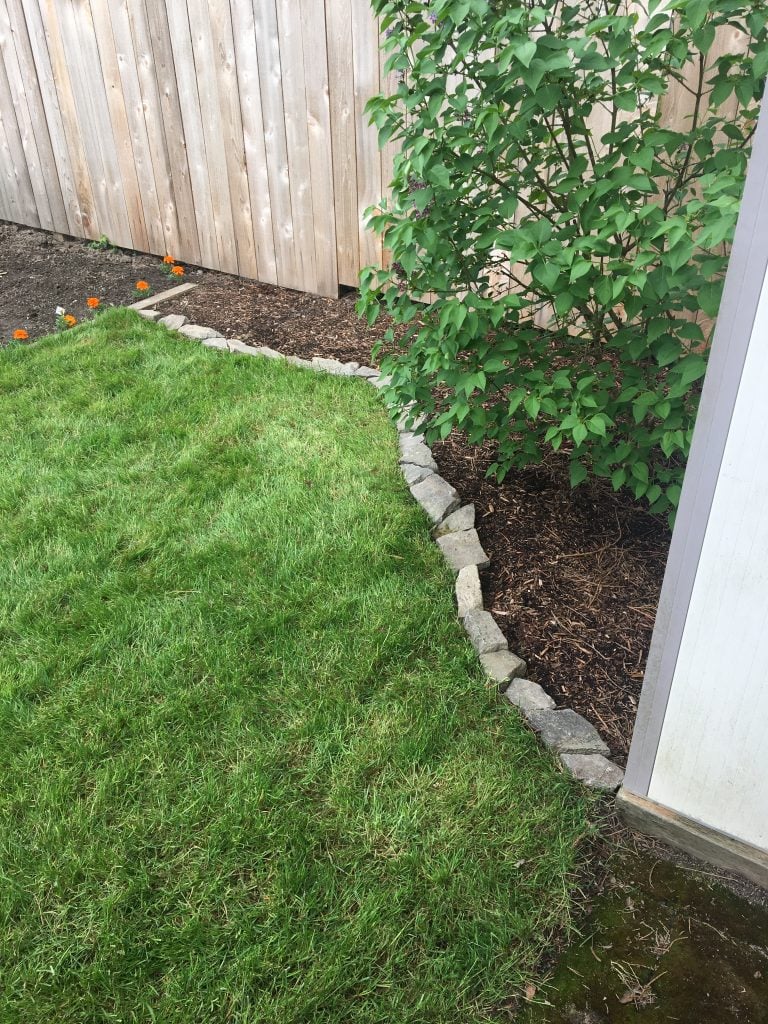
To make a rock border for your garden, dig a shallow trench along the desired border, place the rocks into the trench, and pack soil around them tightly. Are you looking to enhance the aesthetics of your garden?
Adding a rock border can be a simple yet effective way to achieve that. By creating a defined and visually appealing edge, a rock border adds a touch of charm and elegance to your outdoor space. Whether you have a flower bed, vegetable garden, or a pathway that needs some definition, a rock border can provide a natural and rustic look.
In this guide, we will walk you through the steps of creating a rock border for your garden, from digging a trench to placing the rocks and securing them in place. With a bit of patience and the right materials, you can create a beautiful rock border that will enhance the overall appeal of your garden.

Credit: www.ellaclaireinspired.com
Choosing The Right Rocks
Researching Rock Types Based On Garden Theme And Climate
When it comes to creating a rock border for your garden, choosing the right rocks is crucial. To ensure that your rock border complements the overall theme of your garden and withstands the climate, it’s important to research the different types of rocks available.
Here are some key points to consider:
- Granite Rocks: These are popular for rock borders due to their durability and ability to withstand harsh weather conditions. They come in various colors and can add a touch of elegance to your garden.
- Limestone Rocks: Known for their natural beauty, limestone rocks are ideal for gardens with a more rustic theme. They come in various earthy tones and can create a charming and timeless border.
- Sandstone Rocks: If you’re going for a more textured and natural look, sandstone rocks are a great choice. They are available in different shapes and sizes, adding uniqueness to your garden border.
- River Rocks: If you want to create a more relaxed and natural feel, river rocks are a fantastic option. These smooth rocks, typically found near rivers, can add a serene ambiance to your outdoor space.
Considering The Size, Shape, And Color Of Rocks
The size, shape, and color of rocks are important factors to consider when creating a rock border for your garden. Here are some key points to keep in mind:
- Size: Choose rocks that are proportionate to the size of your garden. Smaller gardens will benefit from smaller rocks, while larger gardens can accommodate larger rocks. This will create a visually balanced and aesthetically pleasing rock border.
- Shape: Rocks come in various shapes, from rounded to angular. Select rocks that complement the overall design of your garden. Rounded rocks can create a softer and more organic border, while angular rocks can provide a more structured and modern look.
- Color: Consider the color scheme of your garden when choosing rocks. If you have a vibrant and colorful garden, go for rocks that will complement or contrast with the existing plants and flowers. Neutral-colored rocks can provide a timeless and elegant backdrop for any garden theme.
Looking For Rocks That Are Weather-Resistant And Durable
When choosing rocks for your garden border, it’s important to select rocks that are weather-resistant and durable. Here are some key points to consider:
- Weather Resistance: Choose rocks that can withstand the specific climate of your area. Some rocks may be more prone to erosion or discoloration in certain weather conditions. Research the rocks that are best suited for your specific climate to ensure longevity.
- Durability: Opt for rocks that are strong and long-lasting. This will ensure that your rock border remains intact and visually appealing for years to come. Avoid rocks that are prone to breaking or crumbling under pressure.
- Maintenance: Consider the level of maintenance required for the rocks you choose. Some rocks may require regular cleaning or sealing to maintain their appearance. Choose rocks that align with your desired level of maintenance.
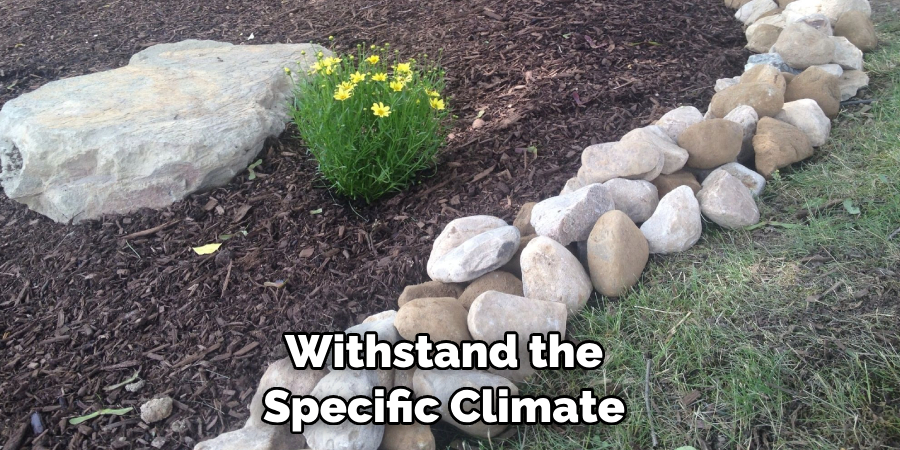
By researching rock types based on your garden theme and climate, considering the size, shape, and color of rocks, and looking for rocks that are weather-resistant and durable, you can create a stunning and long-lasting rock border for your garden.
Planning The Border Layout
Measuring the garden area for the rock border:
- Before you start creating a rock border for your garden, it’s essential to measure the area where you want to place it.
- Measure the length and width of the garden space to determine the amount of rocks you’ll need.
Creating a rough sketch or design for the border:
- Once you have the measurements, it’s helpful to create a rough sketch or design for your rock border.
- Consider the shape and style you want to achieve, whether it’s a straight border or a curved one.
- Drawing a sketch will help you visualize the layout before you start marking the border on the ground.
Marking the border outline using stakes and string:
- To ensure precision and accuracy, you’ll need to mark the border outline before placing the rocks.
- Start by placing stakes at the corners of your garden area.
- Attach a string between the stakes, creating a clear boundary for your rock border.
- Make sure the string is taut and level, as it will serve as a guide while positioning the rocks.
- Repeat this process around the entire border to mark the outline thoroughly.
By following these simple steps, you can effectively plan the layout for your rock border in the garden.
Preparing The Garden Area
Before you can create a beautiful rock border for your garden, it’s important to properly prepare the area. This will ensure a smooth and successful installation process. Here are the key steps to take when preparing your garden area:
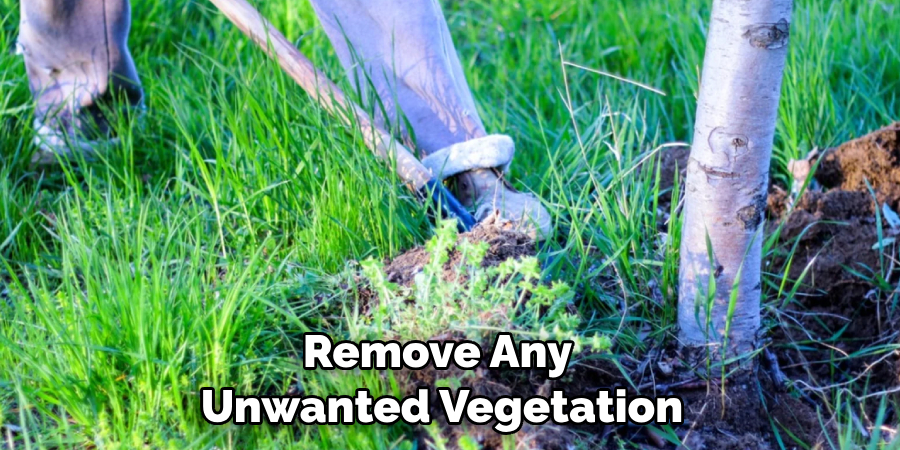
Clearing The Vegetation And Debris From The Border Area:
- Start by removing any weeds, grass, or other vegetation from the area where you want to create the rock border.
- Rake away any leaves, twigs, or debris that may have accumulated in the border area, ensuring a clean base for your rock placement.
Leveling The Ground For A Smooth Rock Placement:
- Use a garden rake or shovel to level the ground in the border area. This will help create a flat and even surface for your rocks.
- Check for any high or low spots and adjust the soil accordingly to achieve a smooth surface.
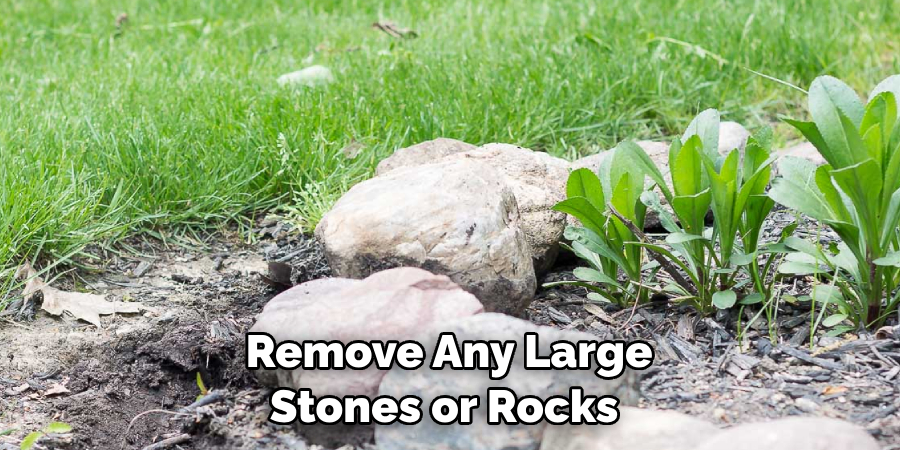
Removing Any Large Stones Or Obstacles From The Soil:
- Carefully inspect the soil in the border area and remove any large stones or rocks that could interfere with the placement of your border rocks.
- Also, remove any other obstacles such as tree roots or large clumps of dirt that may impede the rock installation process.
By following these steps, you’ll ensure that the garden area is properly prepared for the rock border installation. This will make the process easier and the end result more visually appealing. Now, let’s move on to the next step and start installing the rock border itself.
Preparing The Rocks
Rock borders can add a natural and rustic touch to any garden, enhancing its overall appeal. However, before you start building your rock border, it’s crucial to prepare the rocks properly. This step is essential to ensure a durable and aesthetically pleasing border.
Here’s what you need to do:
Cleaning The Rocks To Remove Dirt And Debris:
- Start by inspecting the rocks and removing any large pieces of dirt or debris by hand.
- Rinse the rocks thoroughly with water to remove any loose dirt or mud.
- Scrub the rocks gently using a stiff brush or scrubbing pad to remove stubborn dirt, moss, or algae.
- If necessary, use a mild detergent or cleaning solution to remove stains, ensuring that it’s safe for both the rocks and surrounding vegetation.
- Rinse the rocks thoroughly to remove any traces of cleaning solution and allow them to dry completely before proceeding.
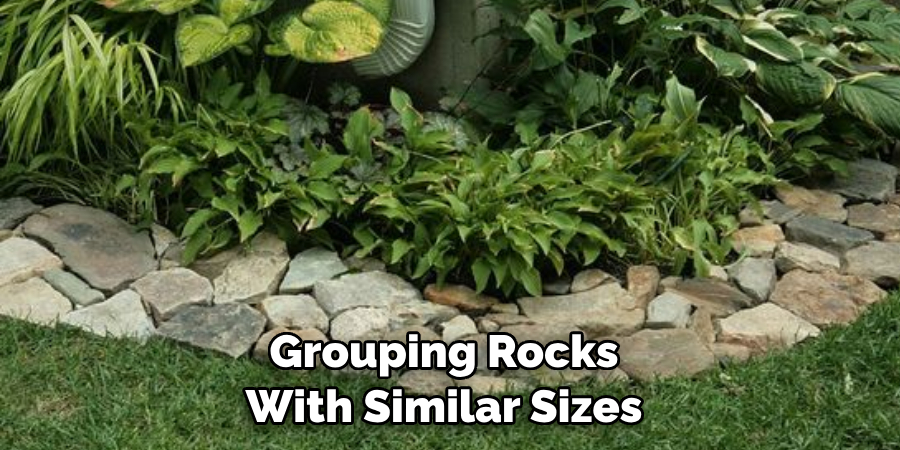
Sorting The Rocks Based On Size And Shape:
- Once the rocks are clean and dry, it’s time to sort them based on their size and shape.
- Separate the rocks into three main categories: Small, medium, and large.
- Within each category, further sort the rocks based on their shape. This will help ensure a balanced and visually appealing arrangement.
- You can also consider matching the shape of the rocks to the overall theme or style of your garden.
Organizing The Rocks In Groups To Ensure A Cohesive Look:
- After sorting the rocks, it’s important to organize them into groups to create a cohesive look for your rock border.
- Arrange the rocks in a way that allows for smooth transitions between sizes and shapes.
- Experiment with different arrangements until you find the one that fits your vision for the rock border.
- Consider grouping rocks with similar sizes and shapes in specific areas to add visual interest and variety.
By following these steps, you’ll be well on your way to creating a stunning and well-prepared rock border for your garden. Remember to take your time during the preparation process to ensure that the end result is nothing short of perfection.
So, let’s get started on making your garden stand out with a beautiful rock border!
Installing The Border
Creating a rock border can enhance the visual appeal of your garden while serving as a functional barrier. To install the border, follow these step-by-step instructions:
Digging A Shallow Trench Along The Marked Border
- Begin by marking the border where you want to install the rock border. Use stakes and string to ensure a straight line.
- Start digging a shallow trench along the marked border. The depth should be enough to accommodate the rocks, usually around 2-3 inches.
- Remove any grass, plants, or debris from the trench to ensure a clean base for the rocks.
- Consider using a garden edging tool or a small spade to make the edges of the trench neat and defined.
Placing The Rocks In The Trench, Fitting Them Tightly Together
- Choose rocks of similar size and shape to create a cohesive look for the border.
- Carefully place the rocks in the trench, fitting them tightly together. This will prevent shifting and maintain the stability of the border.
- Arrange the rocks to create a pattern or design that suits your garden aesthetic. Be creative and experiment with different configurations.
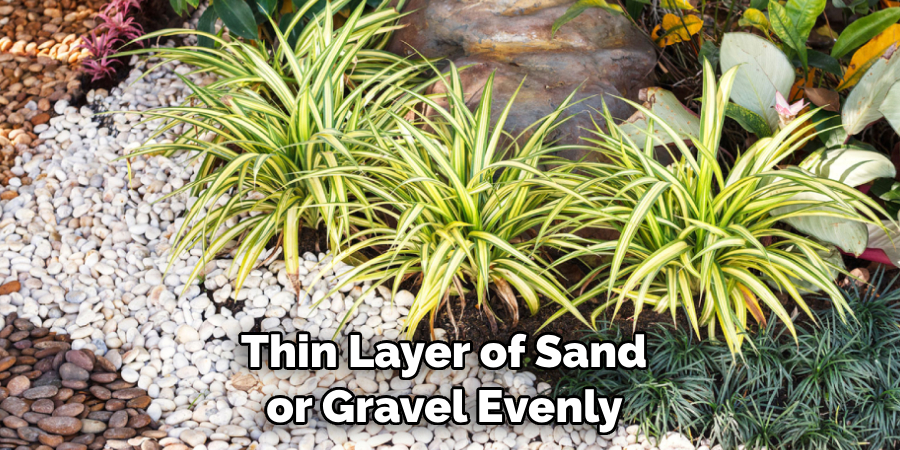
Adding A Layer Of Sand Or Gravel Underneath The Rocks For Stability
- Once the rocks are in place, consider adding a layer of sand or gravel underneath them for added stability. This is especially important if your soil is loose or prone to erosion.
- Spread a thin layer of sand or gravel evenly across the bottom of the trench.
- Use a tamper or the back of a shovel to compact the sand or gravel. This will provide a solid base for the rocks and prevent them from shifting over time.
By following these steps, you can easily install a rock border for your garden. Not only will it enhance the visual appeal, but it will also serve as a functional barrier. Get creative with your choice of rocks and enjoy the transformation it brings to your outdoor space!
Filling In The Gaps
Filling The Gaps Between The Rocks With Smaller Stones Or Pebbles:
One of the final steps in creating a rock border for your garden is filling in the gaps between the larger rocks. This not only adds stability to the border but also enhances its overall appearance. Here are a few key points to keep in mind when filling these gaps:
- Smaller stones or pebbles can be used to fill the gaps between the larger rocks. This helps to create a more uniform and cohesive look.
- Start by pouring the smaller stones or pebbles into the gaps using a shovel or your hands. Make sure to distribute them evenly throughout the border.
- Use your fingers or a small trowel to press the stones or pebbles firmly into place. This will help to secure them and prevent them from shifting over time.
- If necessary, you can add more stones or pebbles to fill any remaining gaps. Aim for a tight fit to ensure that there are no significant spaces between the rocks.
- Take a step back and examine the border from different angles. If you notice any areas where the gaps are still visible, add more stones or pebbles until the border looks evenly filled.
Remember, the goal is to create a seamless border that enhances the beauty of your garden. Take your time during this step to ensure that the smaller stones or pebbles are properly placed and the gaps are adequately filled.
Pouring Sand Or Gravel Over The Border To Cover Any Remaining Gaps:
Once you have filled the gaps between the rocks with smaller stones or pebbles, you may still have some small spaces or uneven areas. To further enhance the stability and appearance of your rock border, consider pouring sand or gravel over the top.
Here’s what you need to know:
- Choose fine sand or gravel that matches the color of the rocks or complements the overall theme of your garden.
- Begin by evenly pouring a layer of sand or gravel over the entire border. Use a shovel or your hands to spread it out and cover any remaining gaps or unevenness.
- As you pour the sand or gravel, ensure that it reaches all the crevices and gaps, filling them completely.
- Use a broom or brush to sweep off any excess material from the surface of the rocks. This will give your border a clean and polished look.
- After sweeping, give the border a final inspection. If you notice any areas where the sand or gravel hasn’t filled in properly, add more material as needed.

By pouring sand or gravel over the border, you can not only eliminate any remaining gaps but also further secure the rocks in place. The sand or gravel acts as a stabilizer and prevents movement or shifting.
Remember to take your time and pay attention to the details when pouring the sand or gravel. The end result will be a beautifully finished rock border that adds charm and structure to your garden.
Adding Finishing Touches
Adding Decorative Elements Such As Plants Or Flowers Along The Border
Enhancing the beauty of your rock border is all about adding the right decorative elements. By incorporating plants or flowers along the border, you can create a charming and vibrant garden oasis. Here are some key points to consider:
- Choose plants or flowers that complement the rocks and the overall theme of your garden. Opt for varieties that thrive in your climate and require minimal maintenance.
- Position the plants strategically, taking into account their height, colors, and blooming seasons. This will create a visually appealing arrangement that adds depth and interest to the border.
- Mix different types of plants or flowers to create a textural contrast. Combine bushy flowers with delicate blooms or mix variegated foliage with vibrant flowers to create a dynamic and eye-catching display.
- Consider adding trailing plants or vines that can cascade over the rocks, softening the edges and adding a sense of movement.
- Don’t forget about seasonal color. Include plants that provide blooms throughout the year, ensuring your rock border remains vibrant and inviting in every season.
By carefully selecting and arranging the right plants or flowers, you can elevate your rock border from functional to fabulous, creating a picturesque garden space that delights the senses.
—
Incorporating Landscape Fabric To Prevent Weed Growth
While rocks can provide an effective barrier against weeds, incorporating landscape fabric is an additional step to ensure long-term weed control. Here’s what you need to know:

- Start by preparing the area where you plan to lay the fabric. Remove any existing weeds or grass by digging them out or using an herbicide.
- Measure and cut the landscape fabric to fit the dimensions of your rock border. Make sure to leave a few extra inches on each side to account for overlapping.
- Lay the fabric directly on the soil, making sure it covers the entire border area. Smooth out any wrinkles or folds to ensure a snug fit.
- Secure the fabric in place using landscape fabric anchor pins. Place them every few feet along the edges and throughout the middle to prevent shifting.
- Cut holes or slits in the fabric where you want to plant your selected plants or flowers. Be careful not to create openings that are too large, as this can allow weeds to push through.
- Once the fabric is in place, cover it with a layer of rocks. This will help to hold it down and provide an attractive finish.
By incorporating landscape fabric, you create a barrier against weed growth while still allowing water and nutrients to reach the roots of your plants.
Applying A Sealant Or Protective Coating To The Rocks For Long-Lasting Durability
To ensure the longevity of your rock border, applying a sealant or protective coating to the rocks is a recommended step. Here’s what you need to know:
- Start by cleaning the rocks thoroughly to remove any dirt, debris, or moss. Use a brush or pressure washer to ensure a clean surface.
- Allow the rocks to dry completely before applying the sealant or protective coating. This will ensure maximum adhesion and effectiveness.
- Choose a sealant or coating specifically designed for the type of rocks used in your border. Consult with experts at your local home improvement store for recommendations.
- Apply the sealant or coating evenly, using a brush or sprayer. Follow the manufacturer’s instructions for the best results.
- Let the sealant or coating dry completely before allowing foot traffic or placing any objects on the rocks. This will ensure proper curing and durability.
- Regularly inspect the rocks and reapply the sealant or coating as necessary, especially in high-traffic areas or where there is exposure to the elements.
By applying a sealant or protective coating, you not only enhance the appearance of your rock border but also provide a shield against weathering, uv damage, and staining, ensuring their long-lasting beauty and durability.
Maintenance Tips
Regularly inspecting the border for any loose or displaced rocks:
- Check the rock border every few weeks for any rocks that may have become loose or displaced. This will help maintain the stability and overall appearance of the border.
- Gently push any loose rocks back into place, ensuring they fit snugly against each other. This will prevent gaps from forming and reduce the risk of tripping hazards.
Removing any weeds or debris that may accumulate around the border:
- Keep an eye out for any weeds or debris that might accumulate around the rock border. Weeds can be unsightly and can also compete with plants for nutrients and space.
- Use a weed trimmer, hand tools, or a garden hoe to remove any unwanted vegetation. Be careful not to disturb the rocks while clearing the area.
- Regularly sweep or use a leaf blower to remove any fallen leaves or other debris that may accumulate near the border. This will help keep the area clean and prevent any potential damage to the rocks.
Replacing any damaged or worn-out rocks as needed:
- Over time, rocks may become damaged or worn-out due to weathering or accidental impact. To maintain the integrity of the rock border, it’s important to replace any damaged or worn-out rocks promptly.
- When replacing rocks, choose rocks that are similar in size, shape, and color to ensure a seamless appearance.
- Carefully remove the damaged or worn-out rock and replace it with the new one. Make sure the new rock fits securely and is level with the surrounding rocks.
Remember, maintenance is key to preserving the beauty and functionality of your rock border. Regular inspections, weed removal, and rock replacement will help ensure that your garden looks its best and remains a source of pride for years to come.
Frequently Asked Questions On How To Make A Rock Border For Garden
How Do I Create A Rock Border For My Garden?
Creating a rock border for your garden involves choosing a suitable location, digging a trench, and placing the rocks in the desired pattern. Then, backfill the trench with soil and ensure the rocks are secure. Finally, add mulch or plants to complete the look.
What Are The Benefits Of A Rock Border In A Garden?
A rock border not only adds visual appeal to your garden but also serves practical purposes. It helps define garden beds, provides a barrier for weed control, and helps retain moisture in the soil. Additionally, rocks can act as a thermal barrier, regulating soil temperature for plants.
What Types Of Rocks Are Best For Garden Borders?
When selecting rocks for a garden border, it’s best to choose ones that are durable, weather resistant, and visually appealing. Common options include river rocks, flagstones, pebbles, or cobblestones. Consider the overall aesthetic of your garden and choose rocks that complement the design.
Conclusion
To summarize, creating a rock border for your garden is a simple and effective way to enhance its overall appearance. By following the steps outlined in this blog post, you can easily transform any ordinary garden into a stunning and visually appealing space.
The use of carefully selected rocks and proper installation techniques will not only add a touch of elegance to your garden but also provide a practical solution for defining boundaries and preventing soil erosion. Remember to choose rocks that complement your existing landscape and consider using different sizes and shapes for added visual interest.
By incorporating a rock border into your garden, you can create a beautiful and low-maintenance feature that will withstand the test of time. So, go ahead and give your garden that finishing touch, and enjoy the beauty and functionality that a rock border can bring.