To paint metal lawn furniture, first, clean the surface and remove any loose paint or rust using a wire brush or sandpaper. Then, apply a primer suitable for metal surfaces, following the manufacturer’s instructions.
Next, choose a paint color and apply several thin coats, allowing each coat to dry before applying the next. Finally, protect the paint job with a clear coat or sealant. Taking these steps will help ensure a durable and long-lasting finish for your metal lawn furniture.
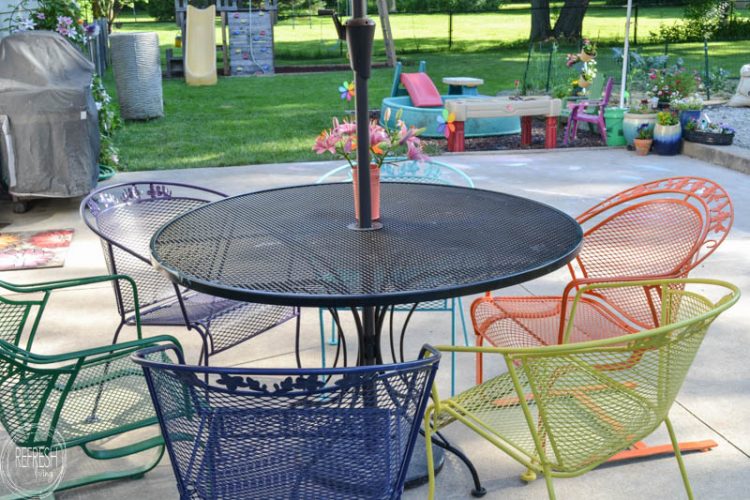
Adding a fresh coat of paint to your metal lawn furniture can revive its appearance and protect it from the elements. However, to achieve a successful paint job, proper preparation and technique are crucial. In this guide, we will walk you through the step-by-step process of painting your metal lawn furniture, from cleaning the surface and applying primer to choosing the right paint and protecting your newly painted furniture. By following these instructions, you can enjoy a beautifully transformed and protected piece of furniture for years to come. So, let’s get started and bring new life to your outdoor seating and dining areas!
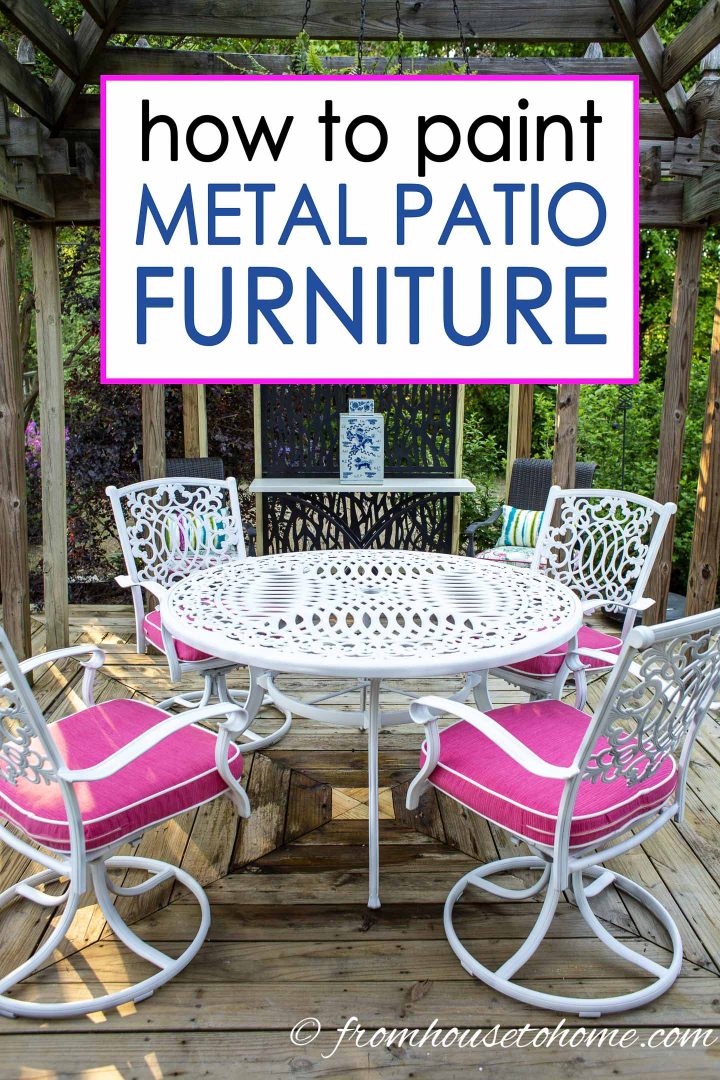
Credit: www.fromhousetohome.com
Selecting The Right Tools And Materials
When it comes to painting metal lawn furniture, selecting the right tools and materials is crucial for achieving a professional finish. By gathering the necessary equipment and choosing the appropriate paint, you can ensure that your furniture makeover project is a success.
Here are the key points to consider:
Choosing The Appropriate Paint
- Determine the type of paint suitable for metal surfaces: Look for paints labeled specifically for metal or multi-surface use, ensuring they are designed to withstand outdoor conditions.
- Opt for paint with rust-inhibiting properties: Metal furniture is prone to rust, so selecting a paint that helps prevent or slow down rust formation is essential.
- Consider the finish: Decide whether you prefer a glossy, matte, or satin finish, keeping in mind that glossy finishes may require more maintenance to keep them looking clean.
- Check the compatibility with your chosen color: Some colors may require multiple coats for full coverage, so be sure to read the instructions on the paint can to determine the necessary application process.
Gathering Necessary Equipment
- Clean the furniture: Before painting, gather cleaning supplies such as soap, water, and a stiff brush or sponge to remove any dirt, grime, or loose paint from the surfaces.
- Sanding materials: Depending on the condition of the furniture, sanding may be necessary to create a smooth surface for the paint to adhere to. Prepare sandpaper or a sanding block with varying grits to suit your needs.
- Priming: Primer helps the paint adhere better to the metal surface, providing a more durable and even finish. Gather primer specifically formulated for metal surfaces.
- Painting tools: Choose the appropriate brushes or rollers for your project, ensuring they are compatible with the type of paint and the surface area. Flat brushes are ideal for large, flat areas, while smaller brushes can reach intricate details.
- Protective gear: Don’t forget safety equipment such as gloves, goggles, and a mask to shield yourself from paint fumes and protect your skin.
By carefully selecting the right tools and materials for your metal lawn furniture painting project, you can achieve a beautifully refreshed and protected piece of outdoor furniture. Remember to follow the paint manufacturer’s instructions for application and drying times to ensure the best possible results.
Preparing The Surface
When it comes to painting metal lawn furniture, proper surface preparation is crucial for a successful and long-lasting paint job. By following these steps to clean the furniture and remove any old paint or rust, you’ll ensure that the new paint adheres well and provides optimal protection.
Let’s dive into the details:
Cleaning The Furniture
Cleaning the metal furniture thoroughly is the first step in preparing the surface for painting. Here’s what you need to do:
- Start by removing any loose dirt, dust, or debris from the surface of the furniture. You can use a brush or a damp cloth for this task.
- For more stubborn dirt or grime, mix a mild detergent with water and scrub the furniture gently using a soft-bristle brush. Rinse off the soapy residue with clean water afterward.
- If your furniture has mold or mildew, you can create a solution of equal parts water and bleach to remove it. Apply the solution using a sponge or brush, let it sit for a few minutes, and then rinse thoroughly.
- Pay particular attention to the joints and crevices, as they tend to accumulate dirt and grime over time. Use a toothbrush or an old toothpick to reach those hard-to-clean areas effectively.
- After cleaning, allow the furniture to dry completely before moving on to the next step.
Removing Any Old Paint Or Rust
To ensure a smooth and even paint application, it’s essential to remove any old paint or rust from the metal furniture. Follow these steps:
- Start by scraping off as much loose paint as possible using a scraper or wire brush. Be gentle to avoid damaging the metal surface.
- For stubborn or peeling paint, you can use a paint stripper. Follow the manufacturer’s instructions carefully and apply the stripper using a brush. Allow it to sit for the recommended time before scraping off the softened paint.
- If your furniture has rust spots, use sandpaper or a wire brush to remove the rust until you reach bare metal. Sanding will also help in creating a slightly rough surface for better paint adhesion.
- Once you’ve removed the old paint and rust, clean the furniture again using a mild detergent and water solution to remove any residue. Rinse thoroughly and let it dry completely before moving on to the painting stage.
By meticulously cleaning the furniture and removing any old paint or rust, you’ll ensure a smooth and durable paint finish. With the surface preparation complete, you’ll be ready to apply a fresh coat of paint that will rejuvenate your metal lawn furniture.
So, let’s move on to the exciting part – painting!
Applying The Primer And Paint
Applying A Coat Of Primer
When it comes to painting metal lawn furniture, applying a coat of primer is an important first step. The primer helps the paint adhere to the metal surface and provides an even base for the topcoat. Here are the key points to keep in mind:
- Clean the furniture: Before applying the primer, make sure to clean the metal furniture thoroughly. Use soap and water to remove any dirt, dust, or grease. This will help the primer adhere better to the surface.
- Choose the right primer: Select a primer specifically designed for metal surfaces. Look for a rust-inhibiting primer to prevent any future rusting.
- Prepare the area: Set up a well-ventilated space for the painting process. Lay down a drop cloth or old newspapers to protect the surrounding area from any paint splatters.
- Apply the primer: Use a high-quality brush or a spray paint can to apply the primer. Start by applying a thin coat in even strokes, working in one direction. Allow the primer to dry completely before applying the paint.
Selecting The Best Technique For Painting Metal
When it comes to painting metal lawn furniture, there are various techniques you can choose from. Here are a few options to consider:
- Spray painting: Spray painting is a popular choice for painting metal furniture as it provides an even and smooth finish. Make sure to shake the can well before using and follow the instructions on the label for best results.
- Brush painting: Brush painting is a more traditional method that allows for more control and precision. Use a high-quality brush suitable for painting metal surfaces and apply the paint in thin, even coats.
- Use a roller: If you have large flat surfaces to cover, using a roller can be an efficient technique. Opt for a foam or mohair roller for a smooth and even paint application.
Applying Multiple Coats For Durability And Even Coverage
To achieve a durable and even finish on your metal lawn furniture, it is essential to apply multiple coats of paint. Here’s why it’s important and what you should keep in mind:
- Durability: By applying multiple coats, you create a protective layer that enhances the furniture’s durability and resistance to wear and tear. It also helps to guard against rusting.
- Even coverage: Applying multiple coats ensures an even and consistent coverage of paint across the entire surface. This helps to avoid patchiness and provides a professional-looking finish.
- Thin coats: When applying multiple coats, remember to use thin coats of paint. Thick coats can lead to drips, uneven drying, and a less polished result.
- Allow drying time: Make sure to follow the drying time recommended by the paint manufacturer between each coat. This ensures that the previous coat has properly dried before applying the next one.

Drying And Curing Time
After applying the primer and multiple coats of paint, it is crucial to allow sufficient drying and curing time. This ensures that the paint fully adheres to the metal surface and provides long-lasting results. Here’s what you need to know:
- Drying time: The drying time will depend on the type of paint used and the weather conditions. Follow the instructions on the paint can for the recommended drying time. Typically, it takes 24-48 hours for the paint to dry completely.
- Curing time: Curing refers to the time it takes for the paint to reach its maximum hardness and durability. This process may vary depending on the paint type. Allow the furniture to cure for at least a week before regular use.
- Avoid premature use: It’s important to resist the temptation to use the furniture too soon. Premature use can lead to smudging, scratching, or dislodging the paint. Patience is key to achieving the best results.
By following these guidelines for applying primer and paint on your metal lawn furniture, you can create a beautiful and long-lasting finish that will withstand the outdoor elements.
Troubleshooting And Finishing Touches
Metal lawn furniture can be a beautiful addition to your outdoor space, providing both functionality and style. However, over time, the paint on these pieces can start to chip or fade, leaving them looking worn and tired. Luckily, with a little bit of effort, you can easily refresh and revitalize your metal lawn furniture with a fresh coat of paint.
In the previous sections, we covered the preparation and painting process. Now, let’s dive into troubleshooting and adding the finishing touches to ensure a long-lasting and professional-looking result.
Common Mistakes To Avoid During The Painting Process:
During the painting process, it’s essential to be mindful of potential mistakes that can compromise the quality and durability of your painted furniture. Here are some common pitfalls to avoid:
- Insufficient cleaning: Neglecting to thoroughly clean the metal surfaces before painting can inhibit paint adhesion. Make sure to remove any dust, dirt, or grease using a mild detergent and water solution.
- Poor priming: Skipping the priming step or not applying an appropriate primer can lead to paint peeling and chipping. Always use a specialized metal primer to promote adhesion and prevent corrosion.
- Overlapping brushstrokes: Applying too many brushstrokes or going over the same area repeatedly can result in an uneven finish. To achieve a smooth and professional look, use long, even strokes and avoid excessive layering.
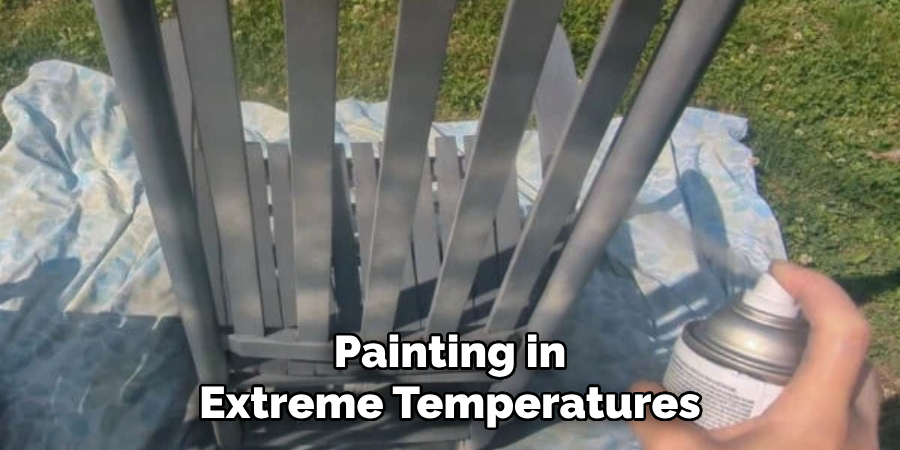
- Ignoring weather conditions: Painting in extreme temperatures or high humidity can affect the paint’s ability to dry properly. Ideally, choose a day with mild temperatures and low humidity to ensure optimal paint drying and curing.
How To Fix Potential Issues:
If you encounter any issues during the painting process, don’t panic. Here are some troubleshooting tips to help you address common problems and achieve a flawless finish:
- Paint drips or runs: If you notice drips or runs in the paint, wait for the area to dry completely. Then, lightly sand the affected area with fine-grit sandpaper. Afterward, touch up the area with additional thin coats of paint, using smooth, even strokes.
- Uneven coverage: In case of uneven coverage, allow the paint to dry completely before applying additional coats. Apply thin, even layers of paint, making sure to overlap each stroke slightly for consistent coverage. Sanding between coats can also help even out any imperfections.
- Paint adherence issues: If the paint does not adhere well or starts to peel, it may be due to improper surface preparation. Consider stripping off the previous layers of paint using a paint stripper or sanding the surface to enhance adhesion. Then, reapply the primer and paint according to the recommended instructions.
Adding A Protective Clear Coat Or Sealant:
To maximize the longevity of your newly painted metal lawn furniture, it’s recommended to apply a protective clear coat or sealant. Here are the steps to follow:
- Allow the final coat of paint to dry completely before applying the clear coat. Refer to the paint manufacturer’s guidelines for the recommended drying time.
- Choose a clear coat or sealant suitable for outdoor use and formulated for metal surfaces. Look for products with uv protection to prevent fading and yellowing over time.
- Apply the clear coat evenly using a brush, roller, or sprayer, following the manufacturer’s instructions. Ensure that all painted surfaces are covered, including hard-to-reach areas. Avoid excessive application to prevent runs or drips.
- Allow the clear coat to dry and cure according to the manufacturer’s recommendations. This may involve waiting for a specific duration, avoiding moisture exposure, or not using the furniture for a certain period.
Adding a protective clear coat or sealant not only enhances the durability of your metal lawn furniture but also provides a polished and professional appearance. Make sure to follow the instructions of the selected product for optimal results.
With proper troubleshooting techniques and the addition of a protective clear coat, you can ensure that your newly painted metal lawn furniture remains vibrant and attractive for years to come. Now that you have gained the knowledge and confidence, it’s time to transform your outdoor space with a fresh and revitalized look!
Maintaining And Caring For Painted Metal Furniture
Metal lawn furniture can be a stylish and durable addition to any outdoor space. However, to maintain its appearance and extend its lifespan, proper care and maintenance are essential. In this section, we will explore some tips for regular cleaning and maintenance, protecting against rust and other damage, and touching up the paint as needed.
Tips For Regular Cleaning And Maintenance:
- Clean the metal furniture regularly using a mild detergent or soapy water. Avoid using abrasive cleaners or harsh chemicals as they can damage the paint.
- Use a soft cloth or sponge to scrub the surface gently. Pay attention to crevices and hard-to-reach areas.
- Rinse off the soap residue with clean water and dry the furniture thoroughly to prevent water spots or rust.
- Consider applying a layer of automotive wax or metal sealant to protect the paint and provide an additional barrier against the elements.
- Inspect the furniture for any loose screws, bolts, or damaged parts. Tighten or replace them as needed to maintain the structural integrity.
Protecting Against Rust And Other Damage:
- Avoid placing metal furniture in direct contact with wet ground or standing water. Use rubber or plastic caps on the legs to prevent moisture accumulation and rust formation.
- Apply a rust-resistant primer before painting the metal furniture. This will provide a protective layer that helps prevent rust from developing.
- Consider using rust-resistant paints specifically formulated for outdoor metal surfaces. These paints contain additives that inhibit rust formation even further.
- Regularly inspect the furniture for any signs of rust or chipped paint. Address these issues promptly to prevent further damage.
- During the winter or when not in use, store the metal furniture in a dry indoor area or cover it with a waterproof furniture cover to protect it from harsh weather conditions.
Touching Up Paint As Needed:
- Over time, the paint on metal furniture may fade or chip. To maintain its appearance, occasionally touch up the paint.
- Clean the area thoroughly and remove any loose or chipped paint. Sand the surface lightly to create a smooth base for the new paint.
- Apply a rust-resistant primer on the exposed metal surface before applying the touch-up paint.
- Use a small brush to carefully apply the paint, matching the color or finish of the existing paint as closely as possible.
- Allow the paint to dry completely before using the furniture again.
Regular cleaning, protecting against rust, and touching up paint as needed are crucial steps in maintaining and caring for your painted metal furniture. By following these tips, you can keep your furniture looking beautiful and extend its lifespan, ensuring years of enjoyment in your outdoor space.
Final Thoughts And Recommendations
Metal lawn furniture can add a touch of style and durability to any outdoor space. From chairs and tables to benches and loungers, these pieces are built to withstand the elements while still looking great. However, over time, the paint on metal furniture can start to fade or chip, leaving you with a less-than-desirable appearance.
The good news is that with a little time and effort, you can easily refresh your metal lawn furniture with a fresh coat of paint. In this final section of our blog post on how to paint metal lawn furniture, we’ll summarize the key takeaways and benefits of painting your metal furniture, as well as provide some additional resources for inspiration and ideas.
Key Takeaways And Benefits Of Painting Metal Lawn Furniture:
- Adding a fresh coat of paint to your metal lawn furniture can instantly transform its appearance, giving it a new lease on life.
- Painting your metal furniture also provides a layer of protection against rust and corrosion, helping to extend its lifespan.
- By choosing a high-quality paint specifically formulated for outdoor use, you can ensure that your newly painted furniture will stand up to the elements.
- Painting your metal furniture allows you to customize it to match your personal style and the aesthetic of your outdoor space.
- Whether you opt for a bold and vibrant color or a more subdued tone, painting your metal lawn furniture allows you to create a cohesive and inviting look in your backyard.
Additional Resources For Inspiration And Ideas:
- Pinterest: Explore a vast collection of images and ideas for painting metal furniture on this popular visual discovery platform.
- Home decor magazines: Look for articles and features that showcase outdoor spaces and furniture makeovers, often including tips and tricks for painting metal furniture.
- Online forums and diy websites: Join online communities or browse through dedicated websites where diy enthusiasts share their experiences, techniques, and before-and-after photos of painted metal furniture projects.
- Youtube tutorials: Watch step-by-step video tutorials by diy experts who demonstrate different painting techniques for metal lawn furniture, offering valuable tips and advice along the way.
Painting your metal lawn furniture is a cost-effective way to bring new life to your outdoor space. By following the steps outlined in our blog post, you can easily and successfully transform your worn-out furniture into a stunning focal point.

Don’t be afraid to get creative with colors and finishes — the possibilities are endless! With the right tools and a little bit of patience, you’ll have your metal lawn furniture looking brand new in no time. So, gather your supplies, roll up your sleeves, and get ready to enjoy your revamped outdoor oasis.
Happy painting!
Frequently Asked Questions Of How To Paint Metal Lawn Furniture
How Do You Prep Metal Lawn Furniture For Painting?
To prep metal lawn furniture for painting, start by cleaning it with a mixture of mild detergent and water. Next, remove any rust spots with sandpaper or a wire brush. After that, apply a metal primer to create a smooth surface for the paint.
Finally, use a rust-inhibiting metal paint to finish the job.
What Type Of Paint Should I Use On Metal Lawn Furniture?
When painting metal lawn furniture, it’s best to use a paint specifically designed for metal. Look for a rust-inhibiting metal paint or a paint that is labeled as suitable for outdoor use. This type of paint is formulated to adhere well to metal surfaces and provide long-lasting protection against the elements.
Should I Use A Brush Or Spray Paint To Paint Metal Lawn Furniture?
Both brush and spray paint can be used to paint metal lawn furniture, but the choice between the two depends on personal preference and the size of the furniture. If you have a large piece of furniture, a spray paint can make the job quicker and more even.
However, if you prefer more control over the application or have intricate details to cover, using a brush may be a better option.
Conclusion
Transforming your tired metal lawn furniture into a stunning outdoor masterpiece is easier than you may think. By following the step-by-step guide provided in this blog post, you can achieve professional-looking results and extend the lifespan of your furniture. Remember to thoroughly clean and prime the surface before applying the paint to ensure long-lasting adhesion.
Choose the right paint and finish for your specific needs, whether it’s rust prevention or weather resistance. Don’t forget to apply thin coats and let each layer dry before adding the next for a flawless finish. With a little bit of patience and effort, you can revitalize your metal lawn furniture and create an inviting outdoor space for years to come.
So, grab your paintbrush and get ready to transform your backyard oasis!