
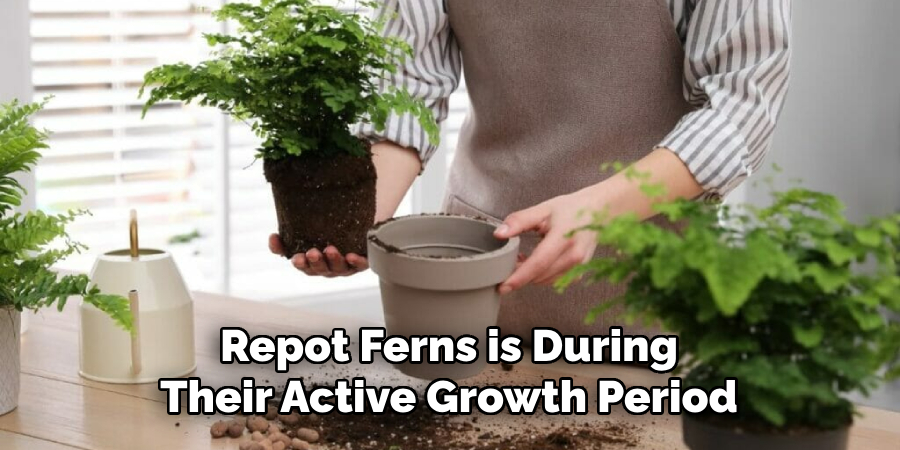
To repot a fern, carefully remove the plant from its current pot and gently shake off excess soil. Repot the fern in a larger container with fresh potting soil, and water thoroughly.
Introducing a step-by-step guide on how to repot a fern. Repotting ferns is essential to maintain their health and ensure proper growth. This process involves removing the plant from its old pot, transferring it to a larger container with fresh soil, and providing adequate watering.
By following these steps, you can give your fern a new lease on life and promote its well-being. So, let’s delve into the details of repotting a fern and learn how to do it effectively.

Credit: mygardenlife.com
How to Repot a Fern: Step by Step Guide
Choosing The Right Pot For Your Fern
Choosing the right pot for your fern is crucial in ensuring its health and growth. When selecting a pot, there are a few factors to consider. First, consider the size of the pot, ensuring it’s appropriate for your fern’s root system.
Next, ensure the pot has proper drainage to prevent waterlogging. The material of the pot is also important; clay pots provide better breathability, while plastic pots retain moisture well. Lastly, finding a pot that matches your fern’s needs in terms of light requirements and humidity levels is essential.
By taking these factors into account, you can successfully repot your fern and provide it with the optimal conditions it needs to thrive. So, let’s dive into the process of repotting your fern successfully.
Preparing Your Fern For Repotting
Preparing your fern for repotting: is your fern showing signs that it needs repotting? Look for: yellowing leaves, stunted growth, or roots poking out from the bottom. Timing is crucial when repotting a fern. Make sure to do it during its active growth season.
To prepare your fern, start by watering it thoroughly a few hours before repotting. Next, prune any dead or damaged fronds to promote healthy growth. Finally, gently remove the fern from its current pot, being careful not to damage the roots.
Shake off the old soil and inspect the roots for any signs of rot or disease. With these steps, your fern will be ready for a fresh start in its new pot.
Repotting Your Fern
Repotting your fern requires gathering necessary supplies, such as a new pot and fresh soil. Loosen the roots gently to avoid damage. Place the fern in the new pot, ensuring it is centered and at the same level as before.
Fill the pot with fresh soil, pressing it down gently to remove air pockets. Water your fern thoroughly after repotting, allowing the water to drain out. For care instructions, keep the fern in indirect sunlight and water when the top inch of soil is dry.
To ensure a successful repotting process, consider a few tips. Choose a pot that is slightly larger than the current one, use well-draining soil, and handle the fern with care. By following these steps and tips, your fern will thrive in its new home.
Aftercare For Repotted Ferns
After repotting a fern, it is crucial to provide adequate water and humidity. Keep the soil moist, but not soggy, to ensure healthy growth. Monitor the fern for signs of stress or problems, such as wilting or yellowing fronds. Adjust the environment if needed, increasing humidity levels by misting the leaves or placing the pot on a tray with water.
Regular maintenance is vital to promote healthy growth. Trim any yellow or dead fronds and fertilize the fern every few months with a balanced fertilizer. Remember to keep the fern in a well-lit area but away from direct sunlight. By following these steps, you can ensure the proper aftercare for your repotted fern and enjoy its lush greenery for years to come.
Frequently Asked Questions About Repotting Ferns
Repotting ferns is an essential task for their healthy growth. The frequency of repotting depends on the size of the fern. Dividing the fern during repotting can promote better growth and prevent root congestion. In case of root rot after repotting, take immediate action by trimming the affected roots and repotting the fern in fresh soil.
Monitor the fern for signs of stress and adjust watering accordingly. Remember to choose a suitable pot with good drainage and use a well-draining potting mix. Always handle the fern with care during the repotting process to avoid damaging the delicate fronds.
Happy repotting!
Frequently Asked Questions Of How To Repot A Fern
How Often Should I Repot My Fern?
Ferns should be repotted every 1-2 years, or when you see roots growing out of the pot. Repotting helps provide fresh soil and nutrients, allowing your fern to continue growing and thriving.
What Kind Of Potting Mix Should I Use For Repotting My Fern?
For repotting a fern, use a well-draining potting mix that retains moisture. You can mix equal parts of peat moss, perlite, and potting soil to create a suitable mixture. Avoid using heavy or dense soil, as it can lead to root rot.
Can I Repot My Fern At Any Time Of The Year?
The best time to repot ferns is during their active growth period, which is usually in spring or early summer. Avoid repotting during the dormant phase, as it may cause stress to the plant. Monitor your fern’s growth patterns to determine the ideal repotting time.
Conclusion
Successfully repotting a fern is essential for its growth and overall health. By following the step-by-step process outlined in this blog post, you can ensure that your fern receives the care it needs. Remember to choose the right pot size, use appropriate soil, and provide adequate drainage.
Gently remove the fern from its old pot, untangle its roots, and place it in the new pot, ensuring that it is centered and at the proper depth. Finally, backfill the pot with soil, press it down gently, and water thoroughly.
With these tips in mind, you can confidently repot your fern and enjoy its lush green foliage for years to come. Don’t forget to provide regular care and monitor its progress. By doing so, you can maintain a happy and thriving fern in your home or garden.