To start dill from cuttings, follow these steps precisely. First, take a healthy stem cutting and remove the lower leaves.
Then, dip it in rooting hormone and plant it in a well-draining soil mixture.

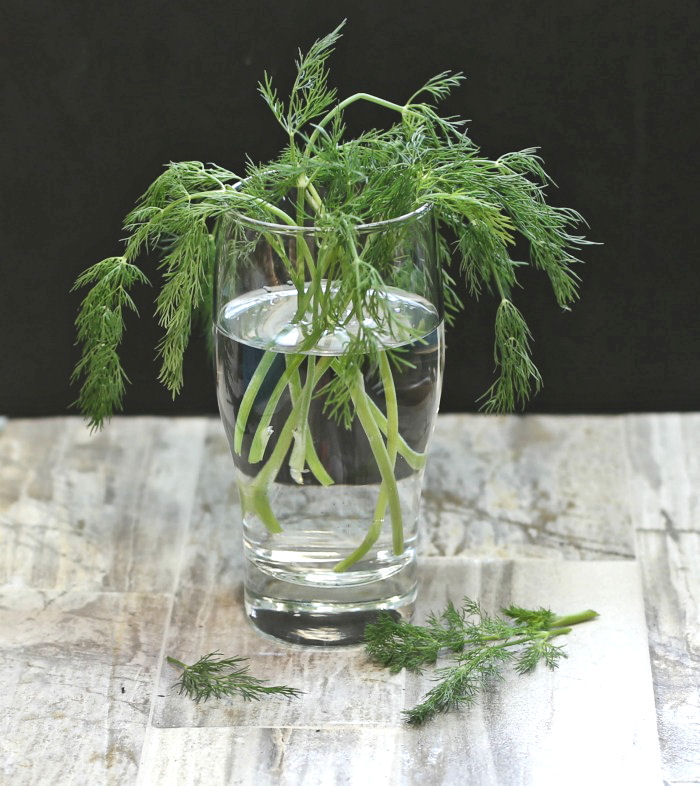
Credit: potgardening.wordpress.com
How to Start Dill from Cuttings: Step by Step Guide
Choosing The Right Dill Plant For Cuttings
Choosing the right dill plant for cuttings is crucial to ensure successful propagation. When selecting plants, it is important to choose healthy and disease-free ones. Look for plants with lush green foliage, no signs of wilting or yellowing leaves, and free from any pest infestations or diseases.
There are several different dill varieties that are suitable for cuttings. Some popular varieties include Bouquet Dill, Mammoth Dill, and Fernleaf Dill. Each variety may have slightly different characteristics, such as plant size, leaf shape, and flavor. Consider the specific requirements and preferences you have before choosing a variety for your cuttings.
Once you have selected the right dill plant, you can proceed with taking cuttings for propagation. It is recommended to take cuttings from the upper portion of the plant, just below a leaf node. Remove any lower leaves from the cutting and place it in a container with water or a rooting hormone solution. Keep the cutting in a warm and well-lit location, and within a few weeks, you should start to see roots forming.
Preparing The Materials For Dill Cuttings
Gathering the necessary tools and supplies is the first step in preparing the materials for dill cuttings. To ensure successful propagation, you will need:
- Potting soil: Use a high-quality potting mix that is well-draining and fertile.
- Growing containers: Choose small pots or seed trays with drainage holes.
- Sharp scissors or pruning shears: You will use these to take cuttings from the dill plant.
- Rooting hormone (optional): This can help promote root development in the cuttings.
- Spray bottle: Fill it with water for misting the cuttings.
- Plastic bags or a humidity dome: These will create a humid environment for the cuttings.
- Grow lights or a sunny windowsill: Dill cuttings need sufficient light to grow.
- Watering can: Use it to water the newly potted cuttings.
Once you have gathered all the necessary materials, the next step is to create an ideal growing environment for the dill cuttings. Place the pots or trays near a sunny windowsill or under grow lights. Maintain a consistent temperature of around 70-75°F (21-24°C) and humidity levels between 50-60%. Mist the cuttings regularly and cover them with plastic bags or a humidity dome to retain moisture. Keep the soil lightly moist but not waterlogged. With proper care and attention to detail, your dill cuttings should start growing roots and thriving in no time.
Taking Successful Dill Cuttings
Propagating dill plants from cuttings is an excellent way to expand your garden without the need for seeds. Identifying the best time and conditions for taking dill cuttings is crucial for ensuring successful propagation.
Dill is best propagated from cuttings during the spring or early summer months when the plant is actively growing. This ensures that the cutting has enough energy to establish roots.
When cutting dill stems for propagation, choose healthy and well-established plants. Look for stems that are lignified, meaning they have turned from green to brown. These stems are more likely to root successfully.
Using a sharp and clean pair of shears, cut a stem of dill just below a node, making sure to include at least two sets of leaves. Avoid damaging the plant while cutting, as this can hinder root development.
After taking the cuttings, remove the lower leaves to prevent moisture loss. Place the cuttings in a container of water or moistened soil, keeping them in a warm and bright location. With proper care and attention, your dill cuttings will soon develop roots, allowing you to transplant them into your garden.
Rooting Dill Cuttings
Dill cuttings can be easily rooted to grow new plants. To prepare a suitable rooting medium for dill cuttings, you can use a mix of perlite and vermiculite. This combination provides excellent drainage and aeration, which are essential for successful rooting. Fill a pot or tray with the rooting medium, ensuring it is moist but not overly wet.
Assisting dill cutting rooting with rooting hormone can also promote faster and more effective rooting. Before planting the dill cuttings in the rooting medium, dip the cut ends of the stems into a rooting hormone powder. This powder contains growth hormones that stimulate root development, increasing the chances of successful propagation.
Caring For Dill Cuttings
Providing the right care and conditions for successful rooting:
Dill cuttings require proper care and conditions to ensure successful rooting. Maintaining adequate moisture levels is crucial for their growth. Ensure that the potting mix is consistently moist, but not waterlogged. It’s important to water the cuttings regularly, especially during dry periods. Monitor the moisture levels closely to prevent them from drying out.
Regularly check the dill cuttings for signs of growth. Look for new leaves and shoots emerging from the cutting. This indicates that the cutting has successfully rooted. Keep a close eye on the overall health of the plant as well. If any issues arise, such as yellowing leaves or wilting, promptly address the underlying problem to ensure the dill cuttings thrive.
Transplanting Rooted Dill Cuttings
To successfully transplant rooted dill cuttings, it is essential to choose the right container and soil. The container should be deep enough to accommodate the roots and allow for growth. Opt for a well-draining container with drainage holes to prevent waterlogging. As for the soil, dill prefers a fertile, loamy mix with good drainage. Sandy soil mixed with compost or organic matter works well.
When transplanting dill cuttings, ensure proper spacing between plants to allow for adequate airflow and prevent overcrowding. Dill plants should be placed about 12-18 inches apart in rows, giving them enough room to grow and spread. Position the plants in an area that receives full sun for at least 6-8 hours a day to promote healthy growth. Providing the right conditions and care will help your dill cuttings thrive and produce flavorful foliage and seeds.
Providing Optimal Conditions For Dill Growth
Understanding the ideal temperature and sunlight requirements for dill: Dill thrives in temperatures between 60-70°F (15-21°C) and requires at least 6-8 hours of direct sunlight daily. It is important to find a sunny location in your garden or balcony for successful dill growth.
Fertilizing and protecting your dill plants from pests and diseases: Dill plants benefit from regular fertilization using organic matter or slow-release fertilizer. Apply the fertilizer according to the manufacturer’s instructions. To protect your dill from pests and diseases, regularly inspect the plants for signs of infestation or infection. Use natural remedies or organic pesticides to control pests and diseases, if necessary.
Harvesting Dill From Cuttings
Harvest dill from cuttings with these simple steps! Learn how to start dill from cuttings for a bountiful herb garden.
Knowing the right time and method to harvest dill is essential for its continuous growth. Dill can be harvested as soon as it reaches a height of 6-12 inches and has developed a good foliage cover. To harvest dill, simply use a pair of sharp scissors or garden shears to cut the stem about an inch above the ground level. This method allows the plant to regrow from the base and ensures a longer harvest period.
When harvesting dill from cuttings, it is important to:
- Choose a sunny and dry morning for harvesting.
- Observe the growth of the plant and harvest when it has matured.
- Check for any signs of pests or diseases before cutting.
- Avoid cutting more than one-third of the plant at a time to maintain its health.
Proper harvesting techniques not only help in maintaining the health of the dill plant but also ensure a plentiful supply throughout the growing season.
Frequently Asked Questions Of How To Start Dill From Cuttings
How Do You Start Dill From Cuttings?
To start dill from cuttings, select fresh, healthy stems with at least four leaves. Remove the lower leaves, dip the stem in rooting hormone, and plant it in well-draining soil. Keep the cuttings moist and in a sunny location. Within a few weeks, roots will start to develop, and you can transplant them to larger pots or in your garden.
Can You Start Dill From Store-bought Herbs?
Yes, you can start dill from store-bought herbs. Simply cut about 4-6 inches off the top of the store-bought dill, remove the lower leaves, and place the stem in a jar of water. Make sure to change the water every couple of days.
Once roots have formed, you can transfer the cutting into a pot with soil.
How Long Does It Take For Dill Cuttings To Root?
Dill cuttings usually take around 2-3 weeks to root. During this time, make sure to keep the cuttings in a warm and well-lit location. You can also cover the cuttings with a plastic bag to create a greenhouse-like environment, which helps retain moisture and promotes root growth.
Conclusion
Growing dill from cuttings can be an affordable and rewarding method for cultivating this flavorful herb. With just a few simple steps, you can easily propagate dill and enjoy a bountiful harvest. By following the tips mentioned you’ll be well on your way to having a thriving dill garden.
So, roll up your sleeves and get ready to experience the joy of growing your own dill from cuttings!