To sterilize soil after root rot, bake it at 180°f for 30 minutes. Root rot can be a common problem in indoor plants and can be caused by overwatering or poor drainage.
Sterilizing the soil helps kill any fungus or bacteria that may be present and prevent future episodes of root rot. In addition to baking the soil, you can also use chemicals like hydrogen peroxide or bleach to sterilize the soil.
However, it is important to be careful when using these chemicals as they can harm the beneficial microorganisms in the soil. Proper sterilization of the soil can help create a healthy environment for plants to grow and thrive.

Identifying And Understanding Root Rot
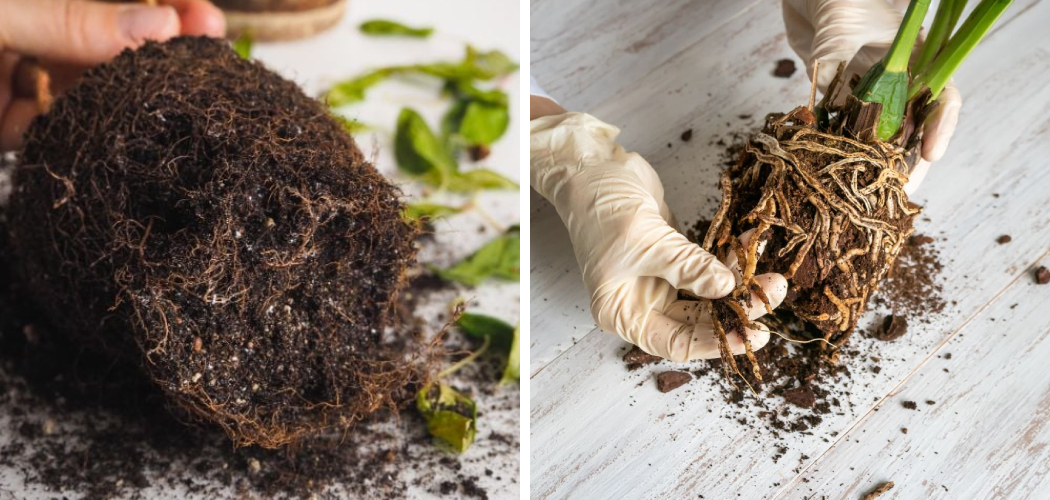
Root rot is a common problem that can affect plants, resulting in stunted growth, yellowing leaves, and eventually plant death. Identifying the signs and symptoms of root rot is crucial in order to take the necessary steps to prevent further damage.
Wilting or drooping leaves, a foul odor, and discolored roots are key indicators. Various causes can contribute to root rot, such as overwatering, poor drainage, or the presence of fungal pathogens in the soil. To sterilize soil after root rot, it is important to remove the affected plants and dispose of them properly.
Additionally, allowing the soil to dry out and ensuring proper drainage can help prevent future occurrences of root rot. Taking these proactive measures will help maintain the health and vitality of your plants.
How To Diagnose Root Rot In Soil
Root rot in soil can be diagnosed through a thorough inspection and analysis of the soil. It is important to identify the affected plants and roots accurately. By carefully examining the soil and observing the plant’s symptoms, you can determine if root rot is present.
Look for wilting or yellowing leaves, stunted growth, and weak stems. Additionally, check for dark, mushy roots that have a foul odor. To sterilize the soil and prevent further spread of root rot, remove the affected plants and dispose of them properly.
Then, treat the remaining soil with a fungicide according to the product’s instructions. It is also crucial to improve drainage and avoid overwatering to prevent future occurrences of root rot. By following these steps, you can effectively manage and eliminate root rot in your soil.
How to Sterilize Soil After Root Rot: Step by Step Guide
Sterilize Soil After Root Rot
Sterilizing soil after root rot is crucial to prevent the recurrence of this damaging plant disease. One effective method is solarization, where the soil is covered with a transparent plastic sheet to trap heat and kill pathogens. Soil pasteurization is another natural technique that involves heating the soil at a specific temperature to eliminate harmful organisms.
Chemical sterilization methods, such as fumigation with methyl bromide, can also be used, although caution should be exercised due to its toxicity. Hydrogen peroxide is a safer alternative for sterilizing soil, as it breaks down into water and oxygen without leaving harmful residues.
However, it is essential to follow precautions and safety measures during the sterilization process to protect yourself and the environment. By employing these natural soil sterilization techniques, you can effectively restore the health of your soil and promote the growth of healthy plants without the risk of root rot.
Post-Sterilization Remediation And Treatment
Sterilizing soil after root rot is crucial for post-sterilization remediation and treatment. One effective method is replenishing beneficial soil microorganisms. By introducing beneficial fungi and bacteria into the soil, its overall health and fertility can be restored. Another important aspect is enhancing soil drainage and aeration, which helps prevent the conditions that led to root rot in the first place.
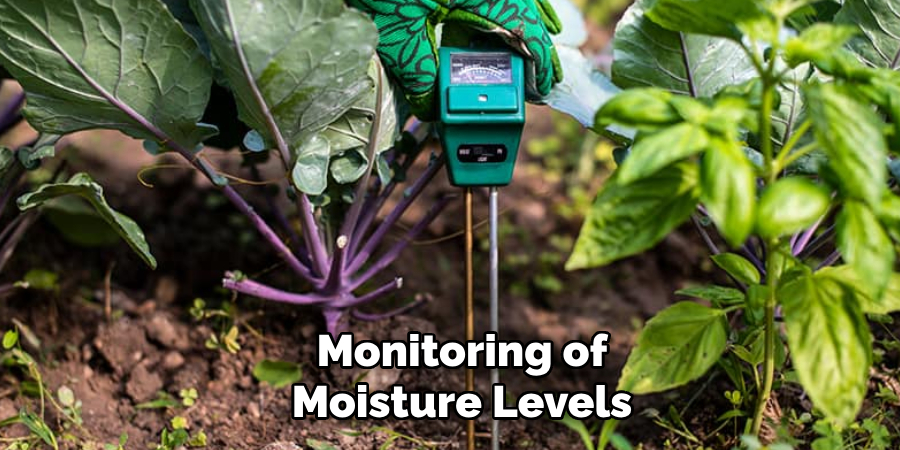
Proper watering and irrigation techniques play a crucial role in preventing future root rot. Consistency and careful monitoring of moisture levels are key. By following these practices, soil can be effectively sterilized after root rot, promoting a healthy and thriving garden.
Tips For Maintaining Soil Health And Preventing Root Rot Recurrence
Maintaining soil health and preventing root rot recurrence requires regular testing and analysis. Crop rotation practices should be implemented to prevent soil diseases. Proper irrigation and watering schedules should be followed to avoid waterlogging. Adequate plant nutrition and fertilization are essential for healthy root development.
By monitoring these factors, gardeners can prevent root rot and promote soil sterilization.
Frequently Asked Questions For How To Sterilize Soil After Root Rot
How Does Root Rot Affect Plants And How Can I Prevent It?
Root rot can damage the roots of plants, inhibiting their ability to absorb water and nutrients. To prevent root rot, ensure proper drainage, avoid over-watering, and use well-draining soil. Additionally, practicing good plant hygiene and maintaining proper air circulation can help prevent the spread of root rot.
What Are The Signs And Symptoms Of Root Rot In Plants?
Signs of root rot include yellowing or browning of leaves, wilting even when adequately watered, root discoloration, and a foul odor. Affected plants may also have stunted growth and develop dark, mushy roots. It’s important to act quickly upon noticing these symptoms to prevent further spread of the disease.
Can I Reuse Soil After Root Rot And How Should I Sterilize It?
Reusing soil after root rot is risky as it may still contain the pathogens responsible for the disease. To sterilize soil, spread it in a thin layer on a tray and bake it in the oven at 180°f (82°c) for about 30 minutes.
Another option is to solarize the soil by covering it with a clear plastic sheet and leaving it in direct sunlight for 4-6 weeks.
What Are Some Natural Methods To Sterilize Soil After Root Rot?
Natural methods to sterilize soil include solarization, which involves covering the soil with a clear plastic sheet and allowing the sun’s heat to kill pathogens, pests, and weed seeds. Another option is steam sterilization, which involves using steam to heat the soil evenly.
These methods can help reduce the risk of recontamination while being environmentally friendly.
How Long Should I Wait Before Reusing Soil After Sterilization?
After sterilizing soil, it’s best to wait at least a week to ensure any remaining heat-sensitive pathogens are eradicated. During this time, the soil should cool down completely before being used again. It’s also essential to store sterilized soil properly in a clean, dry container to prevent the reintroduction of harmful organisms.
Conclusion
To successfully combat root rot and restore healthy soil, it is crucial to implement proper sterilization techniques. By following the steps outlined you can effectively remove harmful pathogens and restore your soil’s vitality. Begin by separating any infected plants and discarding them properly, preferably away from your garden area.
Then, thoroughly clean all tools and containers used in the affected area. Next, solarize the soil by covering it with a clear plastic tarp, ensuring the sun’s heat penetrates the soil and kills off any remaining pathogens. Remember to monitor the soil’s temperature to ensure it reaches the necessary levels for sterilization.
Additionally, rotating your crops regularly can help prevent future root rot occurrences. By adhering to these methods, you can take control of root rot and cultivate a thriving, disease-free garden.